Как установить windows 10 на raspberry pi с помощью woa deployer
Содержание:
- Набор интерфейсов
- Do you need help to get started?
- How to Install Windows 10 on the Raspberry Pi 4
- My setup
- Laser tripwire security system
- Конкуренты Raspberry Pi: Соображения
- Raspbian Buster и первый старт
- Installation Steps
- Безналичный расчет
- Control a motor using Artificial intelligence
- Features Overview
- Create a game using Raspberry Pi
- What is Raspberry Pi?
- Самое интересное
- Сервер rsyslog для сброса логов с роутера
- Installing Windows 10 IoT on the Raspberry Pi 2
- Build your own Raspberry Pi Computer!
- Начальная установка
- Как взаимодействовать с Win IoT на «Малине»?
Набор интерфейсов
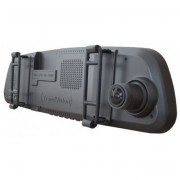
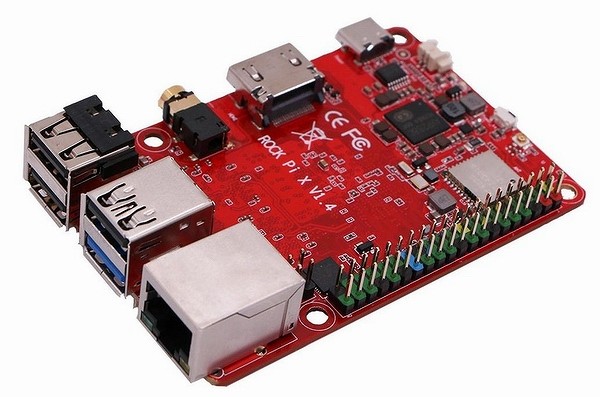
Помимо microSD-слота, на плате Rock Pi X присутствуют три порта USB 2.0 и один USB 3.0 для подключения внешней периферии. За вывод изображения на монитор отвечает HDMI 2.0, который по своим спецификациям поддерживает 4К-разрешение, но штатная видеокарта выдает максимум Full HD.
 В Rock Pi X присутствует полный набор современных интерфейсов
Звук можно выводить по HDMI или через классический 3,5-миллиметровый разъем, а подключаться к Сети – по кабелю через гигабитный Ethernet или по воздуху посредством Wi-Fi 802.11ac (Wi-Fi 5). Компьютер имеет штатную антенну, но при этом поддерживает подключение и внешних антенн. Также в наличии модуль Bluetooth 4.2.
Питание на плату компьютера подается по USB-C. Поддерживаемые стандарты – Power Delivery 2.0 (9В/2A, 12В/2A, 15В/2A или 20В/2A) и Qualcomm Quick Charge 2.0 и 3.0 (9В/2A или 12В/1,5A). Размеры самого компьютера составляют 85х54 мм, что на 1 мм меньше обычной пластиковой карты (86х54 мм).
Do you need help to get started?
By the way, maybe you are new on Raspberry Pi and were looking for an easy way to stay on Windows because you are used to it on the PC. I’m sorry, but as you have seen, it’s not yet ready.The Raspberry Pi world might be overwhelming for beginners, you may be lost among the different models, the operating systems and the thing you can do with it or not.That’s why I have put together a mini-course to help you for the first steps.
By watching a few videos and following my tips, you can jumpstart your journey with a Raspberry Pi, avoid all the obstacles and start having fun with this exciting device.Sounds interesting? Learn more on this page.
This tutorial doesn’t work anymore? Report the issue here, so that I can update it!
How to Install Windows 10 on the Raspberry Pi 4
1. Download the latest pre-release version of WoR tool and extract the files.
2. Visit the Windows on Raspberry Pi Discord server and go to the Downloads channel to Download the latest stable image, currently 0.2.1.
3. Open the WoR Alpha tool and select your language.
(Image credit: Tom’s Hardware)
4. Insert microSD card and select the drive. The Raspberry Pi 4 mode is currently experimental, but has worked reliably in our tests.
(Image credit: Tom’s Hardware)
5. Select your Windows on ARM image.
(Image credit: Tom’s Hardware)
6. Select the latest package of drivers from the server.
(Image credit: Tom’s Hardware)
7. Use the latest UEFI firmware available.
(Image credit: Tom’s Hardware)
8. Check the configuration and when happy click Next.
(Image credit: Tom’s Hardware)
9. Double check everything before clicking Install.
(Image credit: Tom’s Hardware)
The installation process can take as long as two hours to complete, depending on the speed of the microSD card.
10. Download the RAM fix for Rpi 4 file from the Windows On Raspberry Pi Discord server. Extract the contents.
11. Copy winpatch.exe to the root of C: drive.
12. Locate the drive containing the Windows 10 on ARM installation, make a note of the drive letter.
13. Open a Command Prompt as Administrator and go to the root of C: drive.
14. Patch the USB driver to enable USB ports on the Raspberry Pi 4. Change the drive letter to match your installation.
15. Overclock the Raspberry Pi. This step is optional but highly recommended (though you’ll want a cooling fan). Edit the config.txt file found in BOOT drive. Add these two lines at the end of the file. Overclocking will require cooling for your Raspberry Pi.
16. Eject the microSD card and insert it into the Raspberry Pi 4. Connect your keyboard, mouse etc and power on the Pi.
17. Follow the standard Windows 10 install process and after a short while you are ready to use Windows 10 on your Raspberry Pi 4.
18. As an administrator open a Command Prompt and run this command to enable 3GB of RAM. Press Enter to run the command.
19. Reboot the Raspberry Pi for the update to take effect.
(Image credit: Tom’s Hardware)
20. For network access, use a USB to Ethernet or a compatible WiFi dongle.
21. Install Microsoft Edge by double clicking on the Microsoft Edge desktop icon.
22. Installing software works in the same manner as a typical Windows 10 install. We tested GIMP Photo Editor and the Arduino IDE and both installed, albeit slowly and were usable for basic tasks.
Image 1 of 3
(Image credit: Tom’s Hardware)
Image 2 of 3
(Image credit: Tom’s Hardware)
Image 3 of 3
(Image credit: Tom’s Hardware)
My setup
As you probably know, Raspberry Pi 4 is available with three RAM options: 2 GB, 4 GB or 8 GBHere is my setup for this test, so you know exactly what I’m reviewing:
- Raspberry Pi 4 single board with 4 GB RAMIf you still don’t have yours, you can find complete kits on Amazon for a good price. If you’re just starting with Raspberry Pi (4 or any model), a kit will provide you all the accessories I list in the following points. This will avoid some search and headaches to find compatible stuff.
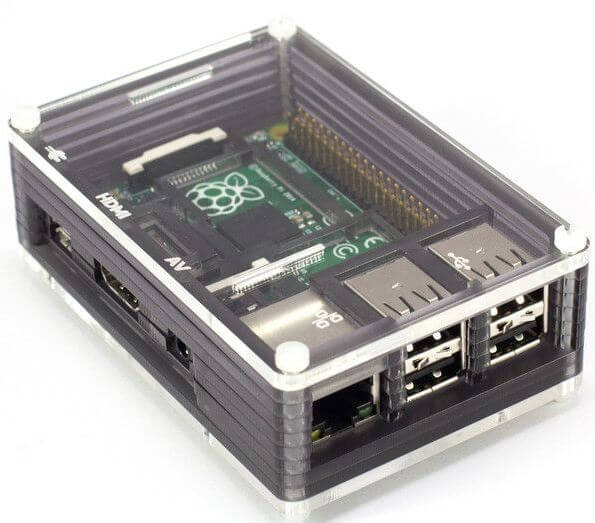
- A case with an integrated fan: you probably need a fan, I’ll come back to this later
- A Samsung Evo+ SD Card (32 GB)
- A desktop mouse and keyboard: not my small Bluetooth keyboard, I needed a comfortable keyboard to work with
- A generic Samsung USB charger (I already have one for my smartphone, you can choose the official one or the CanaKit version if you prefer)
- A micro HDMI – HDMI adapter (I didn’t try the dual screen for this test)
- Raspberry Pi Desktop: I voluntarily choose to not take the full version, so I have the basics and will install only what I need from the recommended software. The Lite version is also a good choice I think, you’ll install only the software and desktop environment you want.
Items without direct link are available in my recommended products pages if you want to see exactly what I’m using
My Raspberry Pi 4 in its case
So, I may not have the ultimate setup for a Raspberry Pi, but that’s enough for my needsI will come back to the options you have in the next chapter
Laser tripwire security system
Ref: Marc Scott
Want to build your own security system with things lying around your house? If you a laser pointer and a Raspberry Pi 4 lying around somewhere, you can make yourself a simple tripwire system!
Each time a stealthy intruder breaks the laser beam, the Raspberry Pi will sound the alarm via a buzzer or a speaker.
What do you need? (Besides Raspberry Pi 4)
- Bread board Clear – 8.2 x 5.3cm
- Laser Pointer
- Drinking Straw
- 1µF capacitor
- Light Dependent Resistor
- 3 female-female jumper leads
- 3 female-male jumper leads (For testing)
Interested? Check out the full tutorial on Raspberry Pi Foundation!
Конкуренты Raspberry Pi: Соображения
В процессе выбора аналога Raspberry Pi, необходимо сразу подумать о его предназначении. К примеру, стоит определиться будет ли SBC использоваться в разных проектах или только для одного из них, выполняя конкретную задачу на протяжении длительного времени? Во втором случае следует сразу подумать о величине бюджета, который можно будет потратить на два или три менее производительных аналога.
Помимо этого, физический размер мини-ПК играет крайне важную роль при условии использования ограниченного пространства. Например, если планируется создать что-то вроде шпионской камеры слежения, то будет разумно выбрать самый миниатюрный форм-фактор, как у Pi Zero. Также разработчики во время покупки рассматриваемых гаджетов часто забывают проверить наличие различных встроенных коммуникационных интерфейсов, а на деле оказывается, что через Ethermet сеть работает медленно, а Wi-Fi-модуль при этом отсутствует.
Наконец, стоит задаться вопросом, нужен ли вам дополнительный специалист для обслуживания SBC, так как многие приборы, альтернативные Pi, нигде не обсуждаются в сети, а к некоторым из них даже нет документации, написанной доступным языком для обычных пользователей.
Далее мы рассмотрим некоторые SBC сторонних производителей, которые будут справляться с вышеописанными задачами, но для начала напомним технические характеристики традиционной модели Raspberry Pi 3 Model B+. Сейчас существует также новая модификация Raspberry Pi 4 Model B+, имеющая проблемы с питанием от USB-C, вследствие чего, мы сравним ее с другими платами в конце нашей публикации.
Raspbian Buster и первый старт
Вместе с новой начинкой мы также получили и новую версию операционной системы — Raspbian Buster
Я не буду заострять внимание на различиях с предыдущей версией Stretch, о них подробно можно почитать здесь. Скажу лишь, что изменения коснулись в основном безопасности, а также чуть изменился интерфейс — его сделали более современным, а именно, убрали красивости
Основное же различие лежит в использовании нового open-source драйвера Open GL совместно с аппаратным ускорением для использования всех возможностей новой четвертой «малины», портировать его в старые версии Raspbian посчитали накладным, и поэтому они не поддерживают новую Raspberry Pi 4. Именно здесь и кроется корень многих проблем: любая новая система требует времени разработчиков на адаптацию их программных продуктов для работы с ней. Более того Raspbian Buster вышел даже раньше официального релиза своего прототипа Debian Buster, официальный релиз которого назначен на 6 июля 2019 года. Соответственно, не стоит ждать полной поддержки всего и вся с первых же дней. В этом я смог убедиться и сам, но об этом немного позже.
Я скачал образ Raspbian Buster Desktop c сайта Raspberry. Записал с помощью Balena Etcher на SD карту, вставил в малинку, подключил ее к монитору и питанию, и загрузка началась. Подводных камней и проблем не было, несмотря на пугающую надпись с официального сайта:
«If your Raspberry Pi 4 will not boot, it is possible that the SPI EEPROM has become corrupted.»
Installation Steps
You need to be logged in to the Windows 10 PC as Administrator user to perform these steps.
Step 2: Save the setup.exe file.
Step 3: Right click on file and select Run as Administrator to start the Windows 10 IoT Core Dashboard. Click Install when prompted and wait for installation to complete.

Step 4: On the dashboard click Setup a new device.
Step 5: In the Device Type select Raspberry Pi 2 & 3.
Step 6: Select Windows 10 IoT Core in OS Build dropdown list.
Step 7: Now insert the SD card into your PC. You will now see your SD card drive in the Drive dropdown list.
Step 8: Enter a device name of your choice in the Device Name box.
Step 9: Enter a password and confirm it in the text boxes provided.
Step 10: Select the checkbox to accept the license agreement.
Step 11: Click Download and Install.

Step 12: A message box will warn you that all the contents in the flash drive will be erased. Click Continue if you are happy with that.

Step 13: After the image has been download and flashed on the SD card you will get the message Your SD card is ready

Step 14: Eject the SD card from your PC, insert it into the Raspberry Pi and power on.
Step 15: Click on My Devices in the Windows IoT Dashboard.
Step 16: First time when you start, it may take several minutes for your device to be discovered and appear in the My devices list.

Step 17: Once the device is found you can right click on it and open Device Portal or connect using PowerShell. The default password for user Administrator is p@ssw0rd.

Step 18: Device Portal lets you easily configure various settings such as device name, passwords, networking, audio etc., and also allows you to manage apps and monitor processes.

Troubleshooting Install issues
Error: Failed to unpack Windows 10 IoT Core installation package
If your installation fails with the above message then you need to run the using the Administrator account. This error message could appear even if you are logged in as a user who has administrator rights; it has to be the Administrator user.
Please note that by default the Administrator account is disable in Windows 10. You need to first enable the Administrator account. The easiest way to do this is:
- Open a command prompt and run the command lusrmgr
- Click on Users in the left pane, then right click on Administrator user and select properties.
- Uncheck the box «Account is disabled» and Click OK.
- Right Click on Adminsitrator User again and select set password to set a new password for this user.
- Now log out and log in as Administrator user and start the install.
Безналичный расчет
Безналичный банковский перевод между юридическими лицами в России
Только для юридических лиц и предпринимателей России. Предоставляется полный
комплект бухгалтерских документов.
Как купить?
- Зарегистрируйтесь в системе управления
заказами WTware. - Дождитесь письма с паролем.
- Зайдите в crm.wtware.ru.
- Выставьте сами себе счет. Оплатите.
- После прохождения оплаты мы вышлем вам по почте реквизиты для входа на
генератор лицензий WTware. Генератором
вы можете воспользоваться для получения лицензий в любое удобное для вас время. - Чтобы получить оригиналы документов, снова зайдите в crm.wtware.ru.
Скачайте сканы, распечатайте, покажите своему бухгалтеру. Если у бухгалтера вопросов не возникнет,
нажмите на кнопку «Бухгалтерию устраивают документы». - Мы вышлем оригиналы Почтой России заказным письмом.
Стоимость каждой лицензии:
1 — 9 лицензий
10 — 19 лицензий
20 — 49 лицензий
50 — 99 лицензий
100 и более лицензий
1000 рублей
600 рублей
500 рублей
400 рублей
350 рублей
На партии более 10 лицензий действует накопительная скидка. Например, если у вас уже есть 40 лицензий и
вы заказываете еще 10, вы получаете цену «от 50 до 99 лицензий».
Control a motor using Artificial intelligence

Ever wanted to control a robot with your voice? With more power and network speeds, using online APIs to do voice recognition is much easier now using the Raspberry Pi 4.
What do you need? (Besides Raspberry Pi 4)
Google AIY Voice Kit
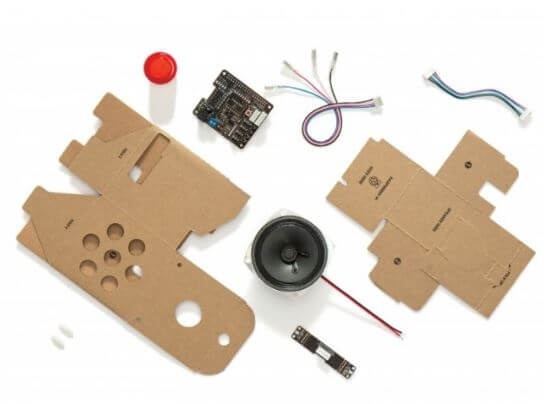
- As seen above, this voice kit allows you to build your own natural language recognizer device and connect it to the Google Assistant.
- Along with everything the Google Assistant already does, you can add your own question and answer pairs.
- It’s easy to assemble, everything is included in a lovely cardboard with an arcade-style button on top.
- 130 DC Motor
- Breadboard Jumper Wire Pack(200 mm&100 mm)
- Bread board Clear – 8.2 x 5.3cm
You can find the full tutorial on how to control a motor using Artificial intelligence on RaspberryPi here: Control a Motor with the AIY Projects Voice Hat
Features Overview
Same as before 3 years, Windows 10 IoT is not using full potential from Raspberry Pi 2 or 3. User experience in most of the app is rather bad, even the default app which is pre-installed on image is sometimes laggy on Raspberry Pi 3, on Raspberry Pi 2 it is even worse. But there are still some bright sides, so let’s have a look at it.
- WiFi (Raspberry pi 3) — Working
- Bluetooth — Working
- HDMI output — Working
- Audio output — Working
- LAN — Working
- USB — Working
- Graphics — Not Working
- Remote client — Not Working
What was an unpleasant surprise to me was that even after 3 years, Microsoft did not add Graphic Chip support. Raspberry board has that chip on board, and all linux distributions are fully capable of playing video. But on Windows 10 IoT, you are not able to play any video, or display some more complex graphic content because all rendering goes only through CPU and it just cannot handle it. Another thing to mention about video is that you will get no sound over HDMI. At least in default setting, maybe it is possible to set it somehow to send sound over HDMI, but in default setting, you get sound only from 3.5 mm jack.
For example, see how video playback looks like on my video.
So if you are thinking about Windows IoT and Raspberry Pi to be a great solution to some digital signage project, think again, without GPU support, you can display only slideshows, or some very simple web pages. This will be very limiting to you in time. It is good to know limitations of platform before you invest into building something on it. I personally did one project where we created digital signage solution running on Windows IoT on Raspberry Pi. But in the end, it was a huge failure because of missing GPU support and limitations depending on this. We ended up displaying every single web page, and even that was not reliable enough, because after some time (6 — 7 months), our Raspberries started to break down because of high CPU usage and overheating. Some did not start at all, and some others did display green lines over screens or similar artifacts.
Another new thing in Windows Iot Core is remote desktop client. It is a very nice feature, and you can work with your device even if you do not have a display attached, but on Raspberry Pi, it will not work. It is a known bug since 2017 and still, it is not fixed. See MSDN thread here. I personally think it will never be fixed, same as Graphics support.
Create a game using Raspberry Pi
 Ref: Scratch
With Scratch 3 now on Raspberry Pi and new blocks for the Sense Hat, this means you can do much more on your Raspberry Pi 4 including creating a game! In this example, you will be creating an amazing racing game using the Raspberry Pi as a steering wheel.
What do you need? (Besides Raspberry Pi 4)
Raspberry Pi Sense HAT – Make your own Astro-Pi

The Sense HAT supports a whole host of projects for the Raspberry Pi, it can measure how fast is the Pi itself travelling (i.e. measure your speed), which direction is the Raspberry Pi facing etc.
- Scratch 3 Desktop software on Raspbian
- Pibow Ninja Enclosure for Model B+
- This Pibow for the Raspberry Pi Model B+ is redesigned with add-on boards in mind. The Model B+ Rainbow is a sleek, durable and attractive case crafted out of eight unique layers.
- Each layer is laser-cut from colorful high-quality cast acrylic and once stacked they securely contain a Raspberry Pi Model B+ while leaving the primary ports, including the camera port, accessible.
You can find the full tutorial on how to make a Scratch 3 Sense Hat game on RaspberryPi here: Make a Scratch 3 Sense HAT game
What is Raspberry Pi?
Have you ever thought of having a mini-computer or a small computer? Here is one for you, Raspberry Pi! Raspberry Pi is a tiny computer or a card-sized computer that can be fit into the monitor or your TV. The primary objective of this little computer, Raspberry Pi, is to make people learn programming skills, like Python and Scratch. Raspberry Pi works the same as that of the traditional computer. You can browse the internet, play high-definition video games, enjoy premium-quality 4K video content, use the word or spreadsheet, etc.
Additionally, Raspberry Pi incorporates more extra features, like parent detectors, weather stations, music machines, etc. Kids can also use this mini-computer to learn computer working and programming languages. Raspberry Pi is developed in the United States, which is an educational charity. Its primary goal is to make people and kids aware of the programming languages, computer science subjects and teach them.
Raspberry Pi is available in multiple versions or generations, like Raspberry Pi B, Raspberry Pi B+, Raspberry Pi 2, Raspberry Pi Zero, etc. Raspberry Pi’s all generation or versions incorporate Broadcom System on a Chip (Soc). It also includes a Central Processing Unit (CPU) compatible with ARM and an on-chip Graphics Processing Unit (GPU).
The very first Raspberry Pi model is Raspberry Pi B, developed in 2012. Later, an advanced version of model B was released as Raspberry Pi B+ in 2014. The next year, the next version, Raspberry Pi 2 was developed with 1 GB RAM and 900 MHz quad-core processor. In the next version of the Raspberry PI, Raspberry Pi Zero, its size was reduced, and in the Zero W model, Bluetooth and Wi-Fi features were also incorporated.
Later came Raspberry Pi 3 models. It includes two different models, B and B+. The B model involves Wi-Fi, Bluetooth, and USB features having the quad-core processor of 1.2 GHz 64-bit. Another advanced B+ model includes more additional features, like network boot and Power over Ethernet (PoE) with a 1.4 GHz quad-core processor.
The fourth generation of the Raspberry Pi, Raspberry Pi model 4 B, is developed with a higher speed quad-core processor. These mini-computers are more advanced and highly-featured. The features involved in this model are Wi-Fi, Bluetooth, USB Type-C port, two USB 2.0 and 3.0 ports, HDMI port, and gigabit Ethernet. Raspberry Pi model 4 B has a 1.5 GHz quad-core processor.
Check out this article if you want for “Why did my PC restart?” Infinite Loop.
Самое интересное
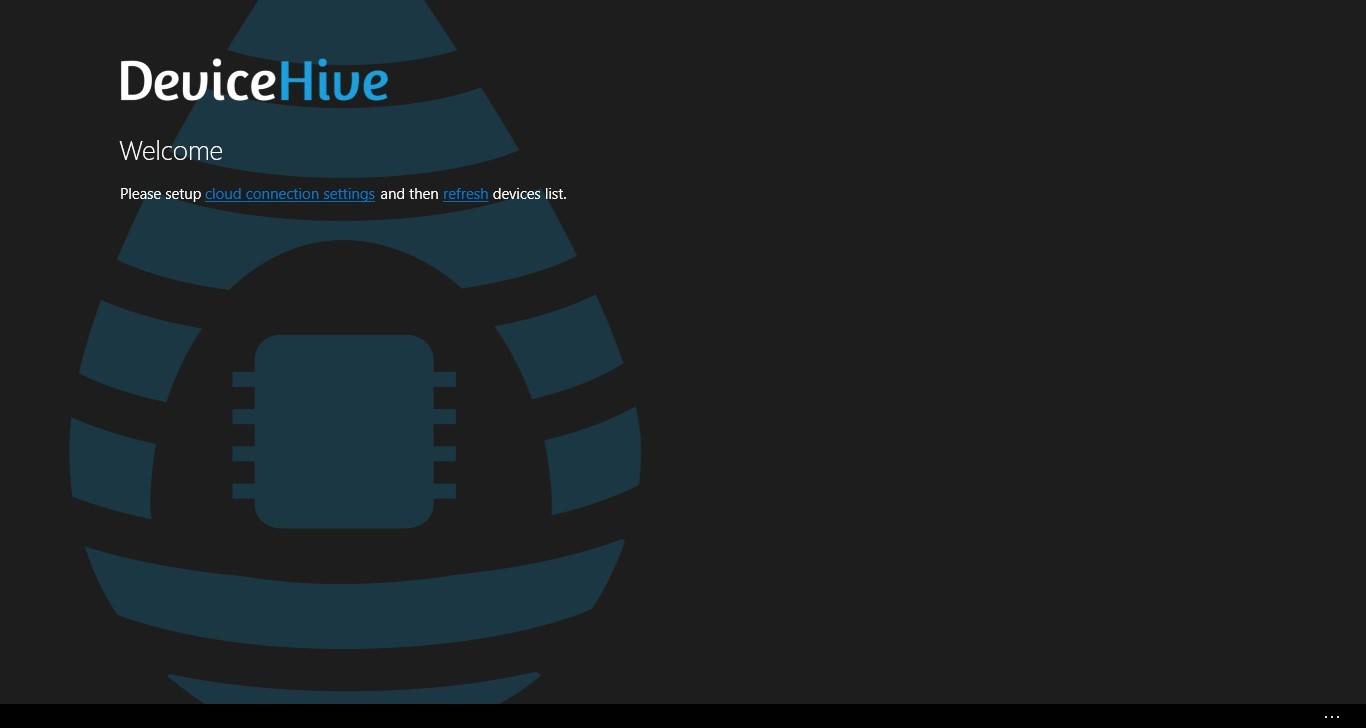
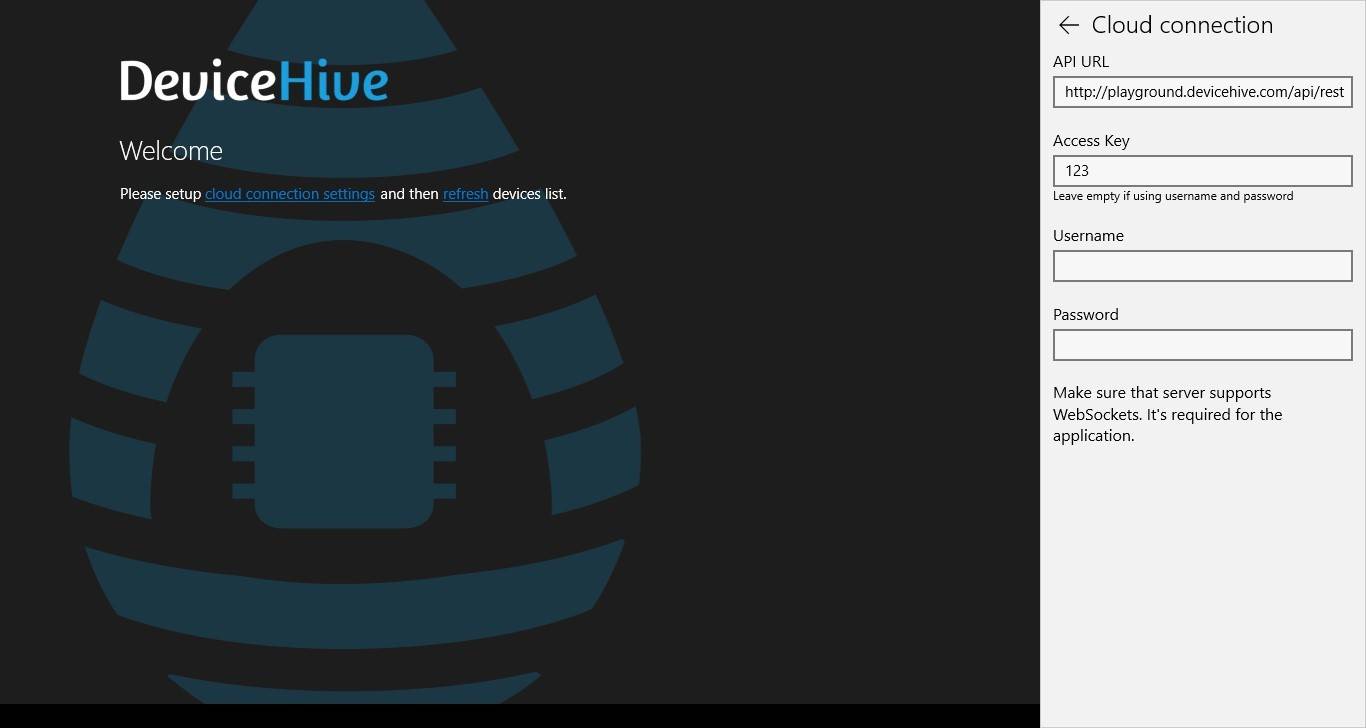
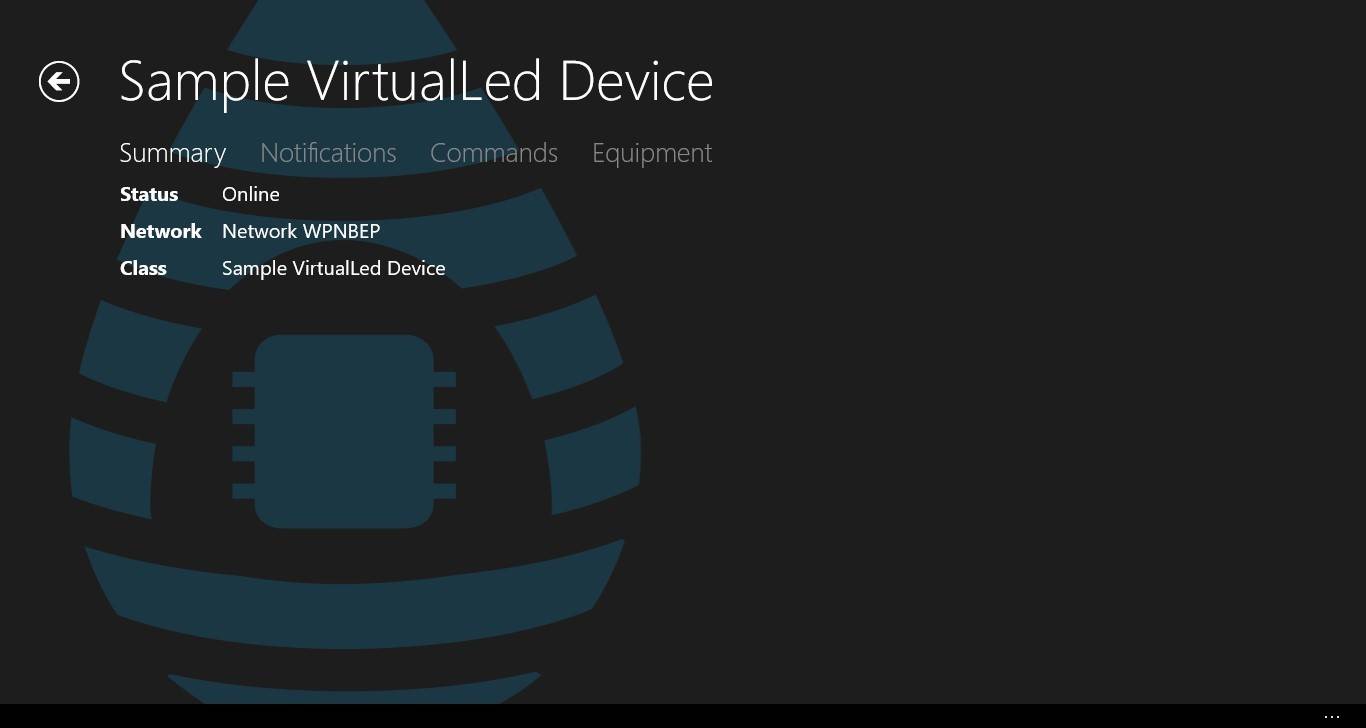
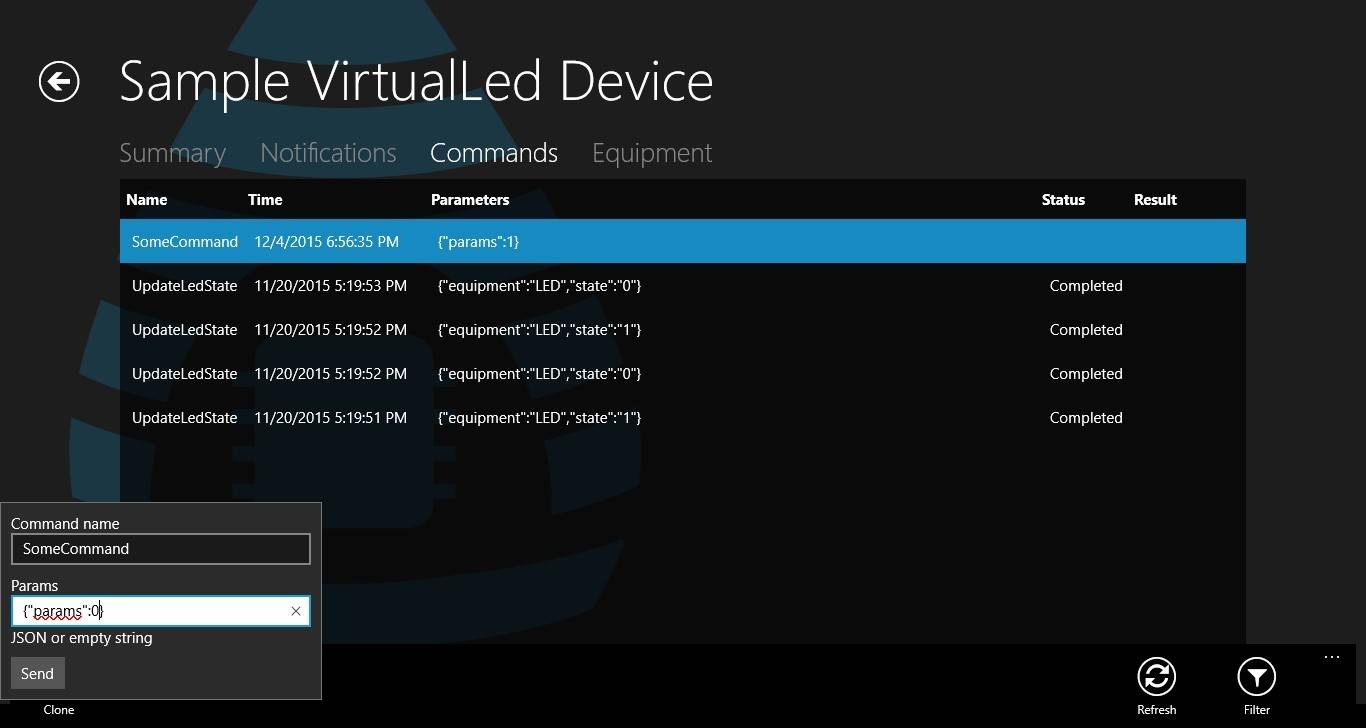
Наше приложение на Raspberry Pi будет не просто кнопочкой включения/выключения светодиода, а практически полноценной админкой всех IoT-устройств нашей DeviceHive-сети. При желании, конечно, можно упростить его до той самой «кнопочки» или наоборот расширить, например, до клиента, управляющего роботом телеприсутствия. Готовое приложение находится в том же репозитории, в solution DeviceHive.WindowsManager.Universal. Не будем останавливаться на нюансах гайдлайнов Win10 – корни приложения растут еще из Win8. Не будет тут и MVVM – все и так знают, как его применять. Давайте сосредоточимся на главном: нам нужна консоль мониторинга и управления устройствами, подключенными к DeviceHive, под Windows 10 на Raspberry Pi2.
- DeviceHive.Client – для «большого» .NET 4.5 и выше. Использует WebSocket4Net.
- DeviceHive.Client.Portable – для Windows 8.1 и Windows Phone 8.1. Использует нативные WebSockets.
- DeviceHive.Client.Universal – для всех редакций Windows 10, в том числе для Win10 IoT Core. Именно она используется в нашем приложении.
Наследуем ClientService от DeviceHiveClient и инициализируем его сеттингами:
А также указываем не использовать LongPolling, а только WebSocket, дабы не упираться в лимит одновременных HTTP-запросов:
 MainPage
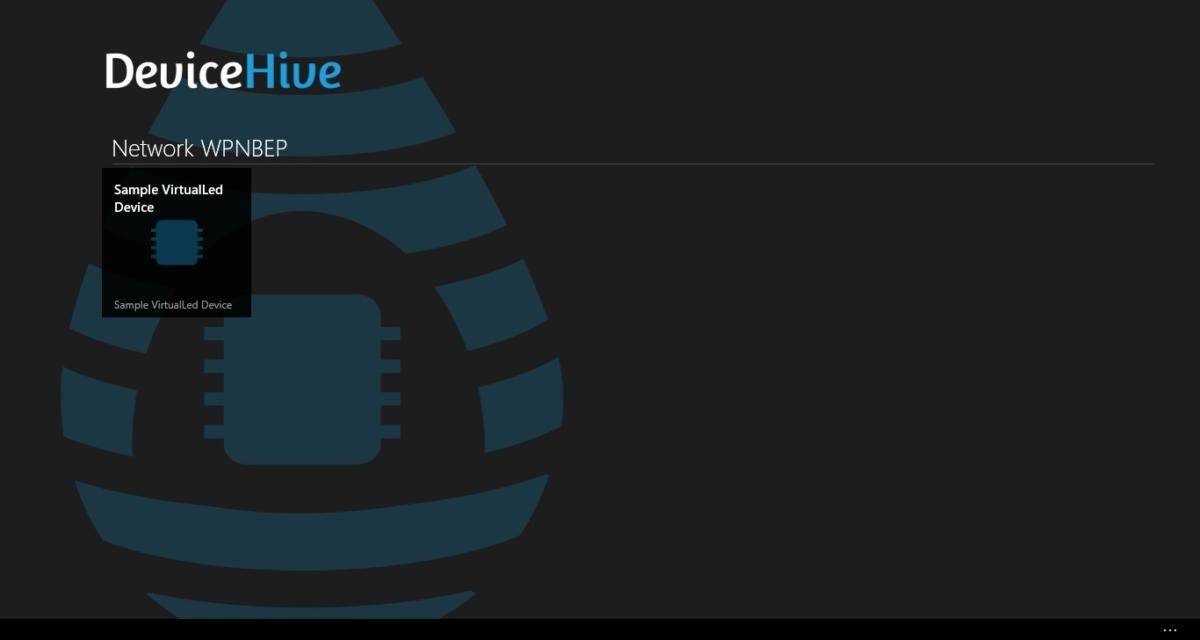
А вот и наш виртуальный светодиод:
 DevicePage
 VirtualLedClientVirtualLed
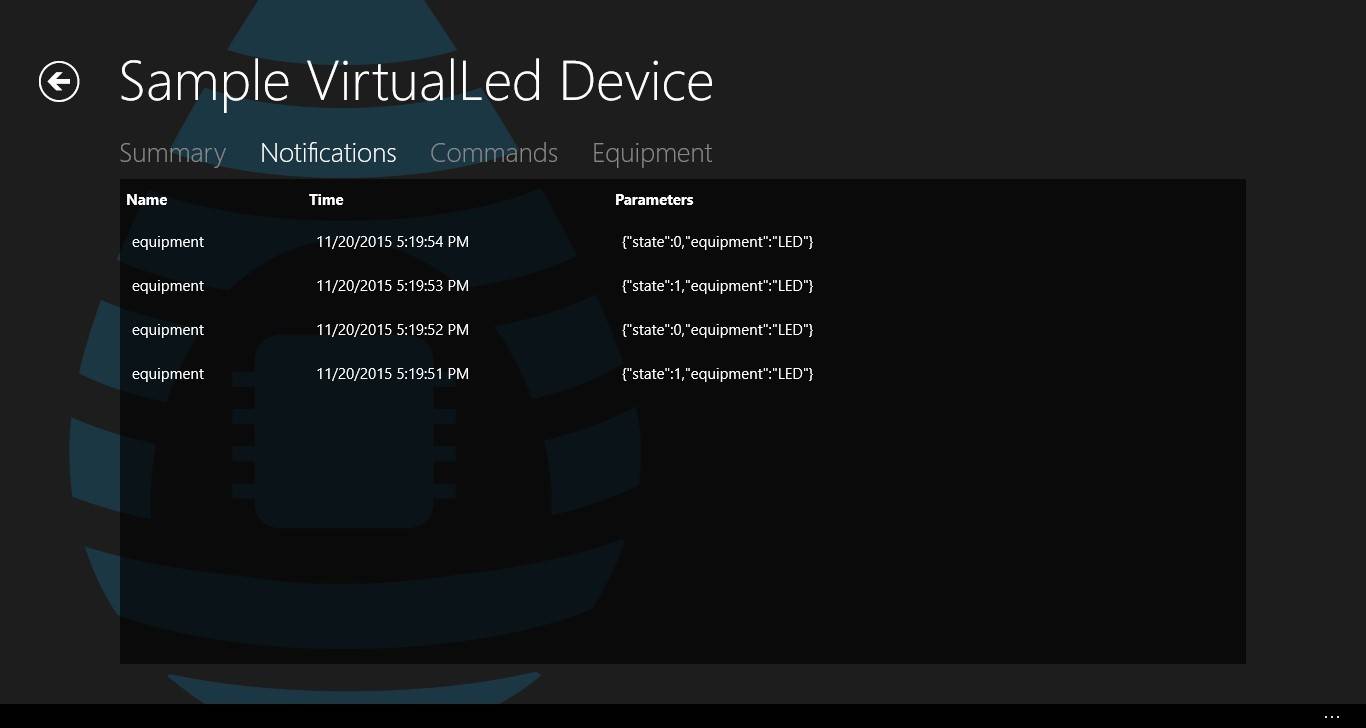
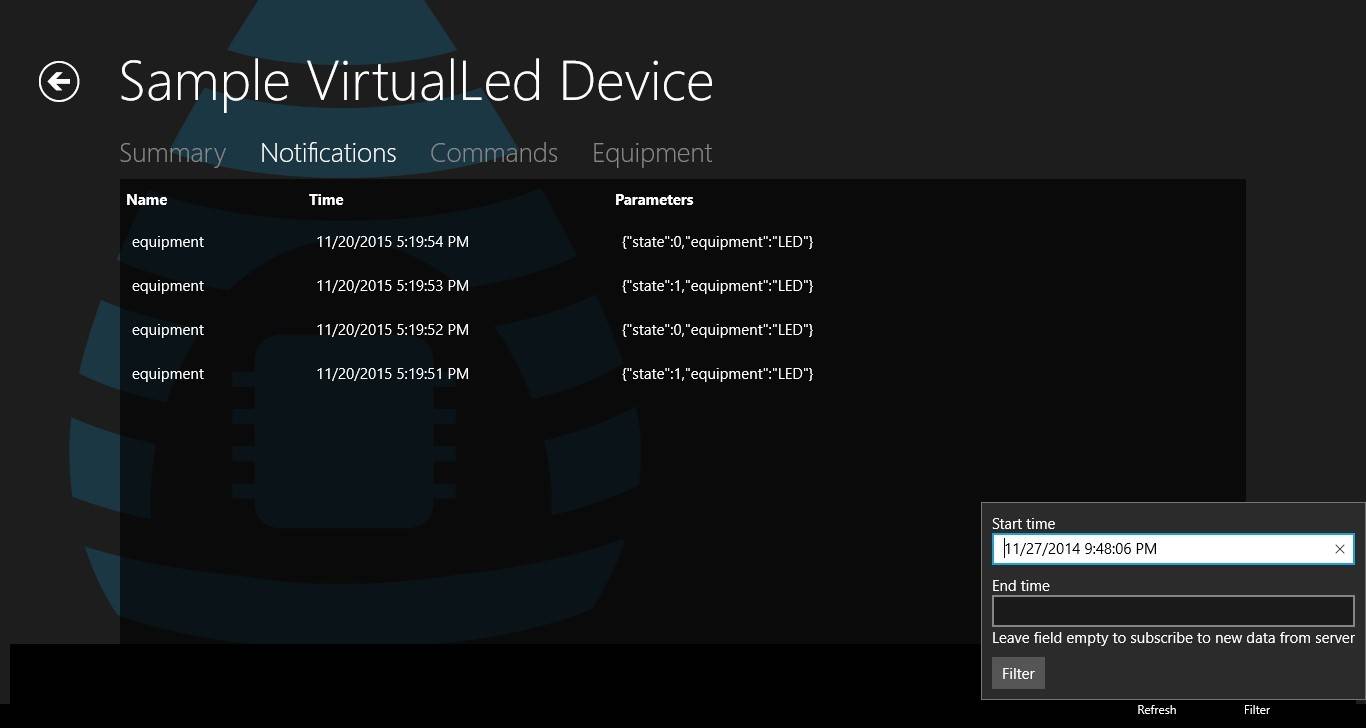
Если не определена конечная дата фильтрации списка нотификаций, подписываемся на новые уведомления, которые будут приходить через вебсокет:
Если попробовать переключать наш виртуальный светодиод, то уведомления о его новом состоянии тут же отобразятся в списке.
Аналогично подписываемся на новые команды:
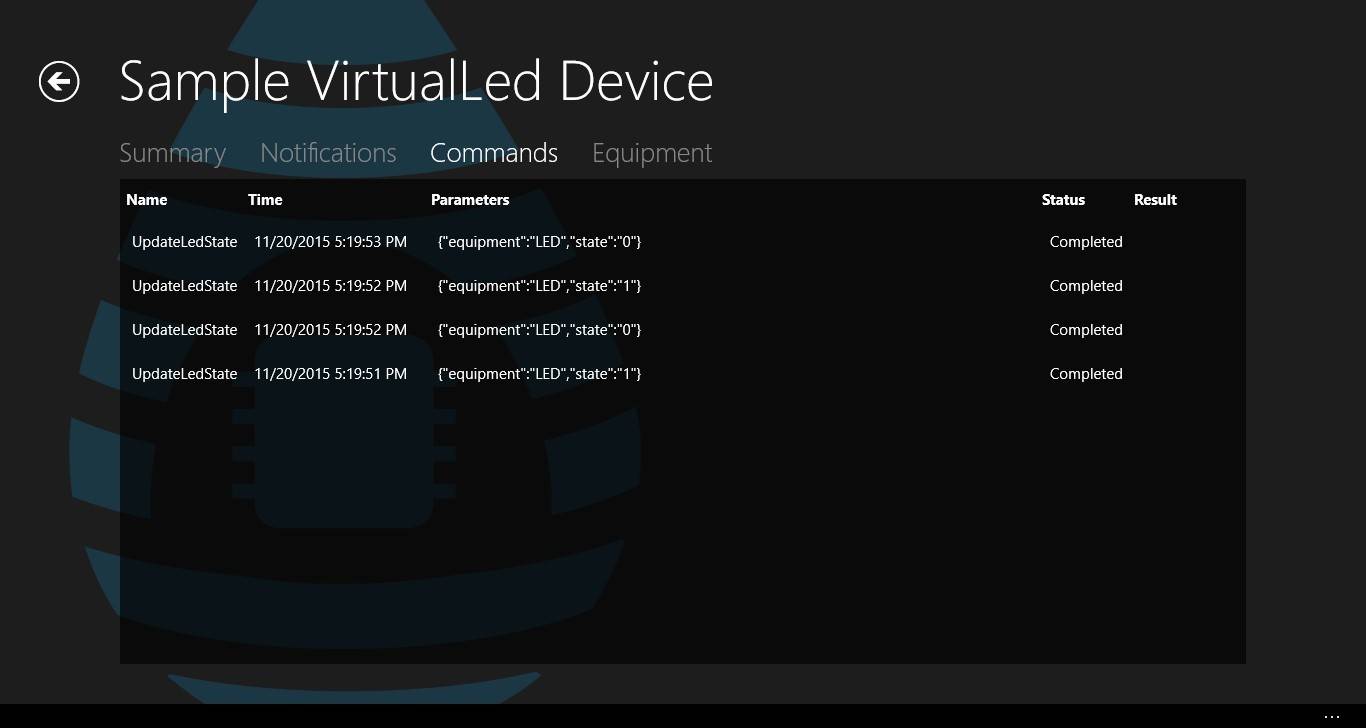
При отправке команды мы подписались на ее обновление методом CommandResultCallback. Обрабатываем результат выполнения команды:

 Raspberry Pi 2Windows 10 IoT Core DeviceHive Raspberry Pi
Сервер rsyslog для сброса логов с роутера
Для настройки сброса логов с роутера (например Zyxel Kinetic) или любого другого сетевого устройства, включаем 514 порт в файле /etc/rsyslog.conf , для этого нужно раскомментировать строчки
Далее создаем файл для лога
Теперь создаем в папке /etc/rsyslog.d/ файл с любым именем и расширением conf, например zyxel.conf, со следующим содержанием (меняем адрес 192.168.1.1 на ip роутера, который будет отправлять логи).
Возможно потребуется написать вместо , но пока работает и так.
Рестартуем сервис
Прописываем в роутере в качестве syslog сервера ip raspberry.
Теперь чтобы логи не раздувались, в папке /etc/logrotate.d/ создаем файл с любым именем (например, zyxel), с правилами архивации:
Installing Windows 10 IoT on the Raspberry Pi 2
Now that all the programs required are installed on your system, the SD card can finally be made. Get out the SD card you’re planning on installing Windows 10 to and insert it into the SD card reader on your Windows 10 desktop. Keep in mind the SD card must be at least 8 gigabyte in size and rated class 10 or better.
Launch the IoT core dashboard. Once launched, you’ll see a few things on screen in the form of three drop-down menus. Select Raspberry Pi 2 in the first drop-down menu, Windows 10 IoT core for Raspberry Pi 2 in the second, and the SD card you plan on using in the third.
When everything has been selected, click the box saying that you accept Microsoft’s terms and conditions, and select the download and install button.
What follows is the flashing process. You’ll see a progress bar pop up on screen and tell you that your SD card is being flashed. This may take a bit of time. Be patient.
Once the flashing has completed, another window will open. This window will partition the SD card in the correct way.
When the partitioning process has completed, the IoT dashboard will notify you that the SD card is ready.
Finally, just insert your SD card into the raspberry Pi, connect your peripherals, network cable, display and power it on. That’s it! You’re now running Windows 10 IoT on your Pi!
Build your own Raspberry Pi Computer!
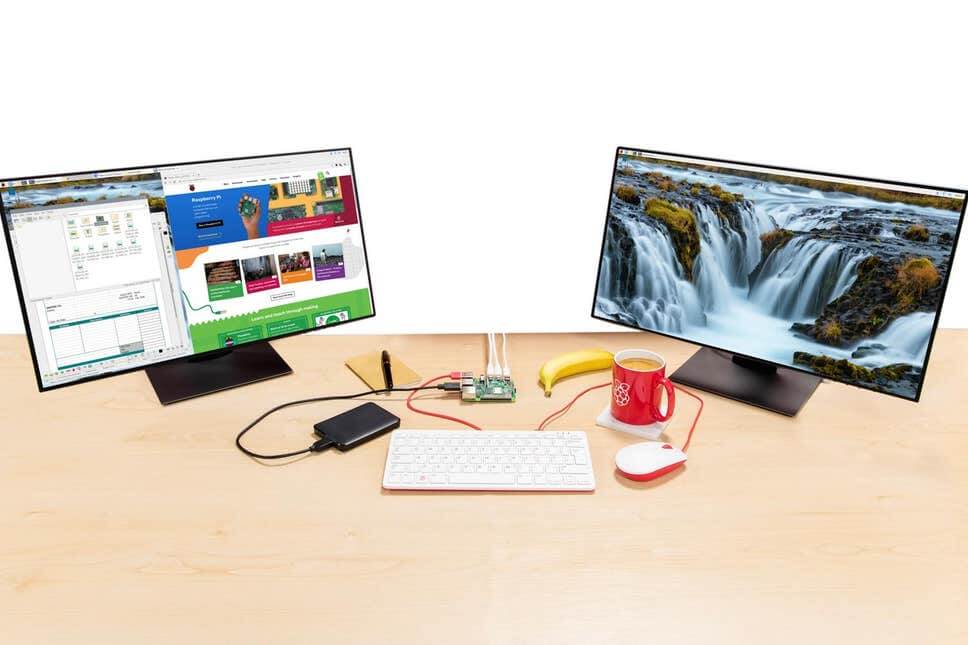 Ref: EveningStandard
With the all new Raspberry Pi 4, you can now build your very own credit-sized computer / laptop at a very affordable price! This computer can power two 4K screens at the same time, allow video and photo editing while having processing power to perform machine-learning. In addition, it has 2 USB3.0 ports and Bluetooth 5.0 connectivity.
Raspberry Pi 4B – Deskstop Kit – 4GB
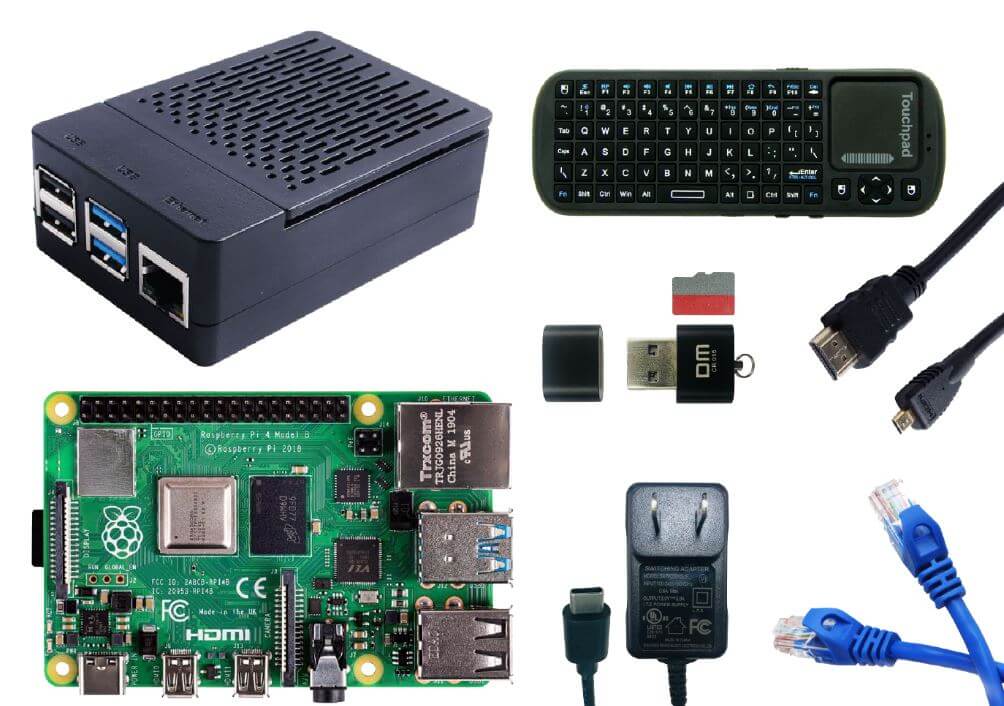
That is all you need, Just one desktop kit from Seeed! This Seeed Raspberry Pi 4 desktop kit has everything you need ranging from a keyboard and a touch pad mouse. We haven’t put a normal keyboard and mouse in the kit since almost all of you have that on hand.
This keyboard can also be a remote controller in some scenarios. Imagine if you make a race car with the Raspberry Pi, you can control it just by using this keyboard!
- This Raspberry Pi 4 desktop kit includes:
- Raspberry Pi 4 Computer Model B 4GB
- Wall Adapter Power Supply – 5VDC 3A Type-C
- Micro SD Card with Card Reader-32GB(Class 10)
- ABS H-Type Black Case for Raspberry Pi 4 B
- Micro HDMI to Standard HDMI Male Cable – 1m(Support Pi 4)
- Cat6 Ethernet Cable – 1 Meter
- Mini Wireless Keyboard and Touchpad Mouse
- Other than the desktop kit, we also offer more Raspberry Pi 4 kits for you to build more products!
- Raspberry Pi 4 (4GB) Basic Kit ($59)
- Raspberry Pi 4 (4GB) Starter Kit ($79.8)
- Raspberry Pi 4 (4GB) Grove Beginner Kit ($98)
- Raspberry Pi 4 (4GB) Media Centre Kit ($84)
Начальная установка
Качаем и устанавливаем программу для записи образа на SD карту Win32DiskImager (в дальнейшем ее же можно использовать для бакапа этой SD карты в файл образа).
Записываем скачанный образ этой программой на SD карту, вставляем ее в слот и загружаемся.
После загрузки жмем Enter и вводим логин pi и пароль raspberry.
Для первоначальной настройки можно использовать консольную программу настройки:
Через нее можно сразу сменить дефолтный пароль, расширить раздел на весь объем флешки, выставить локаль на ru (после выбора локали будет еще запрос на каком языке выводить сообщения — лучше там выбрать англ. язык, на русском выглядит всё как-то не очень привычно и неудобно), настроить таймзону, включить SSH, если будет используется только через консоль без графической оболочки, то для GPU можно выбрать минимальный размер выделяемой памяти (16Мб).
Ставим сразу для удобства Midnight Commander:
Как взаимодействовать с Win IoT на «Малине»?
Базовыми вещами можно на Win IOT можно управлять через веб-интерфейс. Делать это очень просто. Первое – следует подключить «Малину» к Сети. Второе – любым удобным образом выяснить ее адрес. Третье – ввести в браузере IP, который был назначен для RPi.
После этого откроется панель управления Web Manager. Через неё можно проверять статус работы устройства, устанавливать, запускать и удалять программы, производить дебаггинг уже инсталлированных приложений и т. д. То же самое возможно делать и при помощи приложения Remote Clinet.
Но почему также требовалось устанавливать еще и среду разработки MSVStudio? Для работы. Через данное приложение можно комфортно писать скрипты и загружать их прямо на «Малину», работающую под Win10.

Подробную информацию о том, что собой представляют два упомянутых приложения можно узнать из официальной или неофициальной документации о соответствующих продуктах. Данная тема очень обширная, поэтому нет смысла её здесь рассматривать.