Raspberry pi + freebpx(asterisk) + mikrotik = атс мини
Содержание:
Network commands
Shortly after your first Raspberry Pi OS installation, you’ll need some of these commands to help you with the network configuration (especially if you are on a lite version or with SSH).
Configuration
By default, the Raspberry Pi 3B+ comes with 2 interfaces (Ethernet and Wi-Fi). The Ethernet is called eth0 and the Wi-Fi is wlan0. You have to use these names with some commands below.
-
ifconfig: Displays your current network configuration, mainly your IP address if connected.
ifconfig
That’s the easiest way to find the Raspberry Pi address, but there are other solutions when you don’t have access to it (as I explain in this article).
-
ping <ip>: Sends a ping packet to another IP on the network to check if the host is alive.
ping 192.168.1.1
-
ifup <interface>: Enables the specified interface.
sudo ifup eth0
-
ifdown <interface>: Disables the specified interface. Can be useful to disable Wi-Fi if you are already connected by cable for example.
sudo ifdown wlan0
By the way, it’s a great idea to disable the Wi-Fi interface if you don’t use it. You can find more permanent solutions in this article, but ifdown is a quick way to do this.
Raspberry Pi BootcampSale: 10% off today.Take it to the next level.I’m here to help you get started on Raspberry Pi.Learn all the skills you need in the correct order.Watch now!
File transfer and remote connection
-
wget <url>: This command allows you to download a file from the Internet.
wget https://wordpress.org/latest.zip
-
ssh <user>@<ip>: SSH is a network protocol that provides you a way to connect securely to a remote computer.
ssh root@192.168.1.201
-
scp <file> <user>@<ip>:<path>: scp can transfer a file to a remote computer over SSH.
scp test.txt root@192.168.1.201:/root/
-
rsync <file> <user>@<ip>:<path>: rsync does almost the same thing but with a delta comparison algorithm and some optimizations to transfer files faster.
As you can see, you can also use rsync for local file synchronization.
I generally use this command to back up my Raspberry Pi (as explained here). I send all this import files to my local NAS (I’m using this device). It takes a few seconds and I know I’m safe after that.
Files management
These are the basic commands are that every Linux beginner should learn.You might already know these commands, so this might be a reminder.
The Linux arborescence is a tree, starting at the root: /
Each subfolder created under is accessible with /.
For example: /home/pi => pi is a subfolder of /home, home is a subfolder in /.
Don’t forget to use sudo if you are not allowed to access the file or directory (sudo gives you administrator privileges for the command that follows).
-
cd <path>: Changes directory, go to the specified folder in the files tree.
cd /home/pi
- ls: Lists the files and directory in the current or specified folder.
- mkdir <folder>: Creates a new subfolder in the current or specified folder.
- cp <file> <destination>: Copies a file or a directory to another location (to copy a complete directory you need to add the -r parameter for “recursive”).
- mv <source> <destination>: Moves a file or a directory to another location.
-
cat <file>: Displays all the content of the specified file.
cat /home/pi/README.txt
-
more <file>: Displays the content of the specified file, page per page (enter or space to continue, q to quit).
more /var/log/syslog
- tail <file>: Tail allows you to display the end of a file, it’s useful to check new entries in a log file.You can specify the number of lines to display with -n.And finally, my favorite is the option -f to displays new lines in real-time.
- head <file>: It’s the same as tail but to display the beginning of a file.
- grep <string>: Grep is a powerful tool to search string in a text. You can use it to search something in a file or to filter the output of another command or script.Basic usage:As I say, you can use it on a file or a script output:And finally, there are a lot of options to use with grep, like regular expressions or options to display lines before (-B), after (-A) or around (-C) the search string.You can also use -v to display everything except the input string.If you like this tool, I recommend you read the main page to know exactly what you can do with it.
-
nano <file>: Nano is text editor. It would need an entire article to go into detail (I have done it since, click here to read more about it ^^).It allows you to edit a file, and save your changes with (CTRL + O, Enter, CTRL + X).
nano /home/pi/myscript.sh
You’ll find all actions available at the bottom of the screen.
- rm <file>: Deletes a file. For a folder, add option -rf (recursive and force)
-
tar -c: You can use tar to store files into an archive. It’s often used with gzip to compress files.
tar -cvfz archive.tar.gz /home/pi/Documents/mydirectory
-c: create an archive-v: verbose-f: filename of the archive follow-z: compress files with gzip
-
tar -x: It’s the same command but to extract files.
tar -xvfz archive.tar.gz
-x: extract an archive
-
find: As the name suggests, find is useful to locate files on your Raspberry Pi.
find /home/pi -iname *.tar.gz
There are many options to help you find the good file (size, last modification date, …). And if you want to learn options to quickly find a file on Raspberry Pi, you can also read this other article on the topic.
-
pwd: Pwd lets you see in which directory you are.
pwd
- tree: Another great tool to analyze your current location in the file tree. It will show you the entire lower tree (see the example below).
There is a cheat sheet available here that you can download for free, with all the commands listed in this article (in fact there are a few bonuses in the PDF). Make sure to download it, so you always have it handy when you use your Raspberry Pi.
Настройка PLEX Media Server
Помните пункт «Добавляем немного комфорта» выше по тексту? Вот тем крохотным шажком для одной Raspberry мы сэкономили кучу времени для всего человечества. Вместо того, чтобы одними консольными командами создавать папки для контента и другими консольными командами назначать им права доступа, мы просто зайдем по сети в папку Downloads и привычным способом создадим там папки Movies, Music, TV Shows и Other Videos.
Учитывая, что системный пользователь pi наделен правами владельца всего содержимого папки Downloads, у PLEX Media Server не будет никаких проблем с обработкой коллекции фильмов, музыки, сериалов и домашнего видео.
Здесь нас встречает интерфейс с огромным количеством настроек, которое может испугать неподготовленного пользователя. Поэтому вкратце пройдемся по основным.
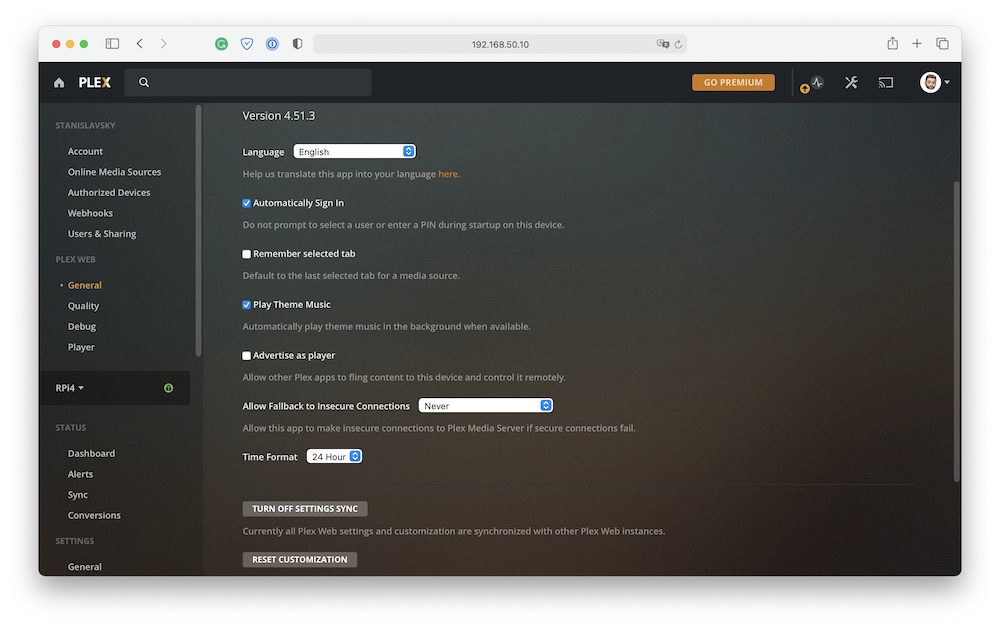
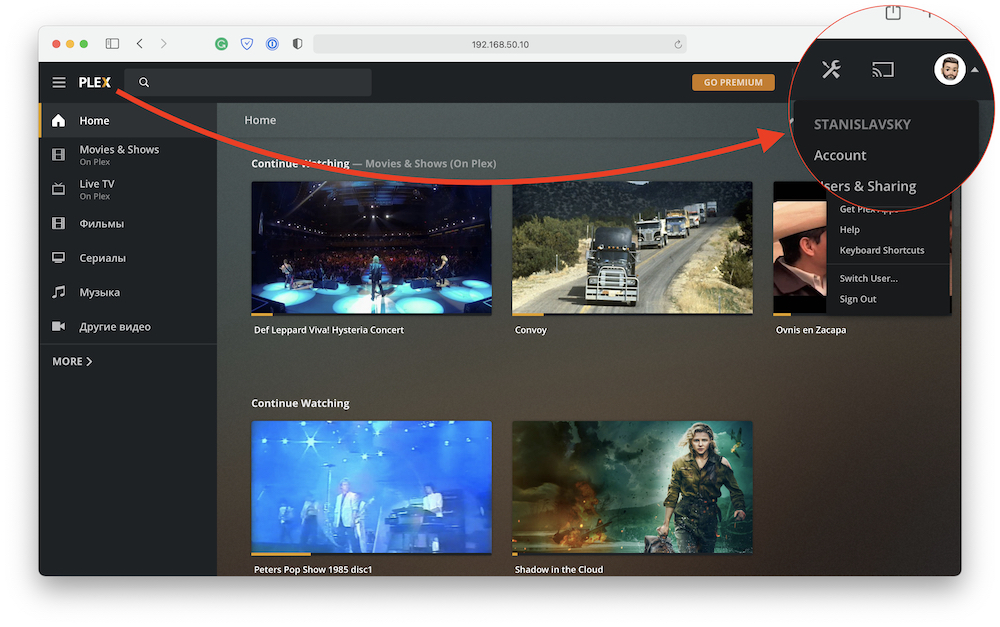
Для начала в верхнем правом углу найдем пиктограмму, отвечающую за учетную запись и залогинимся. С этого момента настройки сервера будут доступны как в локальной сети, так и через учетную запись прямо на сайте PLEX. Ну и сразу же переходим в настройки, нажав на пиктограмму с инструментами.
На что нужно обратить внимание:
- На вкладке Remote Access убедитесь, что ваш сервер виден снаружи вашей сети. Порт по умолчанию 32400, и если вы не видите надписи Fully accessible outside your network, его прийдется открыть в настройках роутера.
- На вкладке Library имеет смысл отметить автоматическое сканирование медиатеки при каждом изменении, чтобы обложки и метатеги от удаленных файлов не забивали интерфейс мертвыми ссылками.
- На вкладке Libraries укажите пути к папкам Movies, TV Shows, Music и Other Videos, которые мы создали чуть раньше на внешнем диске в папке Downloads. Здесь нужно внимательно выбирать тип библиотеки, чтобы встроенные средства сканирования обращались к правильным серверам при поиске обложек, кадров или трек-листов.
На этом, в общем-то, всё. Остальные настройки, вроде параметров транскодинга или включения DLNA-сервера — исключительно в вашем ведении, в зависимости от поставленных задач, клиентских устройств и так далее.
Могу заметить, что на дефолтных настройках моя Raspberry Pi 4 воспроизвела 4K HDR-10 BD-Remux размером 92 ГБ даже не поперхнувшись. В качестве клиента выступала Apple TV 4K с установленным приложением PLEX, подключенная по HDMI. Обложку, кадры, информацию о фильме и так далее PLEX Media Server добавил в полностью автоматическом режиме.

Список платформ, для которых у PLEX есть клиентские приложения, впечатляет еще больше, чем список платформ для серверной части. Вгляните сами, тут есть практически любое устройство, способное воспроизводить медиа:

Ссылку на скачивание нужного вам приложения можно найти на странице Устройства и Приложения официального сайта сервиса.
Приятного просмотра!
К большому сожалению, сервис ретро-игр PLEX Arcade невозможно запустить, если серверная часть установлена на Raspberry Pi и вообще любой Linux-сервер. Поэтому сейчас мы будем превращать нашу «малинку» в ретро-консоль.
System updates
Just after the network configuration, you’ll have to update your system to get the latest version of each default package installed.
On Raspberry Pi OS, and generally on all Linux distributions, you’ll have a package for each app or command you install. A list of all available packages is called a repository. Once installed, you need to update this repository and all of your packages regularly to keep your system safe. These commands explain how to do this. We’ll need sudo for all these commands.
-
apt-get update: Downloads the last repository version for each one you have in your configuration (/etc/apt/sources.list).
sudo apt-get update
-
apt-get upgrade: Updates all installed packages if needed.
sudo apt-get upgrade
-
rpi-update: Only use this if you know what you do.This command will update everything on your Raspberry Pi (firmware, packages, …) and can potentially break something.
rpi-update
Оптимизируем дисковые операции
Поскольку ресурс на запись SD-карты довольно мал, перенесём хранение и ведение логов в оперативную память (на случай, если они вам нужны).
Для этого всего-лишь необходимо отредактировать , добавив в него следующее содержимое:
vi /etc/fstab
tmpfs           /tmp                tmpfs   defaults,noatime,nosuid,size=100m                   0   0
tmpfs           /var/tmp            tmpfs   defaults,noatime,nosuid,size=30m                    0   0
tmpfs           /var/log            tmpfs   defaults,noatime,nosuid,mode=0755,size=100m         0   0
tmpfs           /var/spool/mqueue   tmpfs   defaults,noatime,nosuid,mode=0700,gid=12,size=10m   0   0
И отправим наше устройство в перезагрузку:
reboot
После чего мы увидим что-то следующее:
df -h
Ф. система      Розм   Вик  Дост Вик% змонтований на
/dev/root       7,3G  1,3G  5,8G  18% /
devtmpfs        460M     0  460M   0% /dev
tmpfs           464M     0  464M   0% /dev/shm
tmpfs           464M   12M  452M   3% /run
tmpfs           5,0M  4,0K  5,0M   1% /run/lock
tmpfs           464M     0  464M   0% /sys/fs/cgroup
tmpfs            10M     0   10M   0% /var/spool/mqueue
tmpfs           100M     0  100M   0% /tmp
tmpfs           100M  128K  100M   1% /var/log
tmpfs            30M     0   30M   0% /var/tmp
/dev/mmcblk0p1   41M   21M   21M  52% /boot
tmpfs            93M     0   93M   0% /run/user/1001
Выключаем использование swap-памяти
dphys-swapfile swapoff
dphys-swapfile uninstall
systemctl disable dphys-swapfile
dphys-swapfile.service is not a native service, redirecting to systemd-sysv-install.
Executing: /lib/systemd/systemd-sysv-install disable dphys-swapfile
RPi3 specific
Wi-Fi
Just install the package with
It is also possible to downstrip the provided firmware files with the savedconfig useflag.
Bluetooth
Create the firmware directory:
Fetch the Raspberry Pi 3B, Zero W Bluetooth firmware:
Fetch the Raspberry Pi 3B+ Bluetooth firmware:
NoteWith an update to the firmware a new device tree overlay was introduced that enables autoprobing of Bluetooth driver without need of hciattach/btattach.
FILE
dtparam=krnbt=on
With that parameter set, the bluetooth driver will be loaded automatically and no further action is required.
Both commands will create a HCI device (e.g. hci0) in /sys/class/bluetooth and load the required firmware.
Bootable 64-bit Gentoo Image for RPi3 / RPi4
WarningThis image has not been updated since September 2020 and is currently unmaintained
Screenshot of RPi4 running 64-bit Gentoo image (Xfce)
- The Pi’s onboard Ethernet, Wi-Fi, and Bluetooth adapters;
- Access to the camera module (if fitted) and h/w video codecs, via V4L2-M2M / MMAL;
- ALSA sound playback, via headphone jack and HDMI;
The image contains a full Portage tree (and /etc/portage/<…> set) so that you can run emerge operations immediately.
Raspberry Pi сбросить пароль root
http-equiv=»Content-Type» content=»text/html;charset=UTF-8″>style=»clear:both;»>
0x02. Отредактируйте cmdline.txt
Откройте корневой каталог SD-карты на ПК, стартовая часть видна и содержит файл с именем «cmdline.txt». Отредактируйте этот текст в редакторе и вставьте следующий текст в конец существующего текста
Например, если исходное содержимое cmdline.txt выглядит следующим образом:
После редактирования он должен выглядеть так:
Убедитесь, что все находится на одной линии. Сохраните текстовое содержимое, выньте SD-карту из кардридера и вставьте ее обратно в Raspberry Pi.
0x03. Сбросить пароль
Вставьте SD-карту в Raspberry Pi (здесь нам нужно подключить монитор и клавиатуру). Включите Raspberry Pi, предполагается, что вам нужно подождать некоторое время, прежде чем отобразится мигающий курсор. После идентификатора введите следующую команду:
Вам будет предложено ввести новый пароль, пожалуйста, введите его внимательно и нажмите клавишу ввода. Вам будет предложено еще раз подтвердить пароль.
Теперь пароль изменен, теперь введите следующую команду для синхронизации и выполнения программы инициализации.
Raspberry Pi продолжит загрузку, затем выключит Raspberry Pi и выключится.
0x04. Редактировать текст cmdline.txt
Снова отредактируйте текст на компьютере: удалите последние данные, которые мы добавили на втором этапе. Теперь вы можете вставить SD-карту в Raspberry Pi и перезапустить ее, чтобы использовать новый пароль.
Интеллектуальная рекомендация
Введение 1. Основное содержание этого руководства ASP.NET Введение в основное промежуточное ПО Через настройкуASP.NET Основное промежуточное ПО реализует проверку запросов 2. Экологическая информация …
Сначала создайте индекс и создайте отображение поля, полевое хобби используется IK_SMART Psychoacter Не забудьте использовать запрос на поставку, затем индекс и тип должны быть последовательными выше …
1. После установки vscode перейдите вИнтерфейс запуска наCtrl + Shift + P Появится окно команд, показанное ниже, и введите «display», Введите; как показано ниже 2. Удалите содержимое перед д…
Веб-сервер установки IDEA часто встречает установку и неудачи, запустить сбой. В сочетании с IDEA используется, расчесывание процесс установки веб-сервера, рекомендуется для загрузки серверов Tomcat и…
Доброе утро всем, на этот раз я предлагаю вам прочитать код приложения камеры Android9.0, которое не только для рабочих нужд, но и для личных заметок, чтобы помочь вам учиться. Местоположение исходног…
Вам также может понравиться
Как правило, написано многопараметрическое классу, будет несколько разных конструкторов для звонков клиентов, что приводит к слишком низкой гибкости, и если она поддерживается, головная боль. Использу…
Навыки использования логических операторов Логическое ИЛИ Логическое ИЛИ (||) синтаксис expr1 || expr2 Вернуть expr1, если expr1 истинно; в противном случае вернуть expr2. || выберет первое (крайнее л…
Что такое FFTW? FFTW (более быстрое преобразование Фурье на Западе) — это стандартный набор языка C для быстрого вычисления дискретного Фурье, разработанный М. Фриго и С. Джонсоном из Массачусетского …
Я видел статью Учителя Яо в Чжиху, и она показалась мне очень полезной, поэтому делайте заметки! ! ! Прежде всего, мы получили жалобы от пользователей, что в сети некоторых операторов сети в некотор…
Вставьте текстовый текст код здесь, чтобы простираться вправо, текст превышает максимальную ширину текста, с … заменить текст позади…
Некоторые замечания
После настройки доступа по Secure shell рекомендуется озаботиться безопасностью подключения, даже в том случае, если малинка будет использоваться в качестве не присоединяемого к internet оборудования. Как говорится — в безопасности нужно предусмотреть все. Рано или поздно, возможно будет сделан глобальный выход в сеть. А уж там зависит организация безопасного доступа от элементарной забывчивости. Можно попросту поленится или «забегаться» и не установить пароль для логина или sudo, оставив все по умолчанию. Соответственно, другими словами, предоставив в собственное распоряжение потенциального злоумышленника, вычислительные мощности Raspberry PI работающего в локальной сети.
Основные рекомендации по безопасности, все команды в отношении которых выполняются в консоли малинки:
- Установка пароля root. Делается одним из двух методов, через
с выбором второго пункта программы и действиями в рамках инструкций на экране. Другой способ проще — в командной строке набирается
с последующим вводом пароля и его подтверждения, устанавливаемого в строках «Enter new UNIX password» и «Retype new UNIX password»:Последняя приведенная на скриншоте команда «sudo passwd — unlock root» разблокирует учетную запись администратора, которая в свою очередь еще пригодится впоследствии. - Ограничение использования sudo без пароля. Выполняется, открыв файл конфигурации доступа для редактирования командой
и заменив в строке с пользователем по умолчанию запись на pi ALL=(ALL) PASSWD: ALL. В том случае, если был внесен новый логин требуется приведенную строку указать и для него, вписав ее после имени внесенного, используемого при входе в систему. - Добавление нестандартного пользователя (вписывается вместо <логин>) и удаление старого. Здесь требуется дать следующие команды:
Если стандартного пользователя не удалять (последние две строки игнорировать к вводу), — рекомендуется задать ему пароль, отличный от установленного по умолчанию. Выполняется действие набором «sudo passwd pi» в консоли.
Ставим Zabbix 4.0
Создаем пользователя и базу для zabbix в MariaDB под рутом:
Далее устанавливаем zabbix
Импортируем схему и данные (вводим пароль от базы zabbix)
Редактируем конфиг:
Добавляем туда пароль от базы zabbix
Чтобы при перезагрузке сервера zabbix не вешал на пол часа систему из-за того MariaDB успела остановиться раньше чем zabbix (в этому случае zabbix будет пытаться долго и упорно сконнектиться с базой) — прописываем в настройках сервиса что требуется mysql:
В редакторе прописываем следующие строчки и сохраняем файл:
Стартуем сервер и агент zabbix и прописываем в автозапуск
Далее настраиваем фронтенд для zabbix, редактируем конфиг zabbix для апача
прописываем нашу таймзону там где комментарий # php_value date.timezone Europe/Riga и рестартуем апач
Выставляем права на файлы zabbix
Заходим в веб-морду zabbix http://raspberry-ip/zabbix/ и прописываем настройки zabbix, после завершения входим с дефолтными пользователем и паролем:
Username: Admin
Password: zabbix
Меняем сразу пароль на свой.
Качаем этот архив, распаковываем. Файл userparameter_rpi.conf копируем в папку /etc/zabbix/zabbix_agentd.d , а файл rpi_zabbix_cputemp.xml импортируем в шаблоны zabbix (Настройка-Шаблоны-Импорт). Добавляем импортированный шаблон «Raspberry PI CPU Temperature» — Настройка-Узлы сети-Шаблоны.
Перезапускаем агент:
How To Add A New Member To The Sudo Group?
The default Raspberry Pi user belongs to a “sudo” group. Belonging to a “sudo” group allows the default user to run commands as a root (super) user. It also permits the user to switch to the root user with
Following instructions will help you add a new member to the sudo group:
- Type in in the command line.
- The user “jack” will get prompted to enter their password to run “sudo.”
In case you want to remove this prompt:
- Create a sudoer file using .
- Place it in index.
- Type in in a single command line.
- Save and exit.
After this process, your file will get checked for errors. In case there are any errors,
- A dialogue box will pop up stating, “what now?”. Press the “Enter” key.
- You’ll see various options; just press “e” to edit the sudoers file to fix the problem.
How To Delete A User?
If there are a lot of users on your system, and you feel like removing some of them. Then you can delete the unwanted users by just one command, which is as follows:
- Type in the command line and press “Enter”.
- You can add in the same command to delete the user’s home folder as well..
- Be careful to not delete anything that you are not sure of.
Conclusion
Summing up, it is crucial to reset the Raspberry Pi default login (meaning its password) as soon as you access it the first time. In case you are new to this system and don’t know how to reset the password, then here in this article, we have covered all the basics of resetting the default password. Moreover, you’ll find some additional help and information as well.
Packages
Raspberry Pi packages
Although the majority of the Raspberry Pi cloud/server image works like any other Ubuntu system, there are a few packages that you may not be familiar with. Briefly:
-
linux-firmware-raspi2 — GPU firmware bootloader files and WiFi firmware configuration files
-
linux-raspi2 (linux-image-raspi2) — Linux kernel with patches from https://github.com/raspberrypi/linux
-
u-boot-rpi — Provides the various uboot* binaries under /boot/firmware
-
flash-kernel — Automatically copies the latest kernel, dtb file and u-boot script to the pi’s fat formatted GPU firmware partition
The GPU firmware partition is mounted at /boot/firmware. The /boot/firmware/config.txt file contains the system configuration and refers to several other files within /boot/firmware. Note, it is likely that you will have to adapt third party instructions to these file locations.
Optional PPAs
While the official image includes compatible firmware, bootloader and kernel, there are a few packages available in an unofficial PPA (ppa:ubuntu-raspi2/ppa) which are useful on the Raspberry Pi, including:
-
libraspberrypi-bin — VideoCore utilities from https://github.com/raspberrypi/userland such as vcgencmd, raspistill, etc.
-
libraspberrypi-bin-nonfree — Binary VideoCore utilities not provided in the open source userland repository, currently vcdbg and edidparser.
-
xserver-xorg-video-fbturbo — An accelerated x.org video driver, though this is limited to hardware accelerated window moving/scrolling on the Raspberry Pi.
-
hello-dkms — Not strictly to do with the Raspberry Pi, but a small example DKMS project to test building kernel DKMS modules.
To install:
sudo add-apt-repository ppa:ubuntu-raspi2/ppa
sudo apt-get update
Further/updated Raspberry Pi packages can be found in the Ubuntu Pi Flavour Maker PPA. Many of these packages rely on the user being a member of groups:
sudo groupadd -f --system gpio
sudo groupadd -f --system i2c
sudo groupadd -f --system input
sudo groupadd -f --system spi
Desktop
This is a small ubuntu-server image. If you want a full desktop, go ahead and do so:
$ sudo apt-get install xubuntu-desktop  # or
$ sudo apt-get install lubuntu-desktop  # or
$ sudo apt-get install kubuntu-desktop  # etc
Tasks can be installed with Tasksel.
Accelerated X driver
An accelerated x.org video driver is available (fbturbo), though this is limited to hardware accelerated window moving/scrolling on the Raspberry Pi. Install the optional PPA above, then:
$ sudo apt-get install xserver-xorg-video-fbturbo
Then add this to /etc/X11/xorg.conf (create if it doesn’t already exist):
Section "Device"
    Identifier "Raspberry Pi FBDEV"
    Driver "fbturbo"
    Option "fbdev" "/dev/fb0"
    Option "SwapbuffersWait" "true"
EndSection
VideoCore
As with Raspbian, VideoCore packages are available. Install the optional PPA above, then:
$ sudo apt-get install libraspberrypi-bin libraspberrypi-dev
However, since these packages are compiled from source during build, the files are installed in their «proper» locations in /usr. Some third-party scripts may expect e.g. /opt/vc/bin/vcgencmd; if so, this hack should do it:
$ sudo ln -s /usr /opt/vc
(Raspbian packages use precompiled repositories during build, which install in /opt/vc.) vcdbg and edidparser are not part of the open source package and must be installed separately:
$ sudo apt-get install libraspberrypi-bin-nonfree
Шаг 3. Включите Bluetooth
Чтобы включить Bluetooth, можно использовать удобную утилиту Bluetoothctl, встроенную в нашу Re4son Kali. Чтобы ей воспользоваться, введите bluetoothctl в окне терминала. Затем, чтобы включить агент Bluetooth, введите в консоли agent on. Когда агент будет зарегистрирован, введите в консоли default agent для регистрации дефолтного агента и включения Bluetooth-контроллера.
Чтобы начать сканирование Bluetooth-устройств, введите scan on и если поблизости есть какие-нибудь Bluetooth-устройства, то вы увидите, что список устройств начинает заполняться. Наконец, для соединения с любыми устройствами, которые вы видите, введите pair, а затем MAC-адрес устройства, которое есть в списке.