Обзор дистрибутива linux lite 4.0
Содержание:
- Легкие дистрибутивы Linux
- Lubuntu
- Graphics Drivers and Setup
- Lite Software — Remove Software
- Установка
- Linux Lite
- Uninstalling Software
- Graphics — NVIDIA
- Dual Boot Modification/Repair
- Dual Monitor Setup Instructions
- Installing Software — From Source Code
- NitroShare — Share files with Linux, Mac & Windows
- Bodhi Linux
- Lite System Report tool
- Network Shares — Create Linux Lite Shares
- Volume Toggles
- Какой файл скачивать, iso или торрент?
- Network Shares
- Installation Issues
Легкие дистрибутивы Linux
Linux Lite
Основанный на выпусках Ubuntu LTS, Linux Lite — это дистрибутив минимального размера с чистым и простым рабочим столом Xfce. Он принимает меню «Пуск» в стиле Windows, помогая любому беженцу Windows чувствовать себя как дома.
Небольшой ресурс Linux Lite означает, что вы можете установить его на ПК с процессором 700 МГц и всего 512 МБ оперативной памяти. Это то, что мы называем светом! Это делает его одним из лучших дистрибутивов Linux для старых компьютеров или пользователей, стремящихся увеличить время автономной работы ноутбука.
Lubuntu
Lubuntu — это легкий дистрибутив на основе Ubuntu, который идеально подходит для использования с ноутбуком. Он использует минимальный рабочий стол LXDE (Lightweight X11 Desktop Environment) и поставляется с легкими приложениями, разработанными для повышения энергоэффективности и скорости.
Он отлично подходит для большинства старых компьютеров, нетбуков и мобильных устройств, так как использует минимальное количество оперативной памяти и низкие системные требования.
Если вы ищете лучшую операционную систему Linux для автономной работы ноутбука, Lubuntu — это определенное соперник.
Xubuntu
Производная Xubuntu использует среду рабочего стола Xfce, что делает его элегантной и легкой версией Ubuntu. Он отлично подходит для ноутбуков и нетбуков, а также для настольных ПК с низкими характеристиками.
Поскольку он легкий и использует мало системных ресурсов, Xubuntu идеально подходит для старых компьютеров.
Щенок линукс
Это фантастически маленький дистрибутив, который можно запустить полностью из оперативной памяти. Это означает, что Puppy Linux отлично подходит для старых компьютеров, даже без жестких дисков! Это также легко использовать для удаления вредоносных программ.
Manjaro Linux
Manjaro Linux — это быстрый, простой в использовании и легкий дистрибутив, основанный на Arch Linux. Он направлен на то, чтобы предоставить все преимущества Arch Linux с большей удобством и доступностью, облегчая работу для новичков. Рабочий стол Xfce используется по умолчанию, но доступны и другие параметры.
Arch Linux
Arch Linux — это дистрибутив, разработанный для опытных пользователей. Этот легкий минималистичный дистрибутив нацелен на простоту и использует обновленную модель для обновлений.
В Arch есть специальный менеджер пакетов под названием «Pacman», который позволяет легко создавать, изменять и обмениваться пакетами.
Возможно, это не лучший дистрибутив Linux для начинающих, поэтому мы рекомендуем подождать, пока вы не приобретете некоторый опыт, прежде чем попробовать его.
NuTyX
Изображение предоставлено: NuTyX.org
Хотите настроить свою систему Linux? NuTyX для вас! NuTyX, поставляемая бесплатно и без вирусов, позволяет настраивать с помощью концепции сбора, где вы найдете выбор для всего, что вы хотите использовать. Например, вы найдете выбор настольных сред или оконных менеджеров на выбор.
Результатом является пользовательская операционная система Linux с бесконечными возможностями. Это может быть универсальный рабочий стол или домашний кинотеатр.
Бодхи
Этот дистрибутив на основе Ubuntu поставляется с легким и красивым рабочим столом Enlightenment. Bodhi чрезвычайно настраиваемый, с темами и приложениями, доступными для расширения на легких началах.
Fedora Design Suite
Сэкономьте время на установке художественных инструментов и приложений в Fedora, просто установив этот пакет из команды дизайнеров Fedora. Такие инструменты, как Inkscape и GIMP, входят в число предустановленных в этом дистрибутиве, ориентированном на искусство, иллюстрации и DTP.
Студия Убунту
Впервые выпущенная в 2007 году, Ubuntu Studio, вероятно, является выбором по умолчанию для пользователей Linux с творческими талантами. С включением среды рабочего стола Xfce и низкой задержкой ядра все ориентировано на производство мультимедиа.
Хотя многие другие дистрибутивы будут вам полезны, Ubuntu Studio может быть лучшим дистрибутивом Linux для дизайнеров, музыкальных продюсеров, фотографов и других творческих пользователей.
KXStudio
Все креативные дистрибутивы, перечисленные здесь, предлагают хорошее сочетание инструментов, и, хотя KXStudio ничем не отличается, он фокусируется на производстве аудио. Добавьте рабочий стол KDE, и вы получите цифровую студию, способную обеспечить значительную производительность.
Lubuntu
Минимальные требования:
- Процессор Pentium II или Celeron
- 128 МБ ОЗУ
- 2 ГБ дискового пространства
Любой список легких дистрибутивов Linux для ноутбуков и старых ПК неполноценен без упоминания Lubuntu. Многие из вас, должно быть, знают, что это официальная версия Ubuntu. Благодаря этому в Ubuntu и Lubuntu используется одинаковое программное обеспечение и репозитории. Стоит отметить, что начиная с Lubuntu 18.10, проект перестал выпускать поддержку 32-битных образов. Таким образом, это может быть большой проблемой для тех, кто использует старые компьютеры с 32-битным оборудованием.
Эта быстрая и легкая операционная система для старых настольных компьютеров использует минималистичный рабочий стол LXQt и прекрасный выбор легких приложений. Стоит отметить, что LXQt современен по сравнению с LXDE и был создан в результате слияния проектов LXDE и Razor-qt.
Lubuntu поставляется со всем важным программным обеспечением, которое вам нужно. Вы получаете веб-браузер Mozilla Firefox, программу для чтения PDF-файлов, устройство для записи компакт-дисков, почтовый клиент, MP3-плеер, текстовый редактор, MTPaint и многое другое. Если вы знакомы с Ubuntu и ищете дистрибутив Linux для старого ПК и виртуальной машины, выберите Lubuntu.
Graphics Drivers and Setup
Legacy Binary Drivers and Proprietary Binary Drivers
Legacy binary driver — a driver for older video cards no longer supported by the current driver.Proprietary binary driver — a driver for newer video cards.
If you’re not sure whether your video chipset/card needs a legacy binary driver or a proprietary binary driver, please select from the following
links for nVidia and AMD:
nVidia Legacy information — If your card is listed here, you can either use the
pre-installed video driver for Linux Lite or you can try the legacy driver. Linux Lite recommends you stick with the pre-installed video driver as it is the most reliable, and the
safest choice.
AMD Legacy information — Linux Lite recommends you stick with the pre-installed
video driver as it is the most reliable, and the safest choice.
Lite Software — Remove Software
Removing Additional Software in Linux Lite is just a few simple steps.
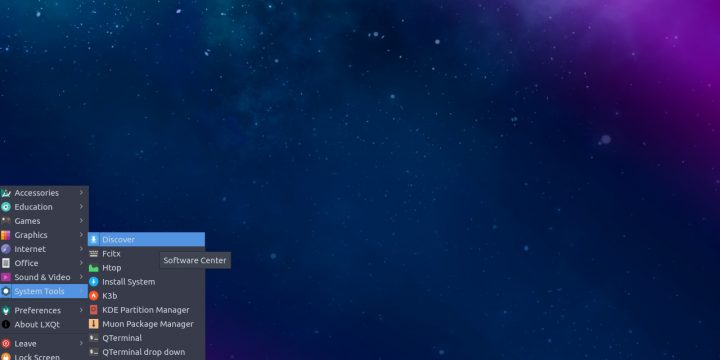
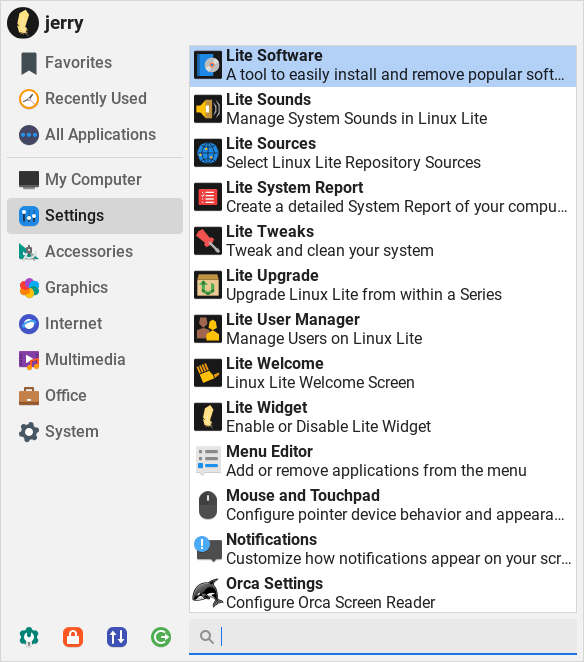
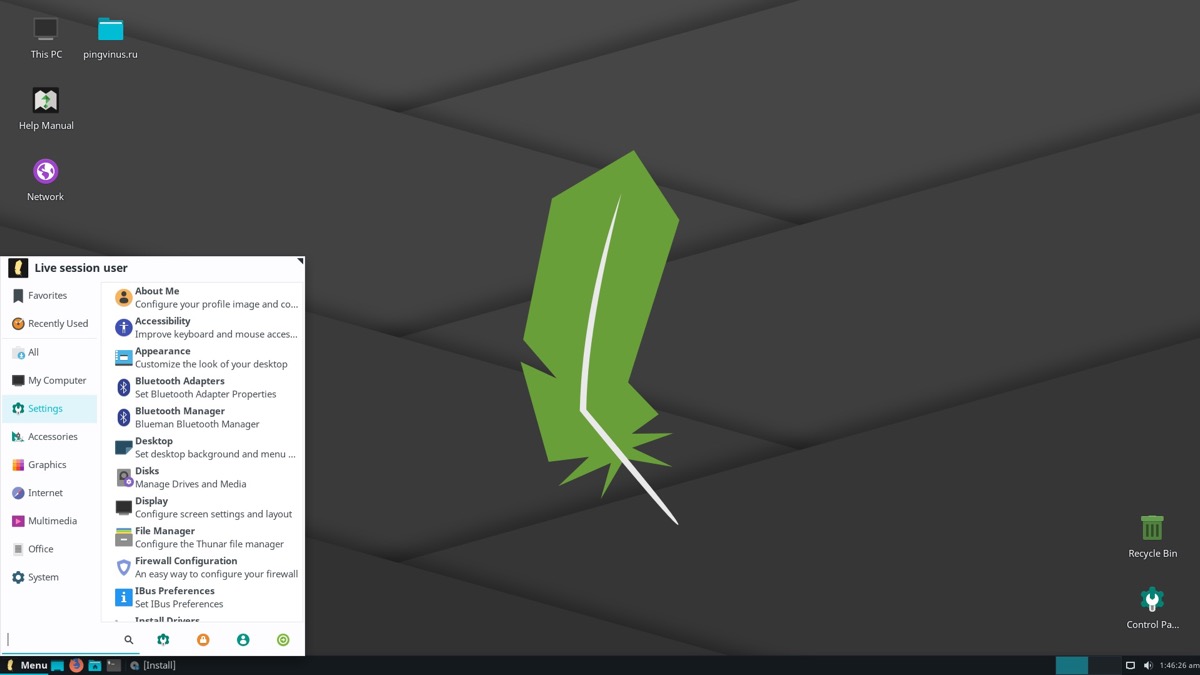
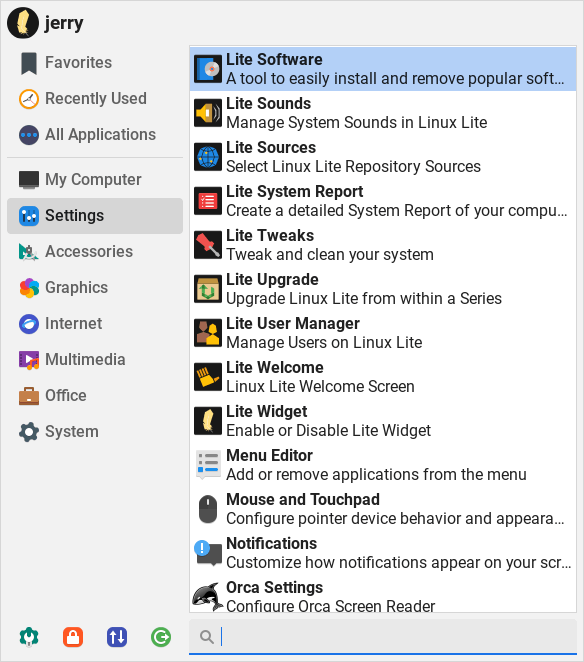
Click on Menu, Settings, Lite Software.
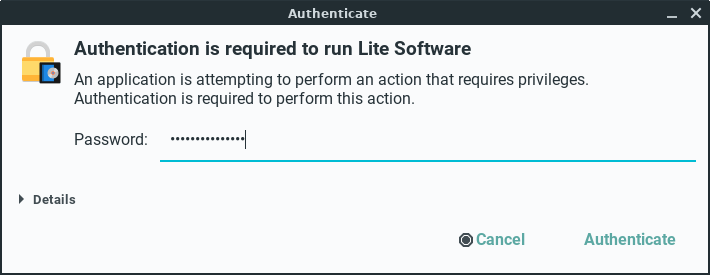
Enter your password and click OK.
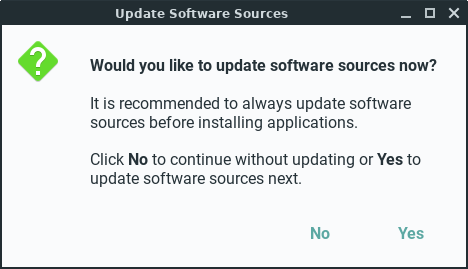
Next you will be shown the Update Software Sources window, always answer Yes.
Sources will be updated:

Once the sources have been updated, the following window will appear, select Remove Software and click OK.
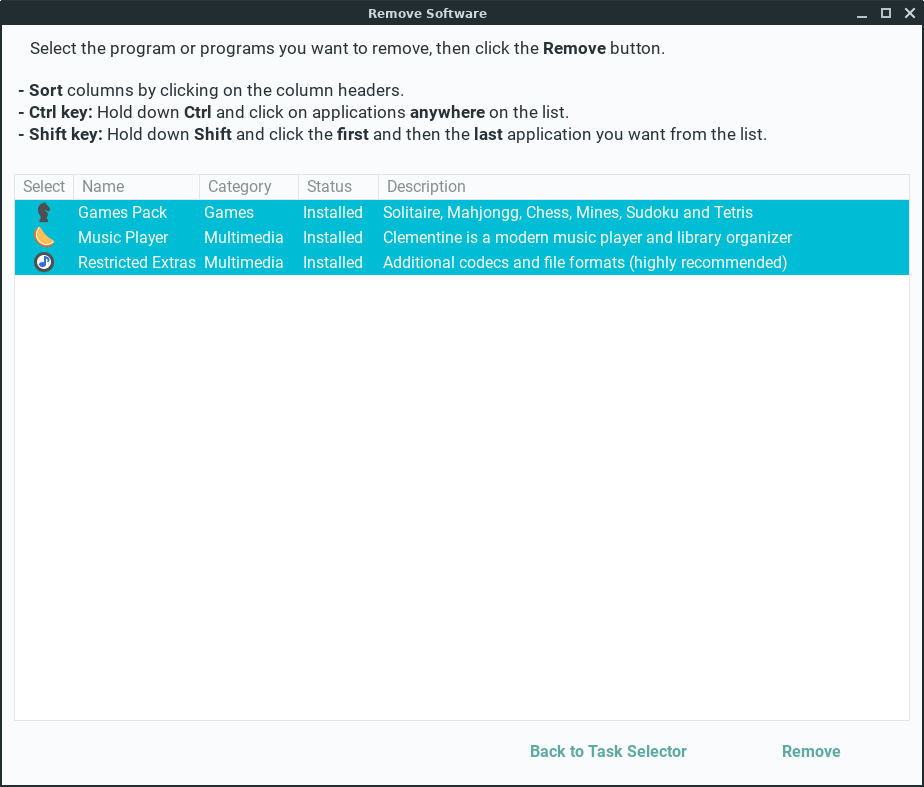
Next, you’ll see the following window pop up. Select each application by holding down the Ctrl key. You may
choose to remove more than one package at a time if you like. In this example we’ll choose to remove, Games Pack,
Music Player and Restricted Extras. Next, click the Remove button.
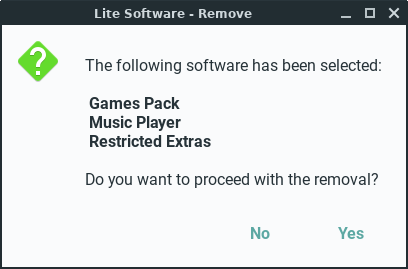
In the next dialog, you’ll be shown which applications you’ve selected to remove. Click Yes when ready.
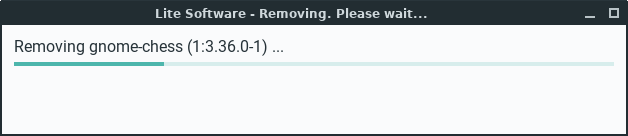
The programs will now be removed automatically for you. This can take anywhere from a few seconds to a few minutes depending on how many applications you’ve
selected and the size of the program/s.
When the removal process is complete, you will get a confirmation like the following. Click OK.
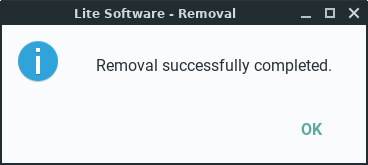
The Lite Software window will reappear at the end in case you want to perform another task. If you have finished, click Quit.
Установка
Linux Lite использует установщик Ubiquity, который он унаследовал от Ubuntu. Настройка операционной системы довольно проста. Мы выбираем наш язык, получаем возможность изменить раскладку нашей клавиатуры и возможность установки поддержки мультимедиа. Установщик Lite предлагает автоматическую настройку разделов, или мы можем использовать его очень простой встроенный менеджер разделов. Ubiquity поддерживает настройку файловых систем Btrfs, JFS, XFS и ext2/3/4, и я решил настроить Lite на ext4. Последние два экрана установщика просят нас выбрать часовой пояс с карты, а затем создать имя пользователя и пароль. Весь процесс выполняется довольно быстро.
Linux Lite
Минимальные требования:
- 700 МГц процессор
- 512 МБ ОЗУ
- VGA экран с разрешением 1024 × 768
Эта операционная система росла быстрыми темпами в недавнем прошлом. Если вы ищете дистрибутив Linux, который одинаково легок, удобен для начинающих и хорошо выглядит, ваш поиск должен закончиться здесь. Это отличная облегченная ОС Linux на основе Ubuntu, основанная на версиях LTS.
Он поставляется со всеми популярными и полезными приложениями. Это означает, что с Linux Lite у вас будет готовый функциональный рабочий стол Linux. Меню Linux Lite может напомнить некоторым людям о Windows XP. Облегченная для начинающих и легкая среда рабочего стола Xfce упрощает работу.
В целом, Linux Lite может сделать то, что другие популярные дистрибутивы Linux не делают. Несмотря на легковесность Linux Lite поставляется со всеми основными инструментами и обеспечивает бескомпромиссную производительность. Это также один из моих любимых дистрибутивов Linux.
Uninstalling Software
1. Uninstalling software is the reverse process of installing software in Package Manager (Synaptic Package Manager). Type
the name of the software into the Quick Filter or the spy glass box:
2. Right click on the software and select Mark for Removal. Now hit the Apply button on the Synaptic toolbar and your
software will uninstall. Be very careful with this process as you can inadvertently uninstall crucial system software. If you
have any doubts, please search the net first to see if it is safe to uninstall the software. Synaptic is pretty good at
warning you should there be any potential problems.
Graphics — NVIDIA
If you’re not sure if your graphics card is nVidia or not, open up a terminal and run this command:
Terminal Command:
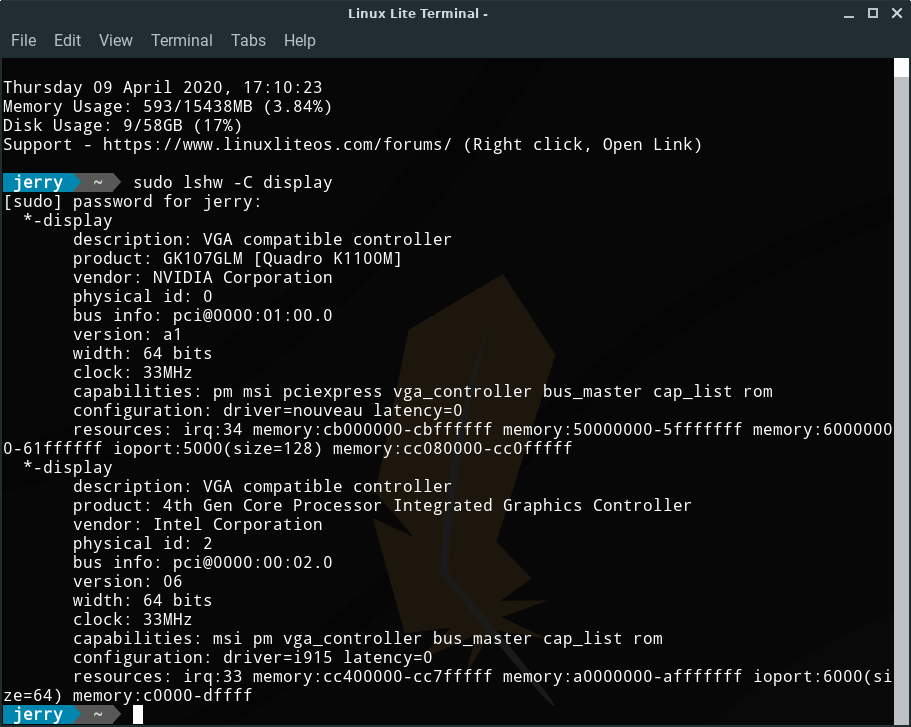
You see under product: nVidia or GeForce (and similar naming schemes for nVidia cards) depending on your card. The
vendor: line may also show you the Product or Company name.
NOTE: You must be connected to the internet before you start the driver install.
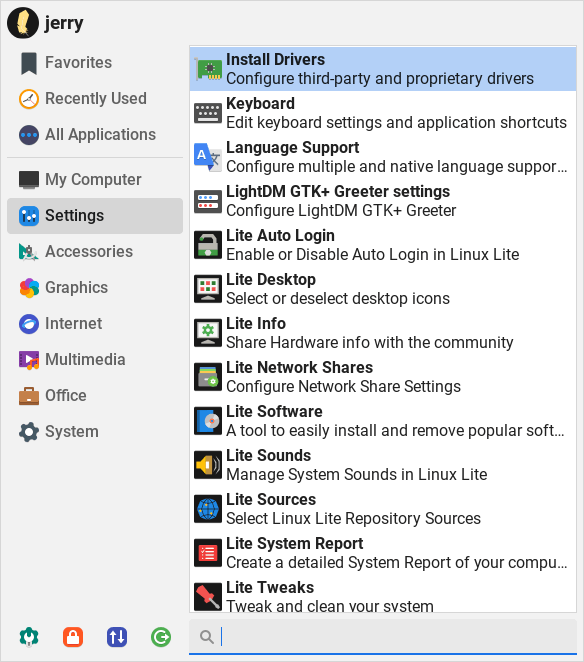
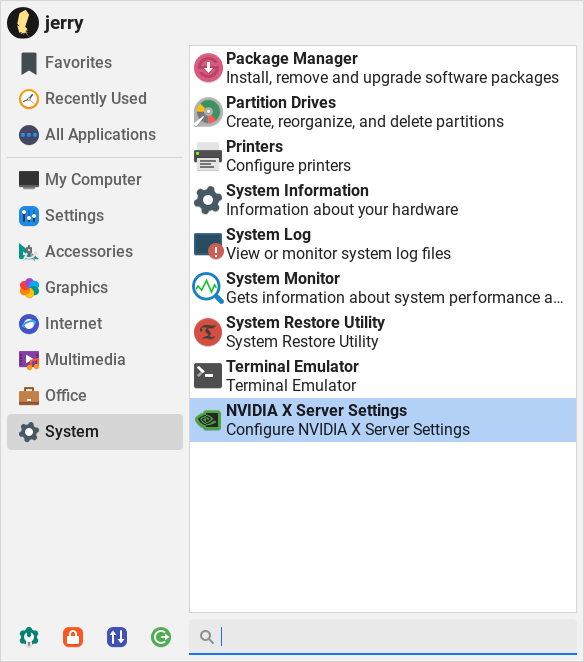
The next step is to go to Menu, Settings, Install Drivers.
The program will then scan your computer for any drivers that you may need, this may take some time.
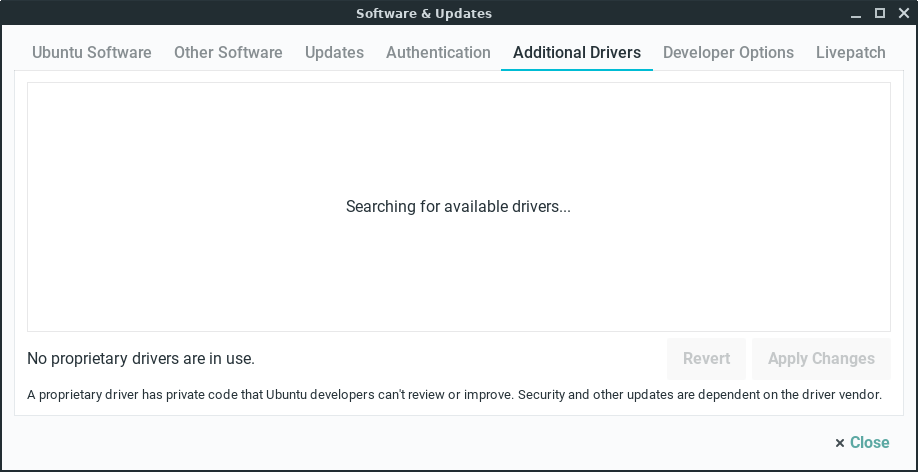
When it has finished scanning, you will see a dialogue box similar to the one below.
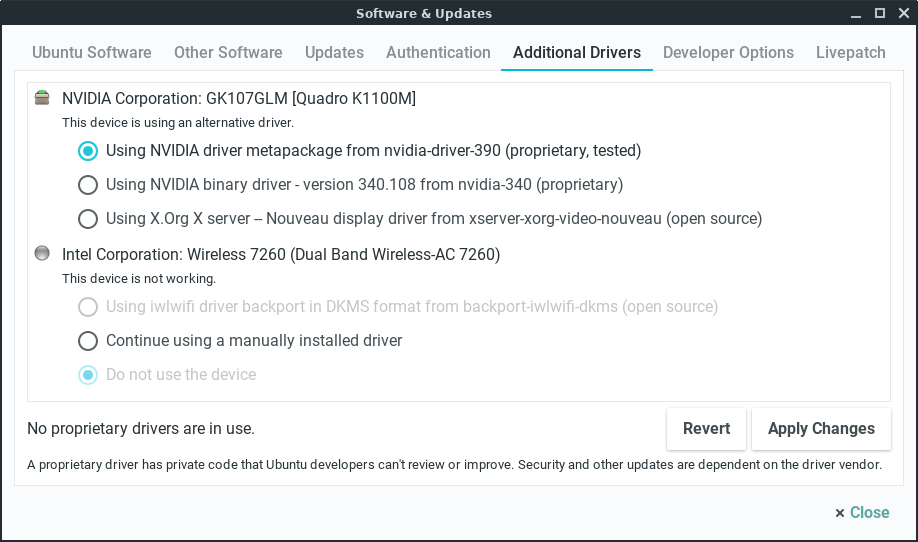
Generally you will want to select the current version, the tested driver. In the above example we selected the Using NVIDIA binary driver (proprietary, tested).
NOTE: If you plan to play graphic intensive games or you have a lot of Steam games, you need to select the proprietary, tested driver.
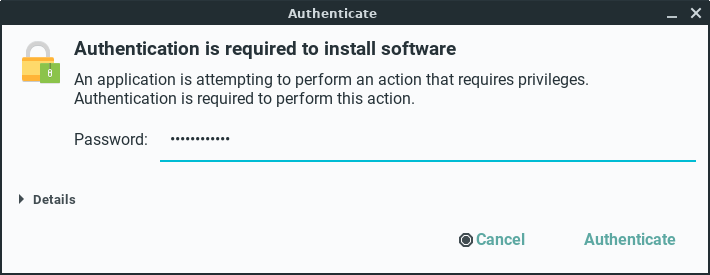
Now click on Apply Changes. You will be prompted for your password:
You will see the following dialog as it downloads and installs:
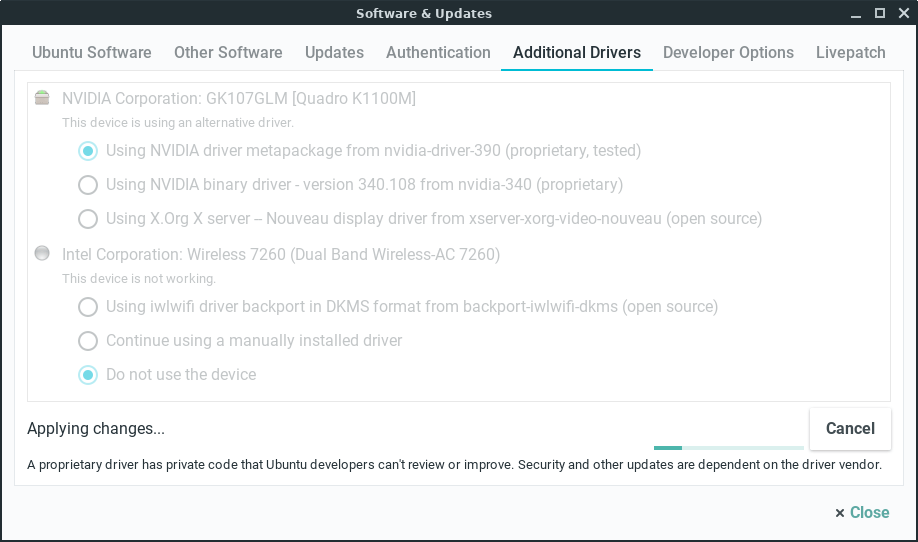
When the driver has finished, restart your computer.
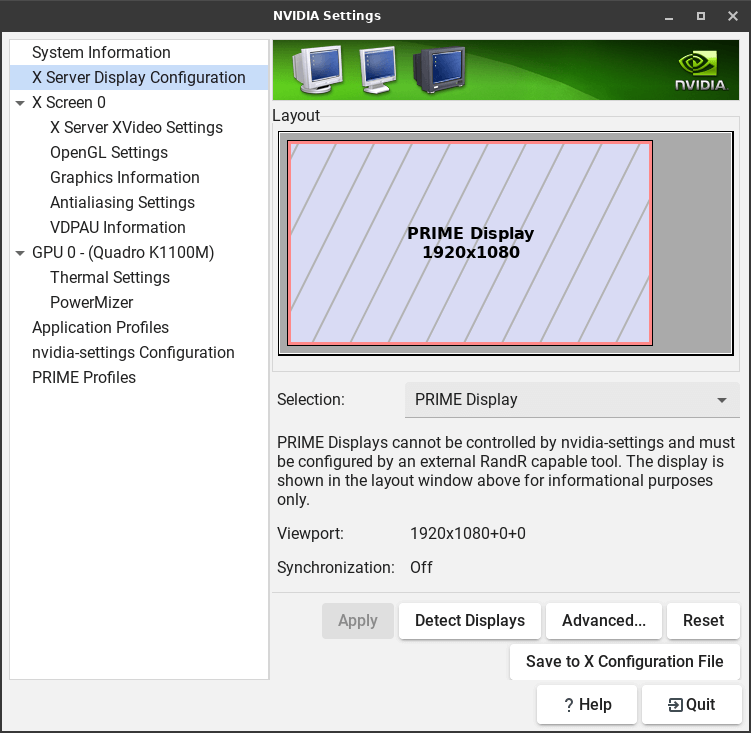
Now head over to Menu, Settings, NVIDIA X Server Settings.
Once you open NVIDIA X Server Settings, you will have a number of options to select as well as some technical data to look over.
Dual Boot Modification/Repair
You may be in a situation where you want to modify or repair your dual boot set up.
Boot-Repair is an excellent tool for the job. To install Boot-Repair, open a terminal and type (one line at a time):
Terminal Command:
Terminal Command:
Terminal Command:
After the install Boot-Repair will launch automatically and scan your computer for your boot configuration and other operating systems.
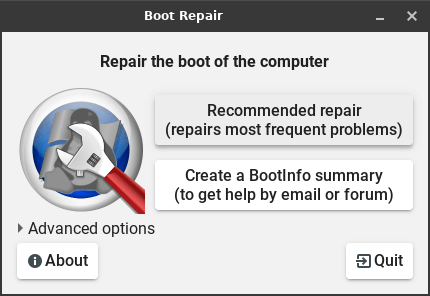
Click Advanced options to see all the features.
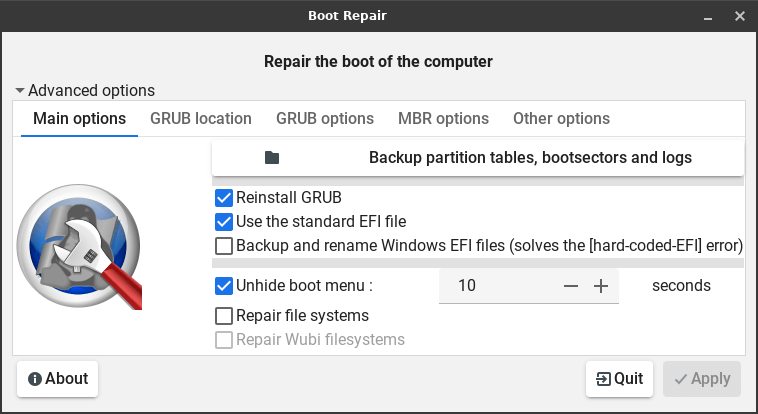
Now use Boot-Repair to carry out the task you need doing. Boot-Repair is in Menu, System. More information can be found here —
https://help.ubuntu.com/community/Boot-Repair
Dual Monitor Setup Instructions
If you have two monitors, they will start out ‘mirroring’ the same displayed output.
To get the monitors to act as one large area allowing you to spread your work out separately on each, you can now do that easily through the GUI Settings
Manager instead of through terminal commands and manually editing configuration files.
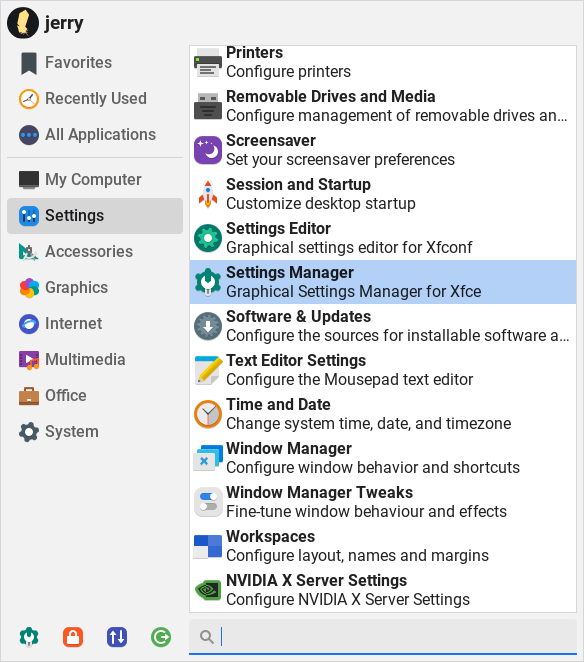
Go to Menu, Settings, Settings Manager.
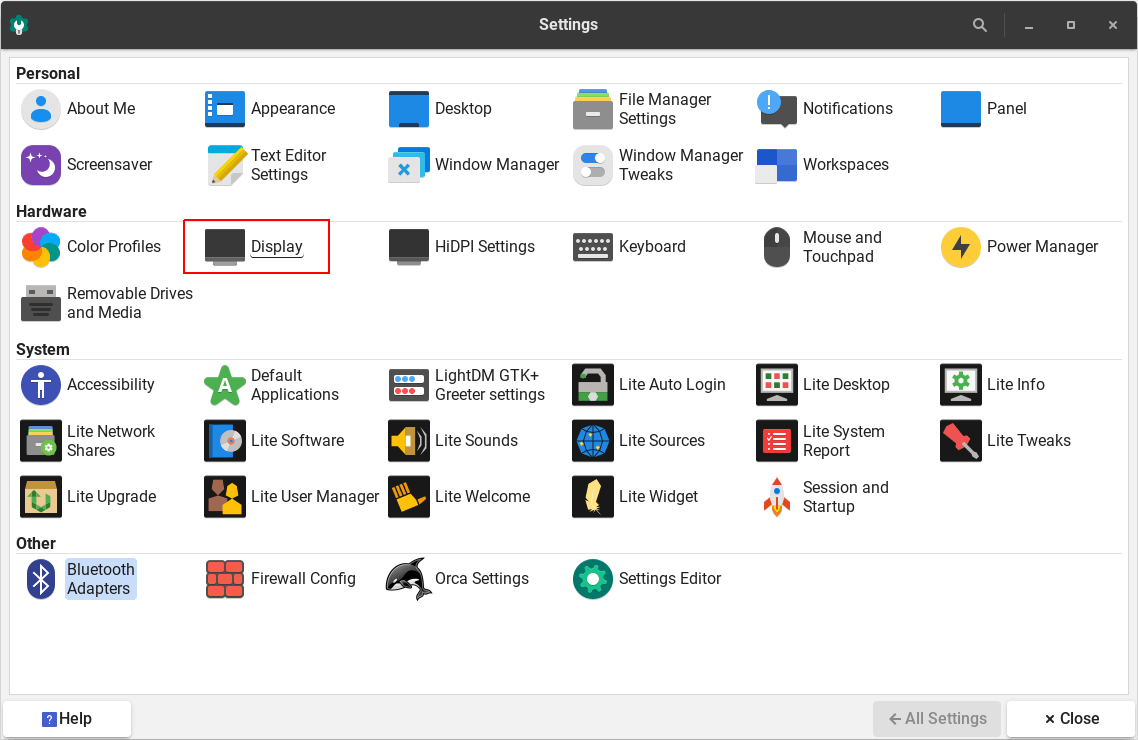
Click on Display under the Hardware category.
Initially, both monitors will have the Mirror displays box checked.
Click on the first monitor listed on the left and un-check Mirror displays on the right. Repeat the procedure for the second monitor.
Drag and drop each screen to where you want them to be arranged. Click Apply when you are finished.
Once they are no longer mirrored, you may see that one of them is missing the desktop wallpaper and the lower panel only spans one of them.
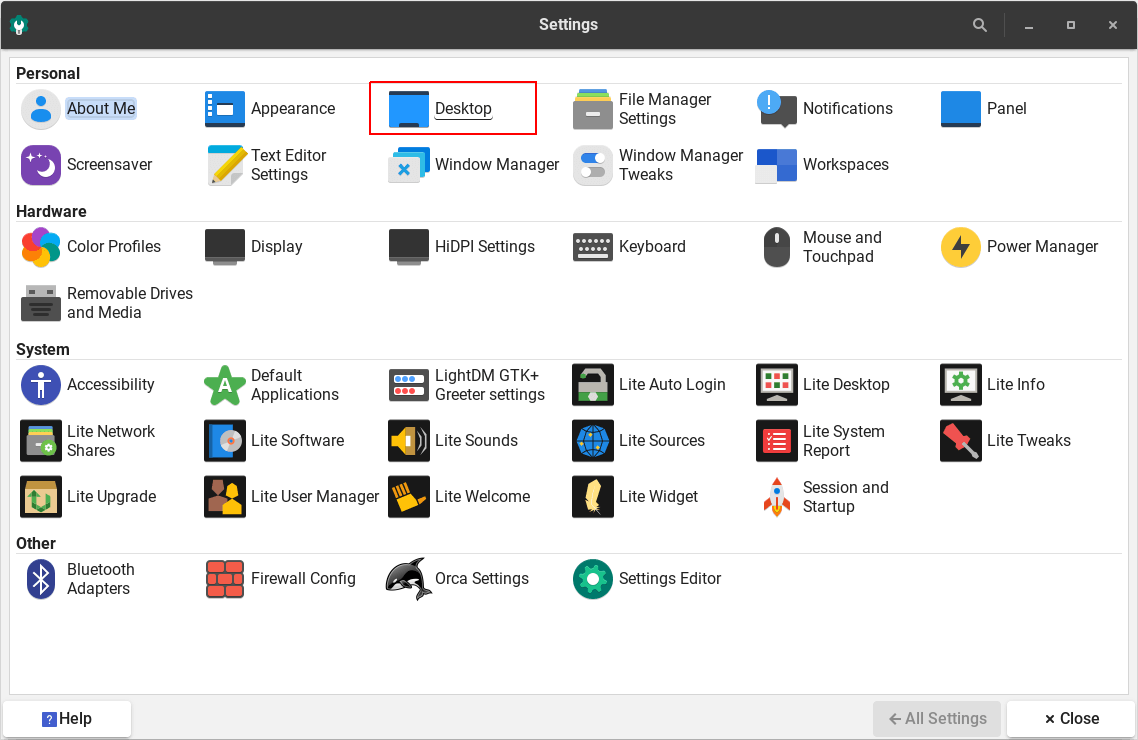
Click All Settings to go back to the main Settings Manager window and choose Desktop under the Personal category.
Whichever monitor the Desktop settings window is on, that is the one it will apply to. Drag it over to the monitor that is blank and notice how the
monitor description changes according to which one it is on.
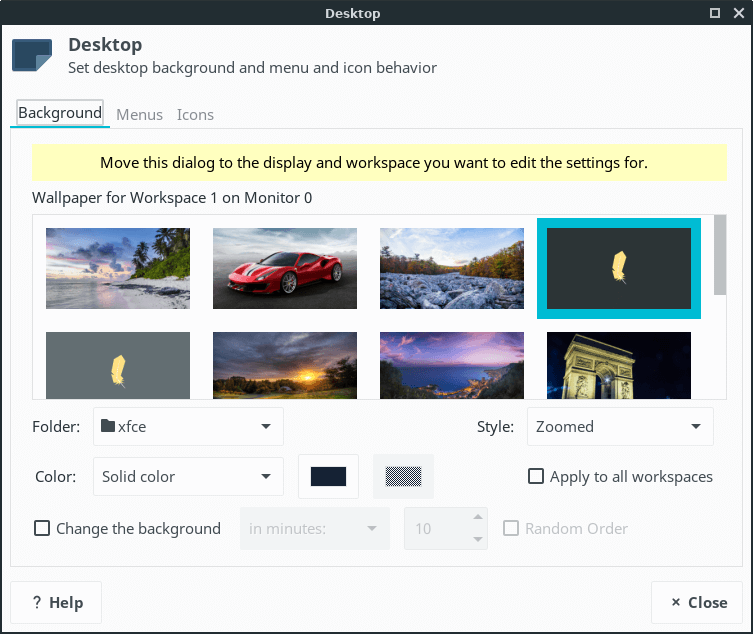
When you drag the Display settings window over to another monitor, the wallpaper that was highlighted on the one you dragged from stays highlighted,
but no change will take effect on the second monitor until you actually click on one of the wallpapers. You may set a different wallpaper for each monitor.
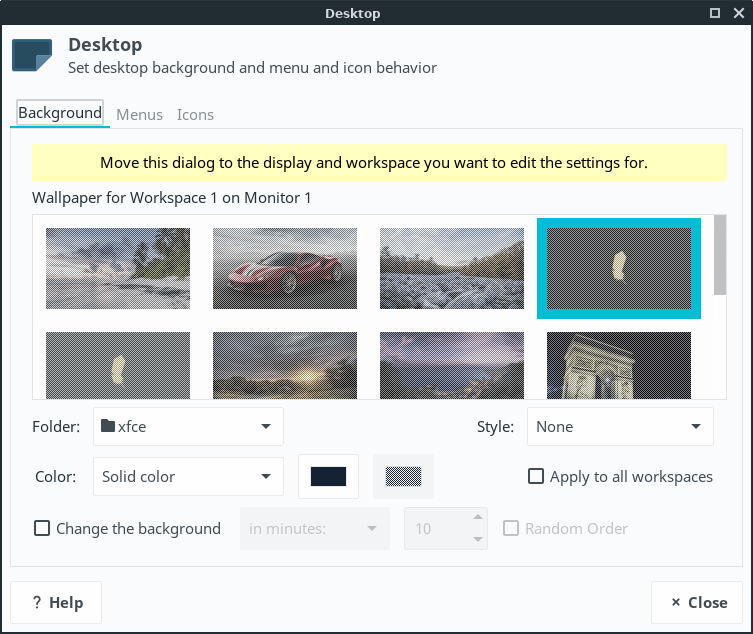
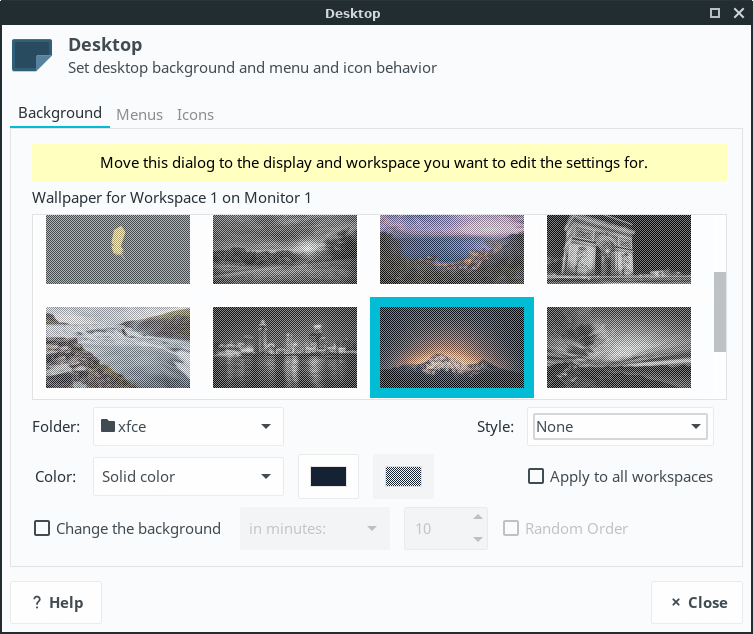
If you want one picture to span across both screens, set the second screen to None in the Style drop down box. (Remember — you need to have the Desktop
settings window positioned on the second monitor to do this.)
Then move the Desktop settings window back to the monitor with the wallpaper displayed and select Spanning screens from the Style drop down box.
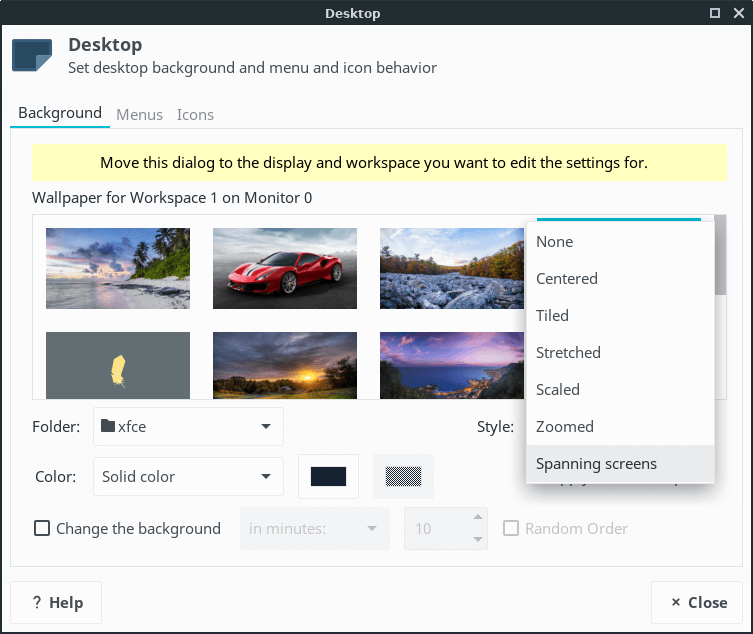
Now, you will have wallpaper spanning across both screens; but you still have the panel stuck on only one of them.
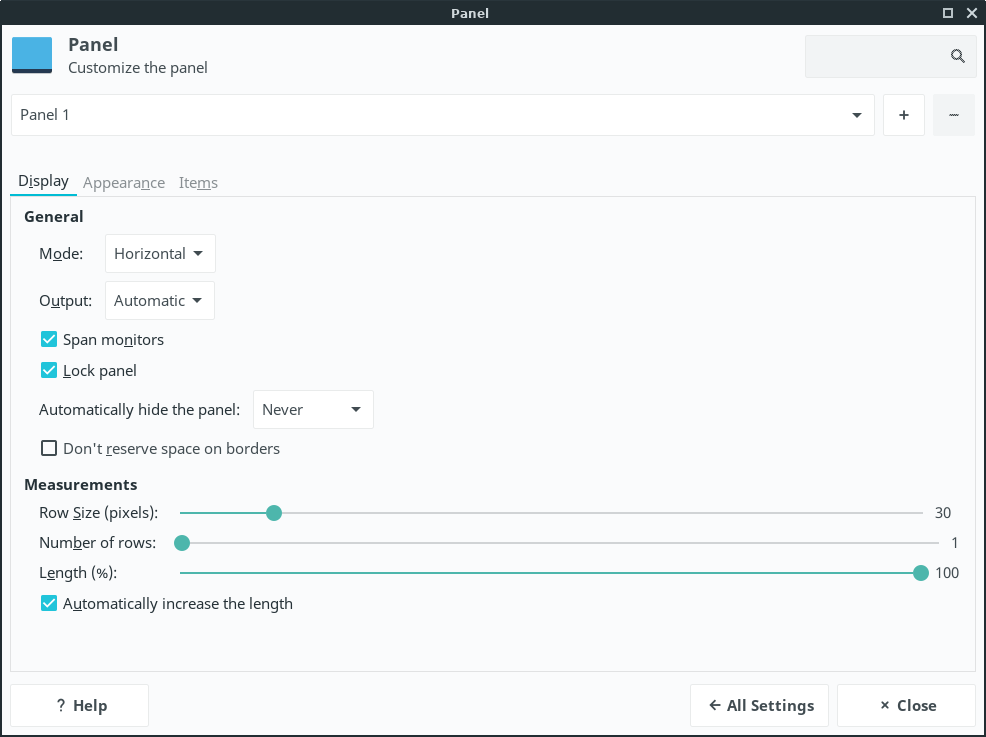
To get your panel to also span both monitors, go back to the main Settings Manager window and choose Panel under the Personal category.
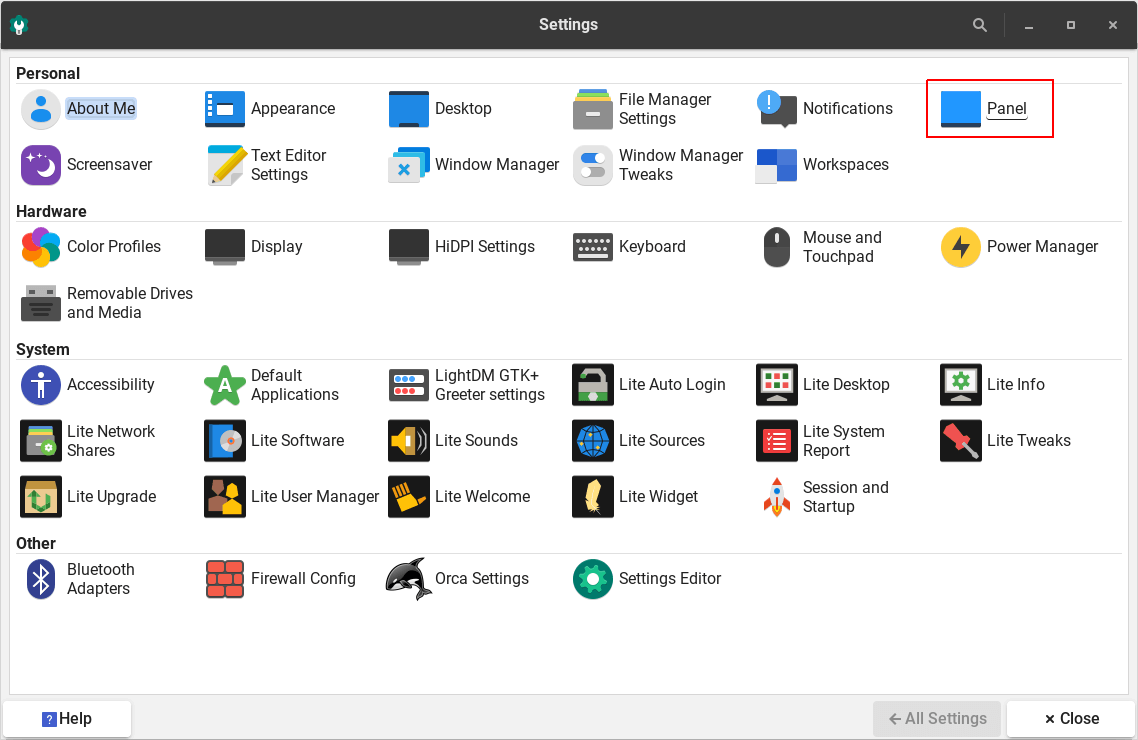
In the Panel settings window, click on the box next to Span Monitors.
Congratulations, you have successfully set up and configured dual monitors.
Installing Software — From Source Code
There will be times when you need to compile and install an application or driver from source code. Here’s what you do.
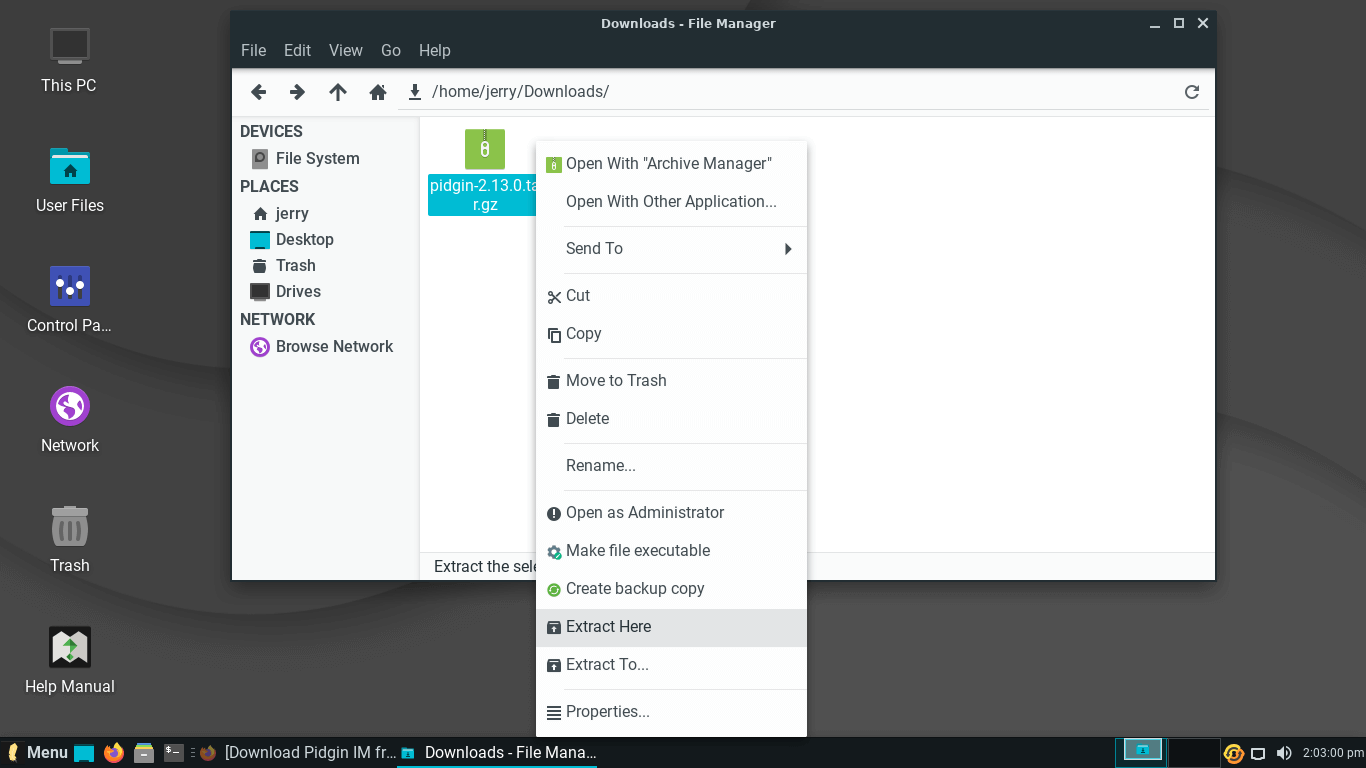
In this example, we’ll install an application (Pidgin) from source code.
Most source code packages will come in a compressed archive format. Let’s right click on the archive and select Extract Here.
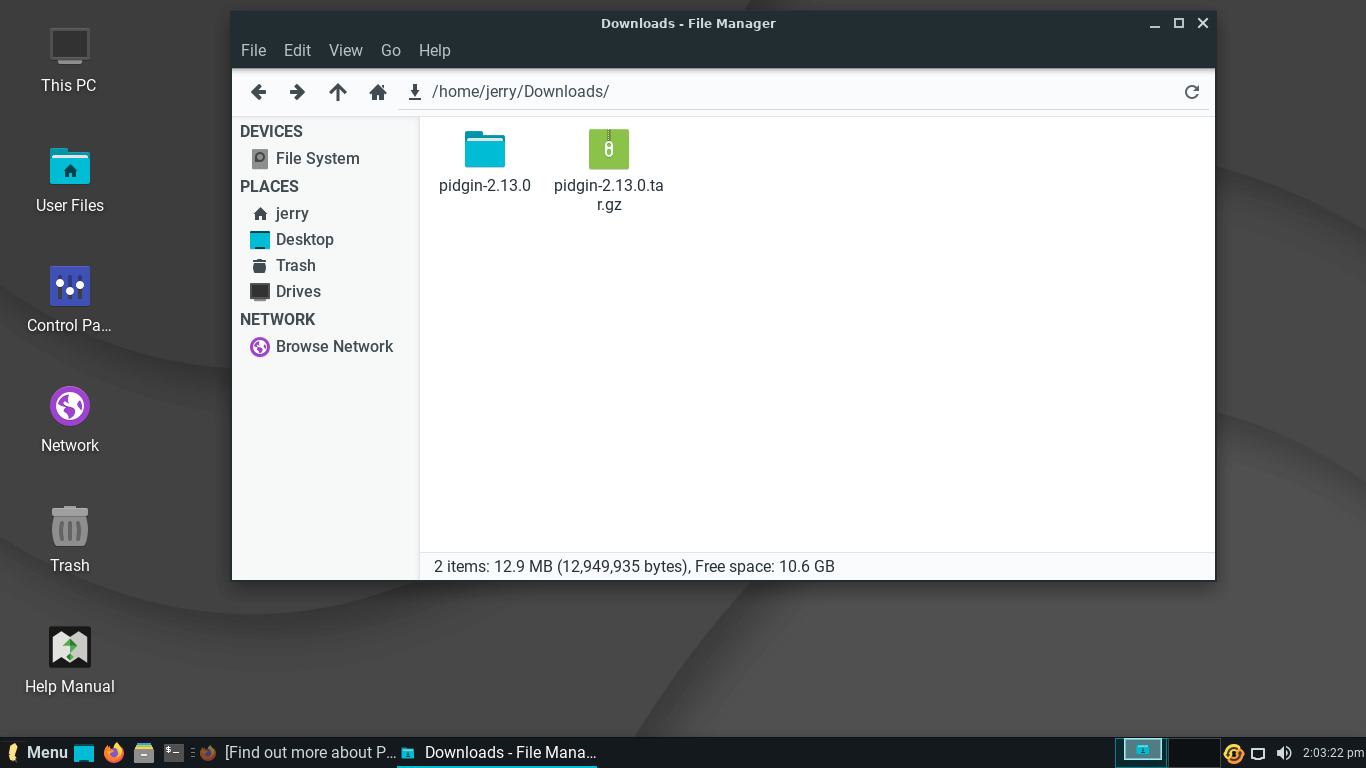
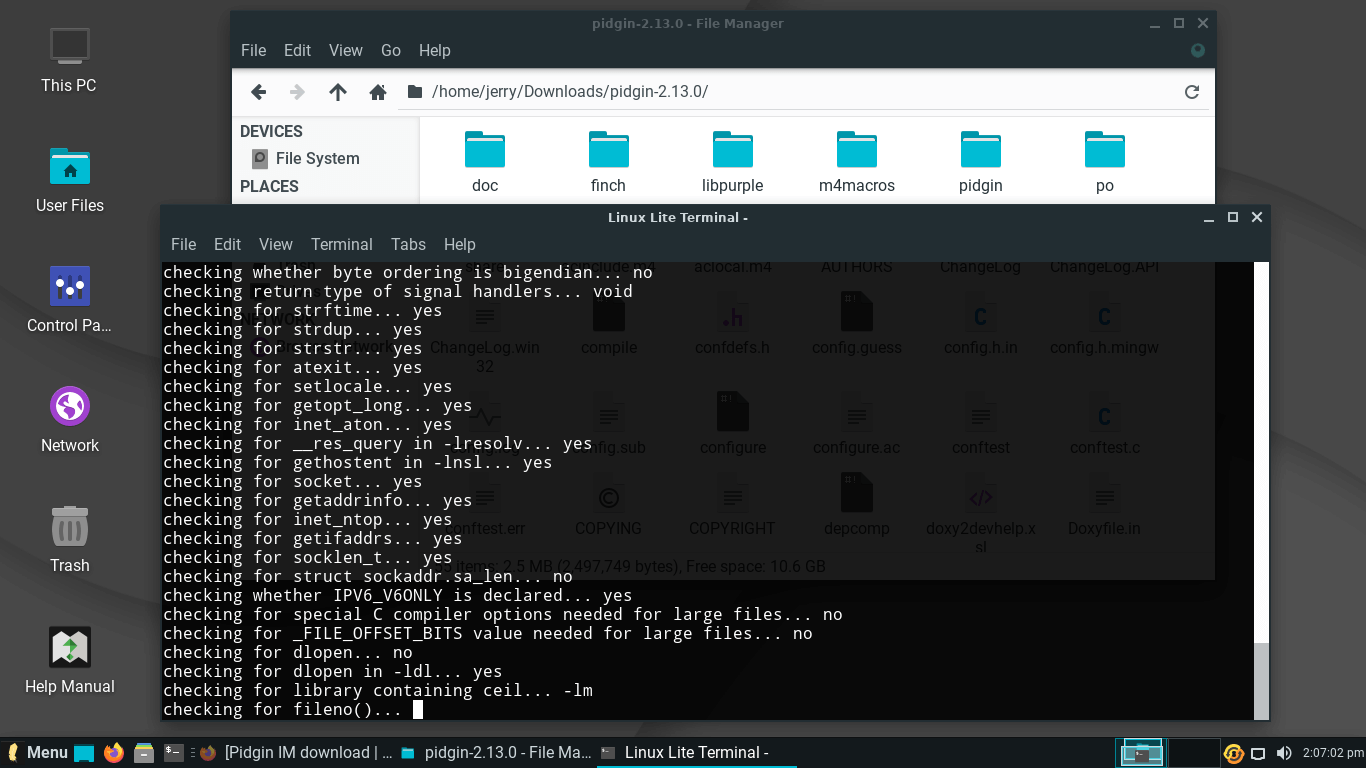
We’ll go into the newly extracted folder, right click, Open Terminal Here and enter the following command:
Terminal Command:

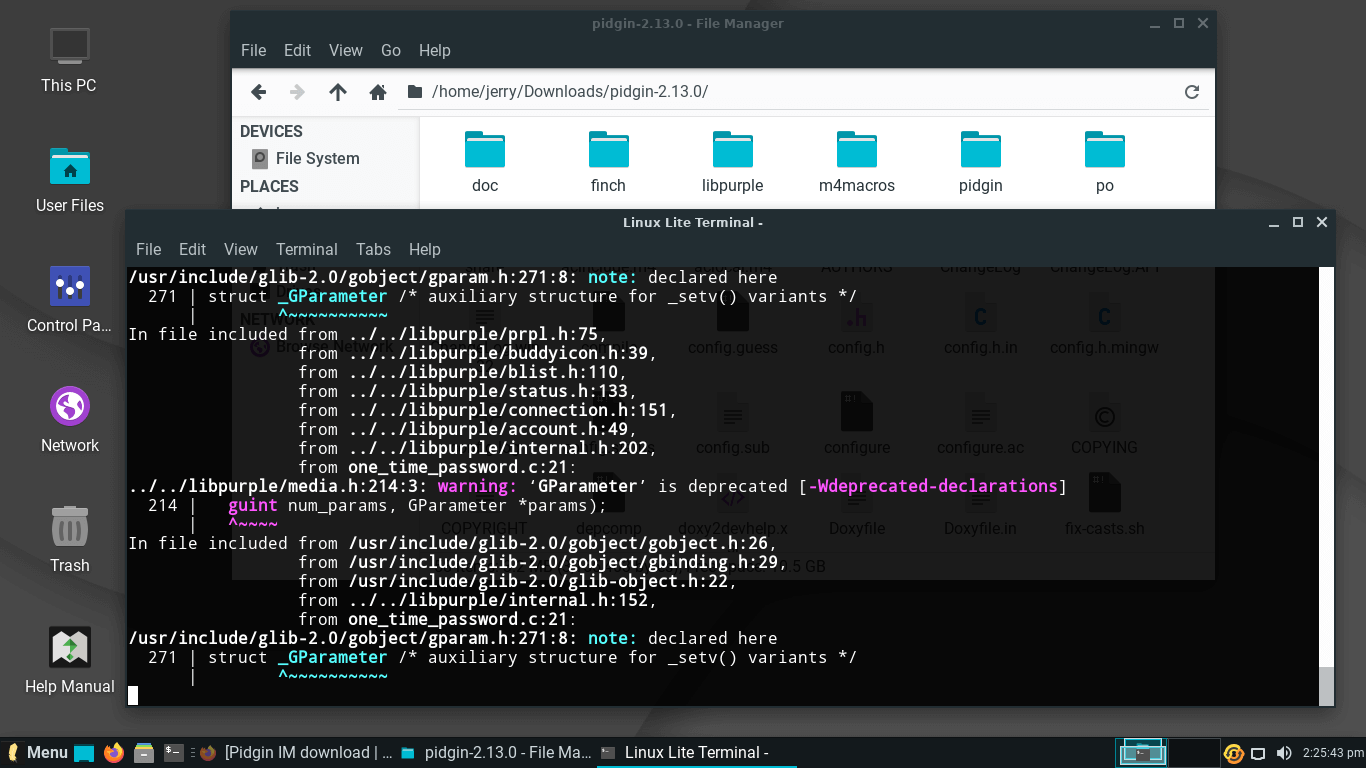
It will now go through and make sure we have all the tools we need to compile this software..
As we can see from below, it needs some software called intltool. Lets go ahead and install that with apt-get.
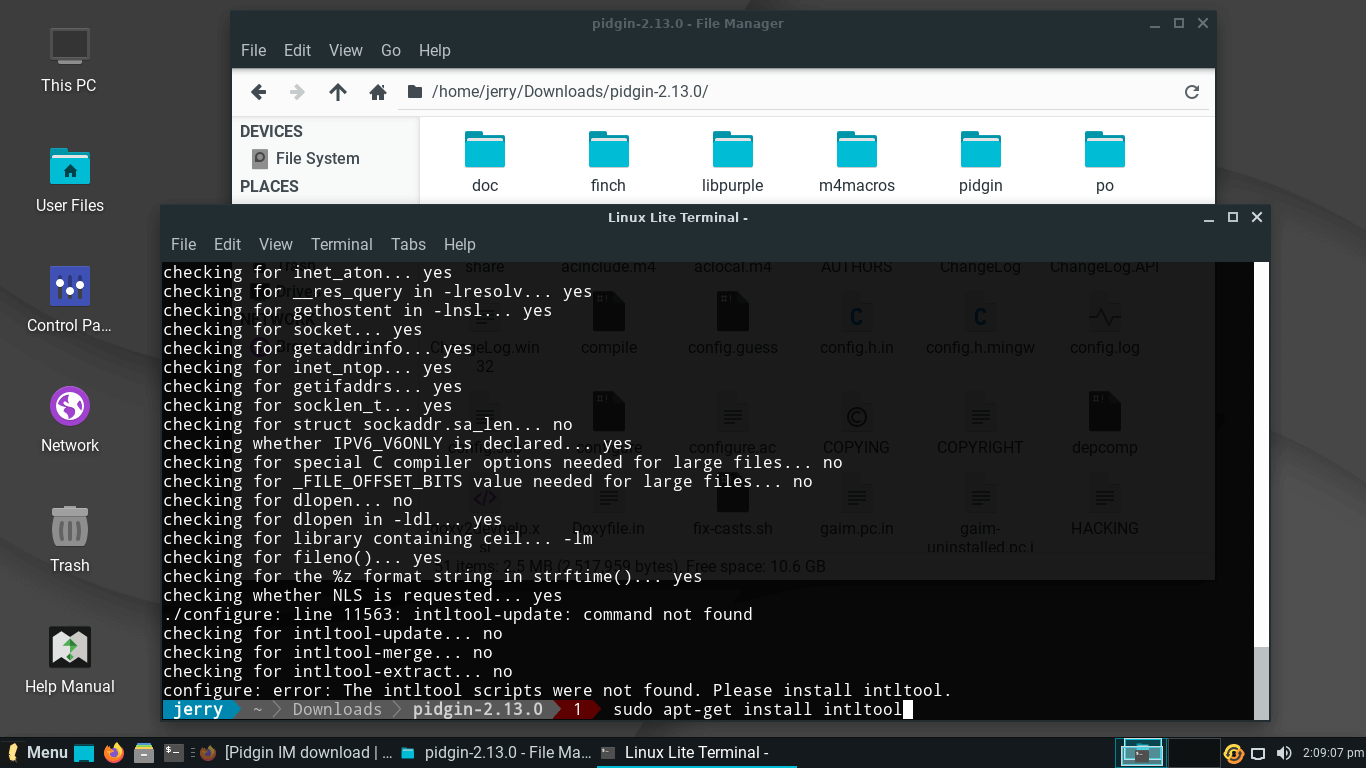
Now that our required package is installed, we can try to ./configure again.
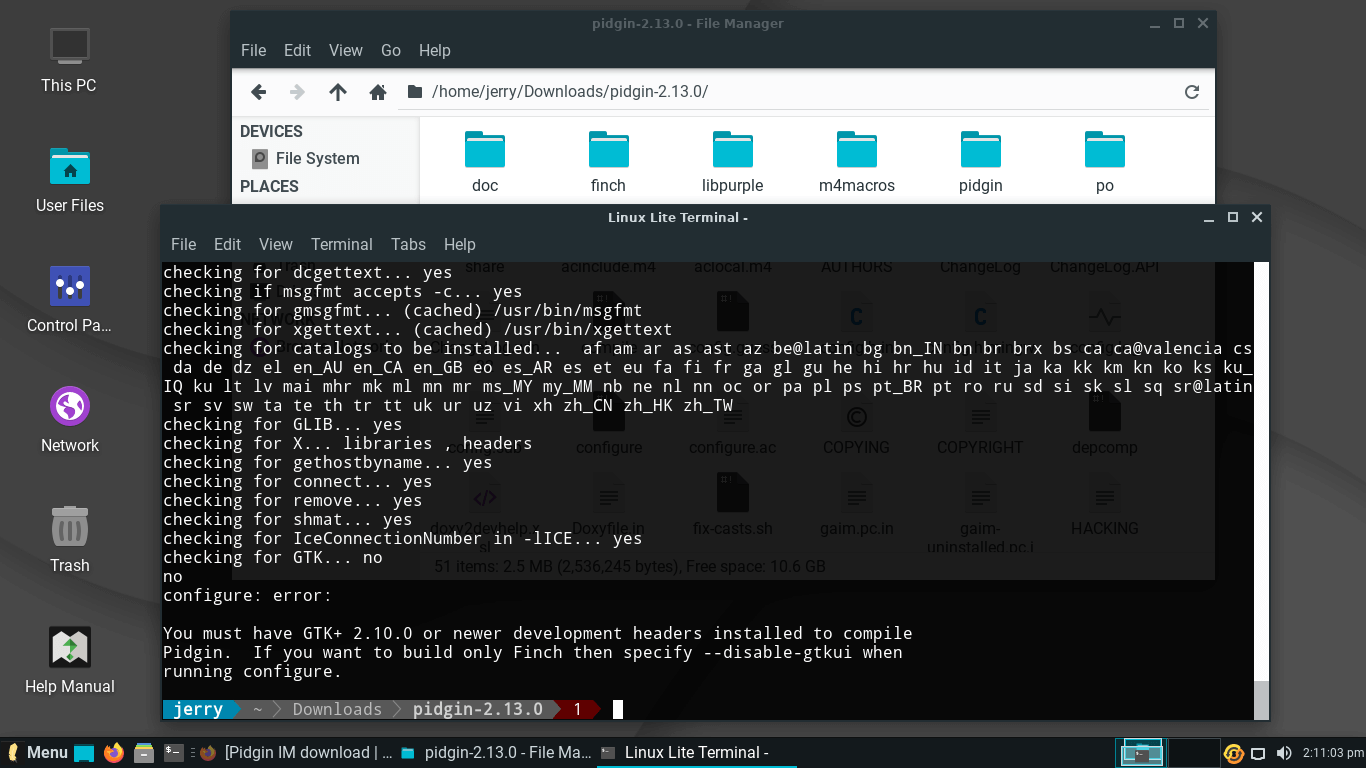
TIP: Search the error messages in Google, they should lead you to the package that you need to install.
Keep working through the information in the Terminal until ./configure works properly.
At last, a successful ./configure.
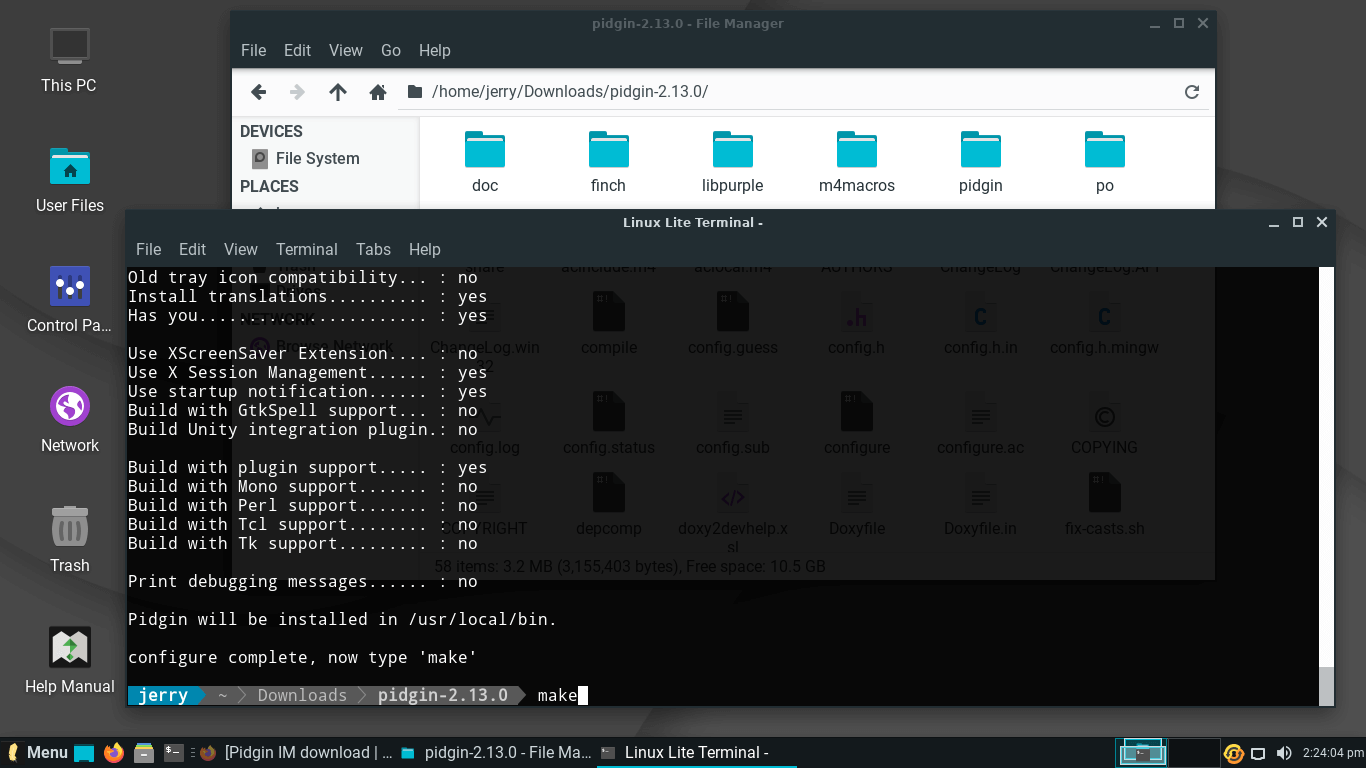
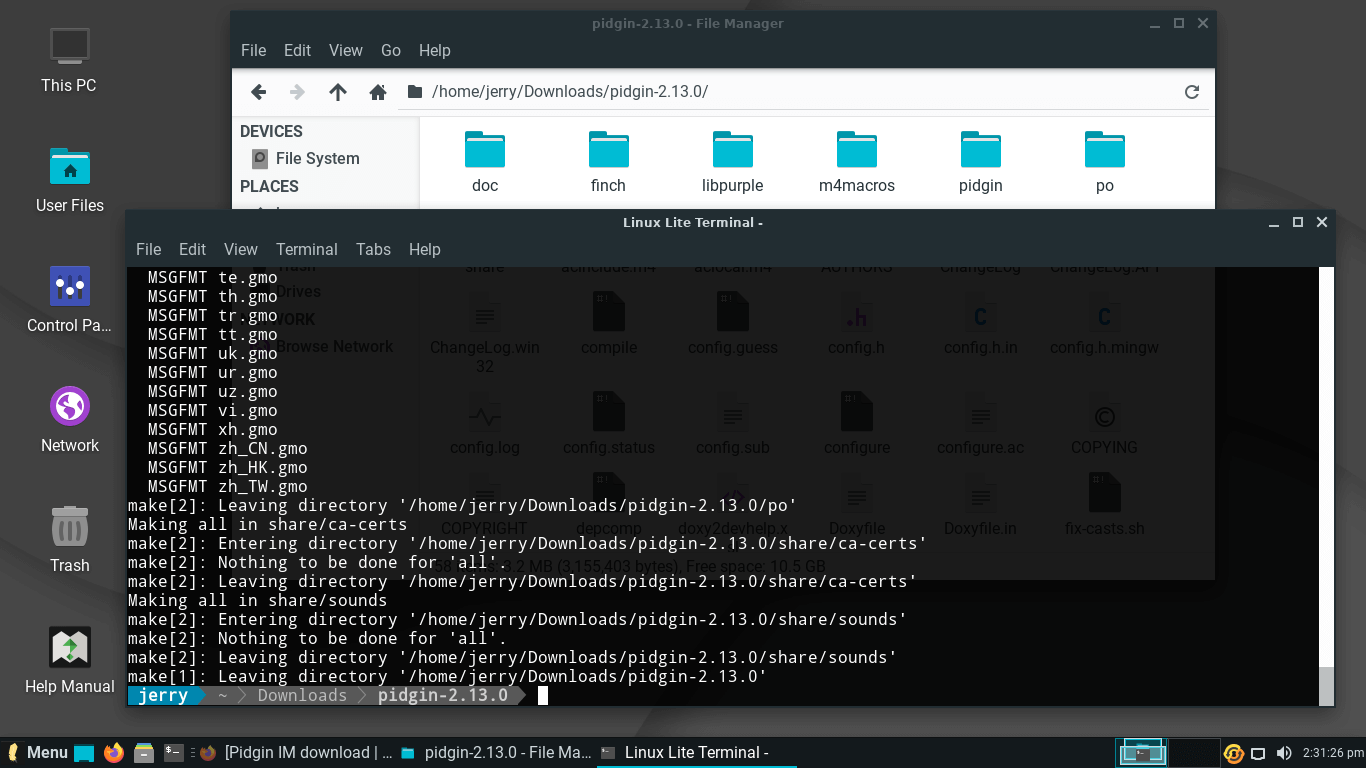
Now we can compile the actual application with the make command.
Terminal Command:
This process can take quite a while, so let it run it’s course.
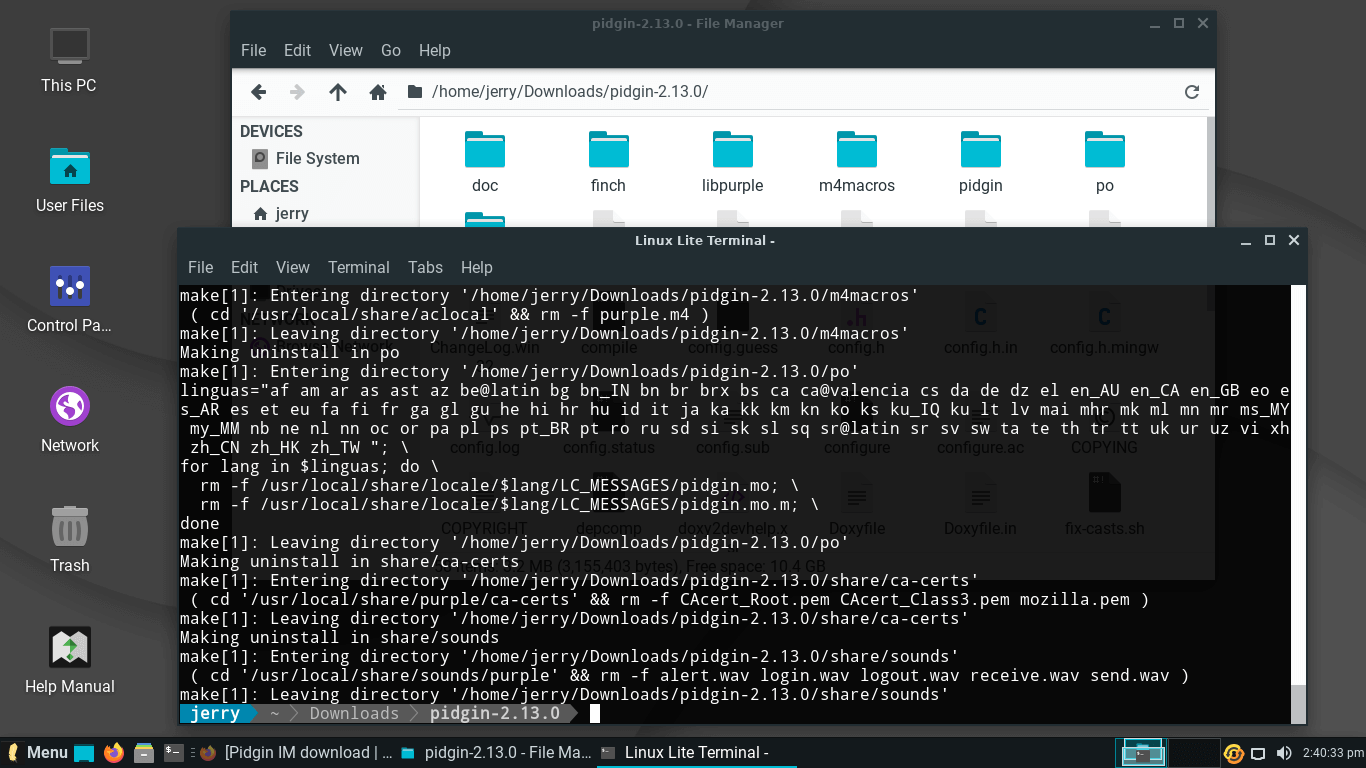
The make command has completed without errors.
Now to install the application. Here we use the sudo make install command. Enter your password when prompted:
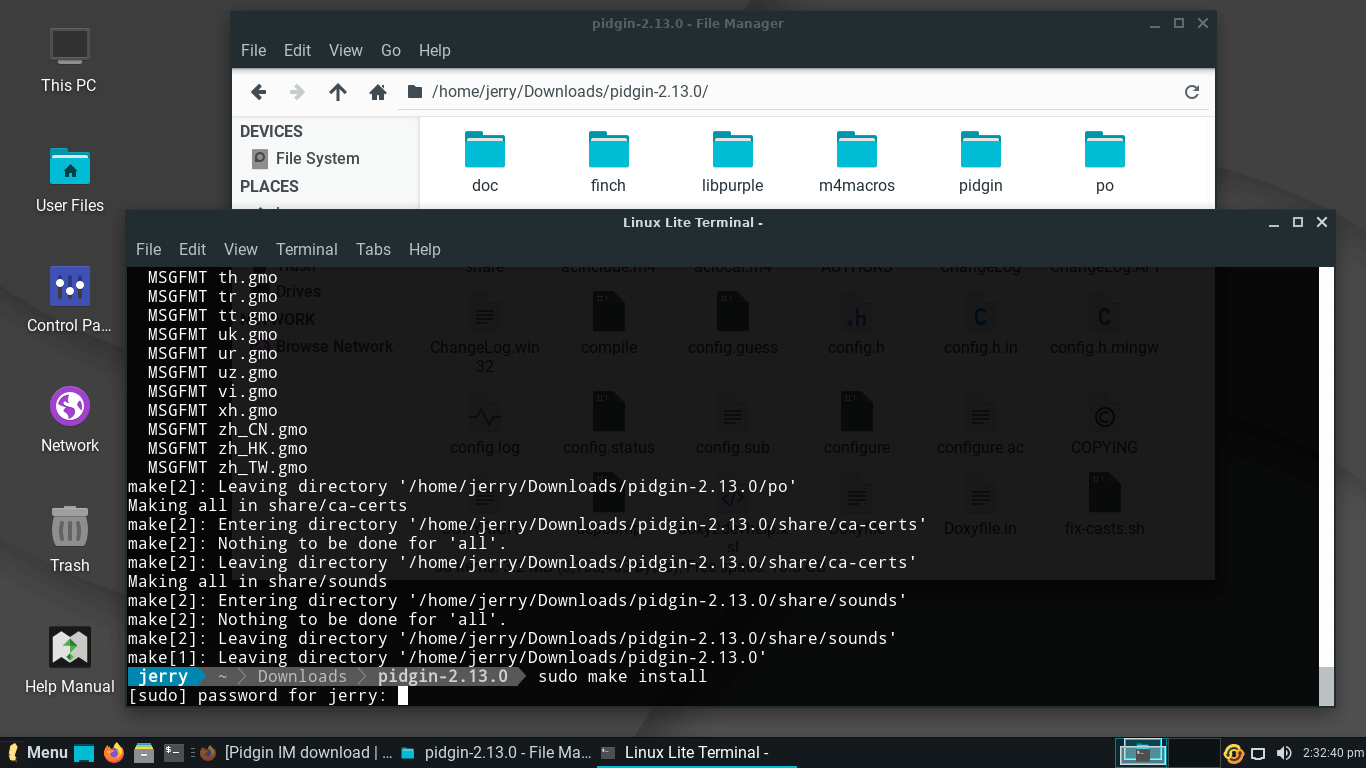
Terminal Command:
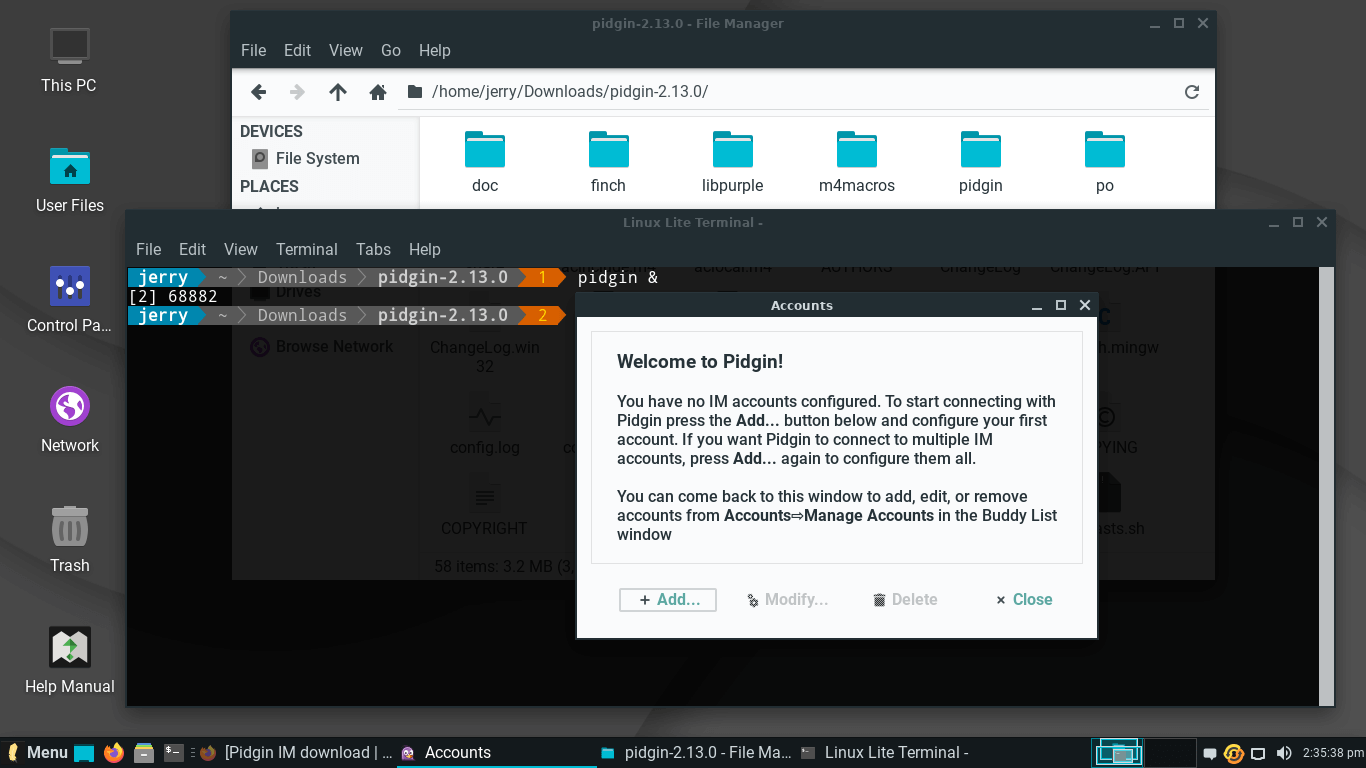
Once our program has installed, we can run the application command (pidgin) from the Terminal. Note that we place a space and the & symbol at the end.
This is so that we can still run the application and close the Terminal.
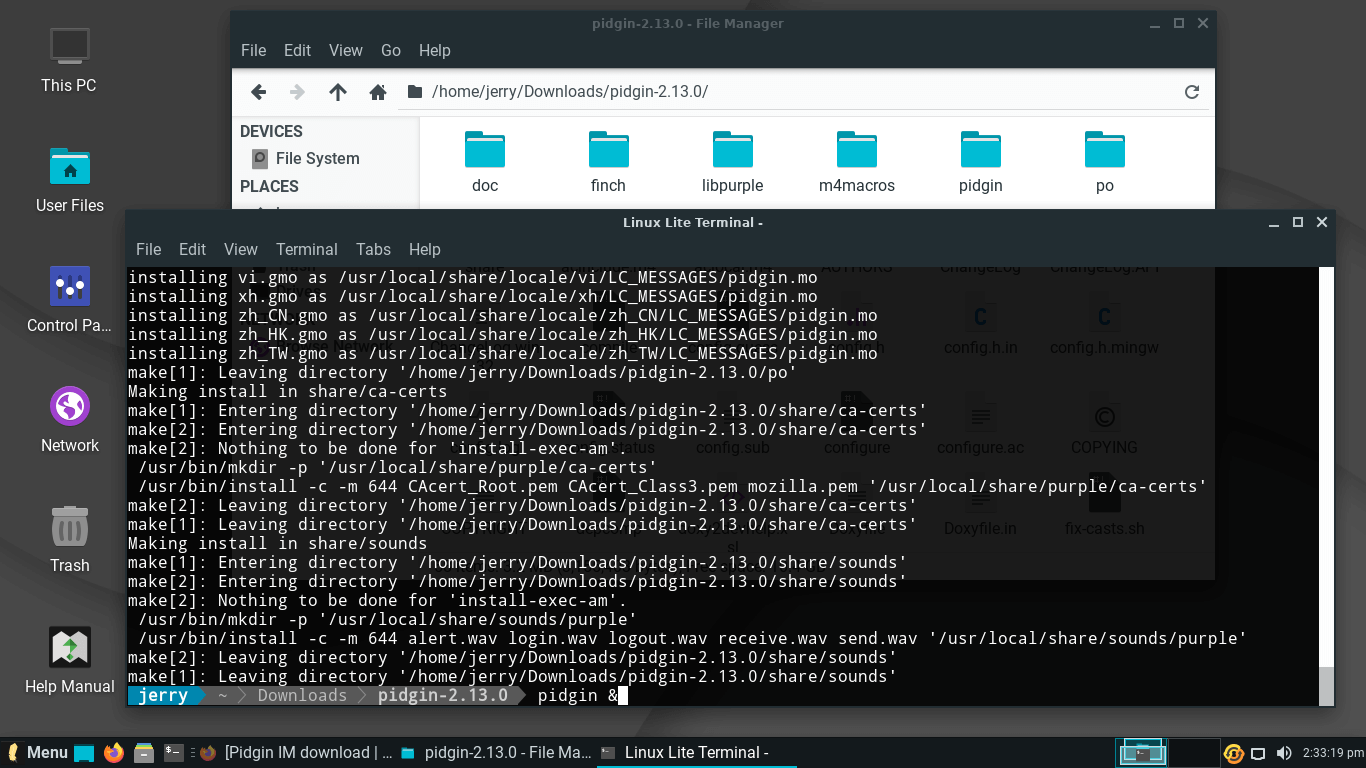
Our application in action.
To Uninstall an application from Source Code:
Open a Terminal from inside the source code folder of the application you want to remove and enter the following command:
Terminal Command:
Enter your password.

Application successfully removed.
NitroShare allows easy point and click sharing of files between all desktop operating systems including Linux, Mac & Windows.
If you are going to use a Firewall:
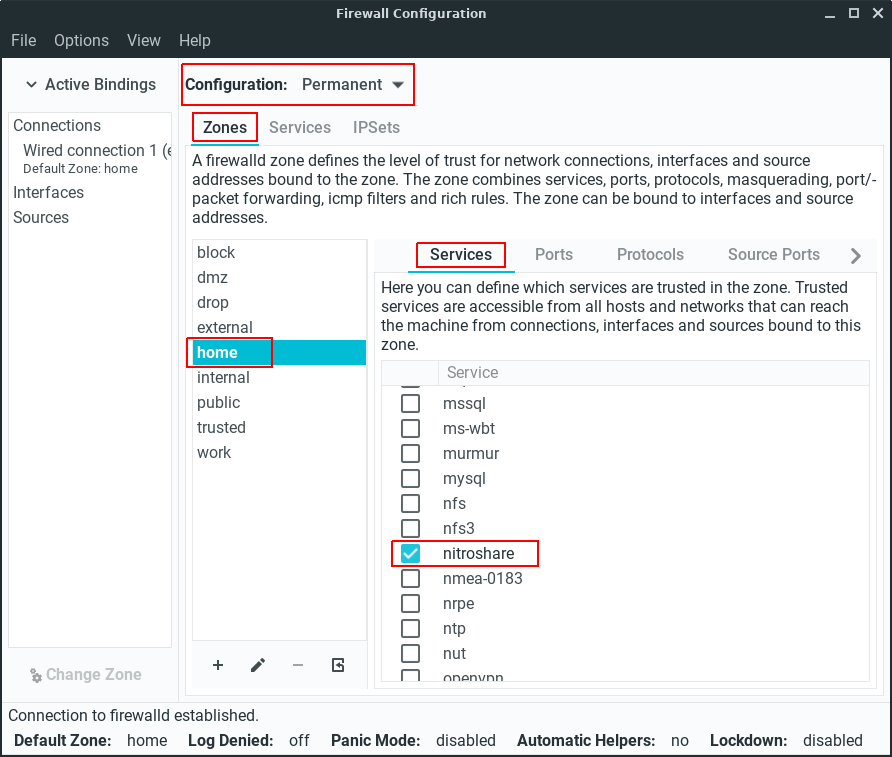
In Linux Lite, the Firewall (disabled by default) has been preconfigured to allow NitroShare traffic. Make sure your Firewall has been set to home before beginning this tutorial if you are going to use a Firewall. See for more information on this.
If you’re running Linux Lite make sure you place a tick in nitroshare as shown below. In the Firewall, click on Configuration — Permanent, place a tick in nitroshare as shown below, then click on Options, Reload Firewalld.
Let’s install NitroShare. Menu, Settings, Lite Software. Enter your password and click on yes to update sources now.
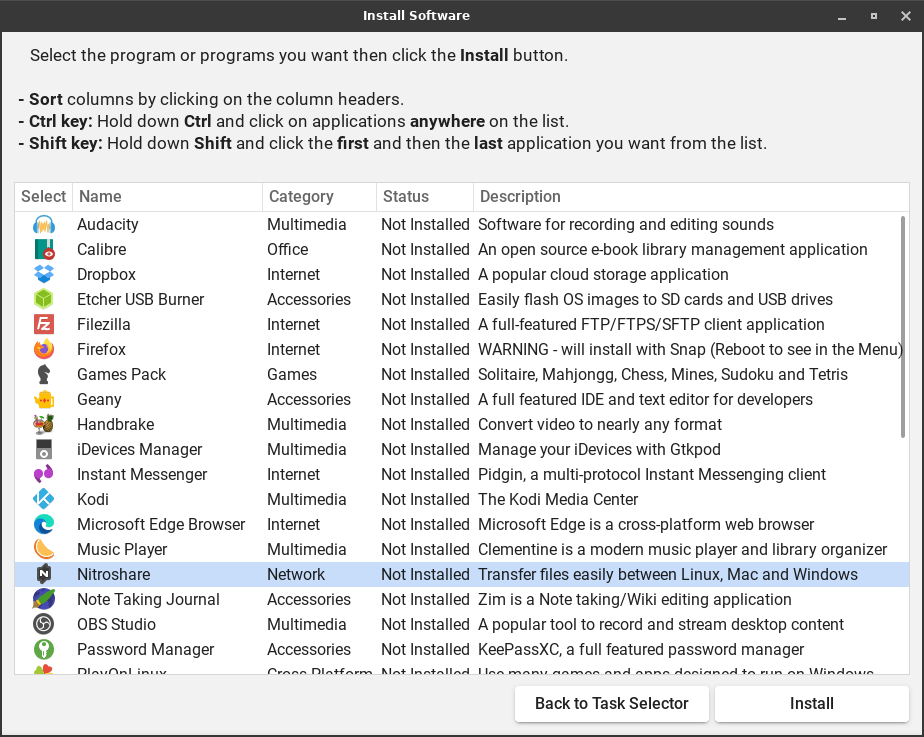
Now click on Install Software.
Left click on NitroShare and click on Install at the bottom right. Proceed with the installation. When the installation has finished, quit Lite Software.
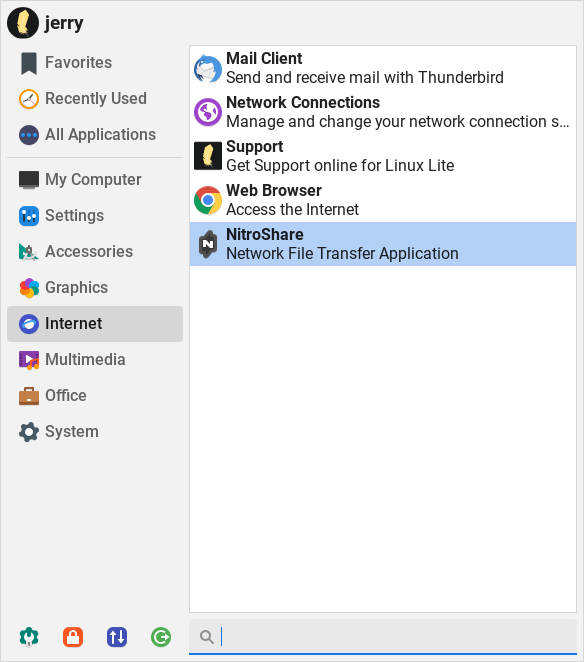
Go to Menu, Internet, NitroShare. Click on the Close button that pops up one time only, and then right click on the NitroShare tray icon and choose Settings.
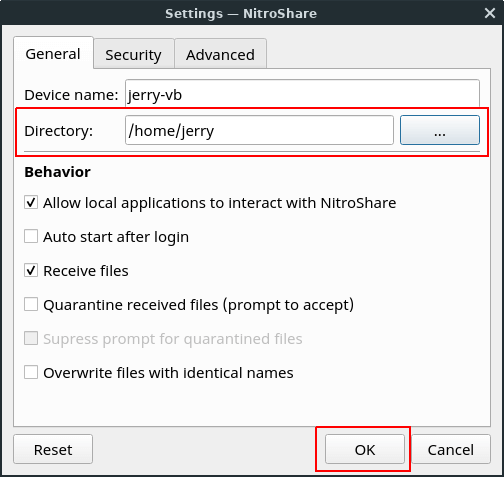
Choose the directory where you want to receive files to. Leave the other settings, unless you want to change them. Click OK when done.
Let’s send someone else on the network running NitroShare a file. Both computers MUST be on the same network, ie. connected to the same router.
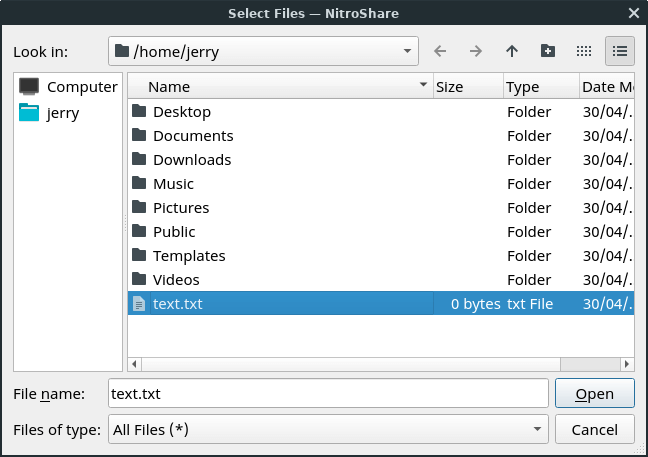
Right click on the NitroShare tray icon, select Send Files.
Select the file you want to send and click on Open.
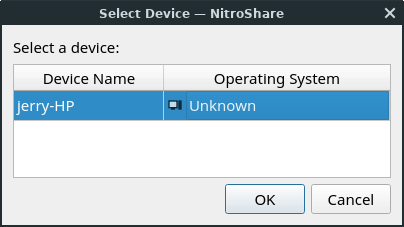
Select the computer you want to send the file to, and click on OK.
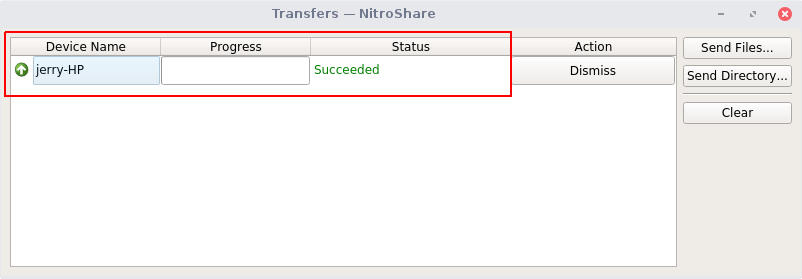
Transfer successful.
Bodhi Linux
Минимальные требования:
- 500 МГц процессор
- 128 МБ ОЗУ
- 4 ГБ дискового пространства
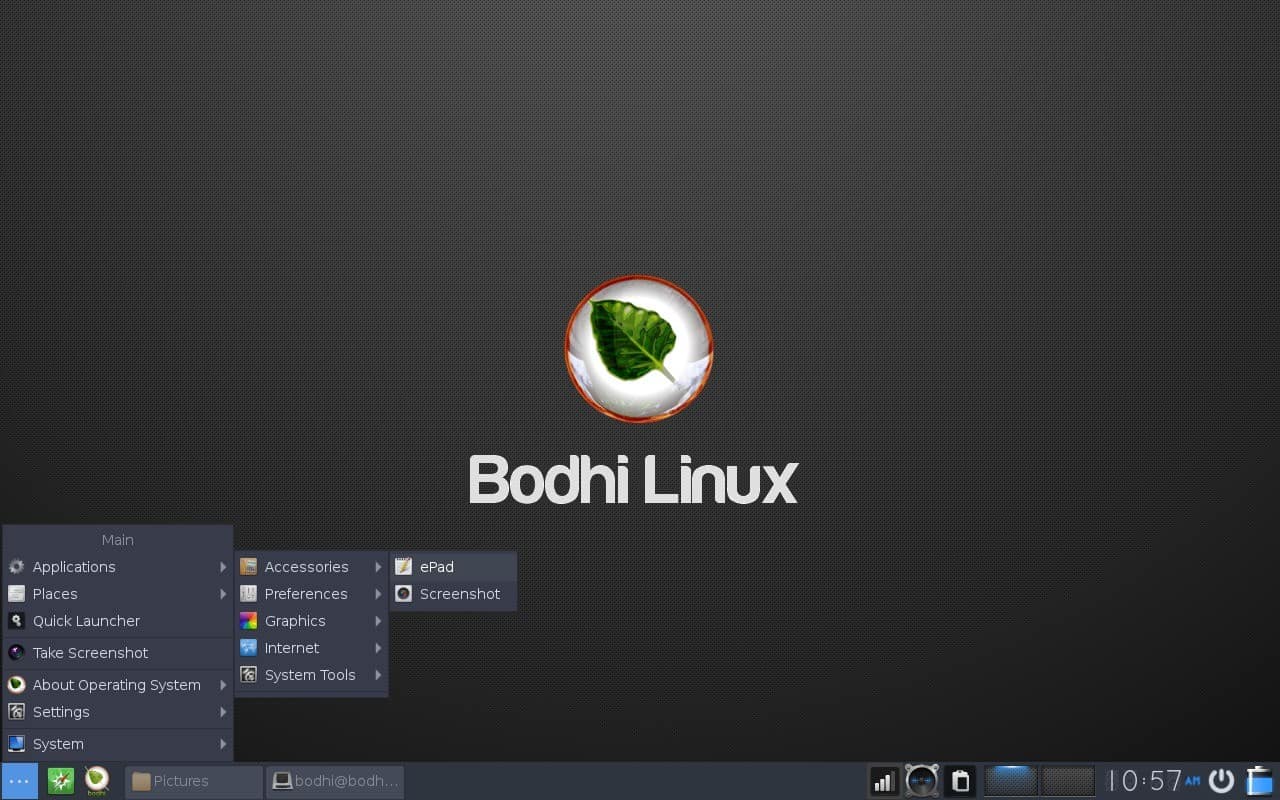
Bodhi Linux, является одним из легковесных, облегченных Linux дистрибутивов, который был выпущен в 2011 году. По данным сайта Bodhi Linux, он может работать на процессоре с частотой всего 500 МГц.
Bodhi Linux — это облегченная версия на основе Ubuntu LTS, которая включает в себя среду Moksha Desktop. Moksha является продолжением рабочего стола Enlightenment 17 с дополнительными функциями и меньшими ошибками.
С точки зрения эстетики, Bodhi Linux выглядит великолепно, и все работает просто отлично. Благодаря репозиториям Ubuntu вы получаете доступ к множеству бесплатных программ.
Последний выпуск Bodhi 5.0.0 основан на ядре Ubuntu 18.04 и является первым основным выпуском проекта. Проект предлагает три релиза Standard, Legacy и AppPack.
Lite System Report tool
The Lite System Report tool was created to better help people who experienced a problem with their computer. The report contains useful information about the
hardware, network and software. The idea of the tool is to run it, then you would attach the generated file to a Forum thread with a title about the issue you are having.
Lets get started.
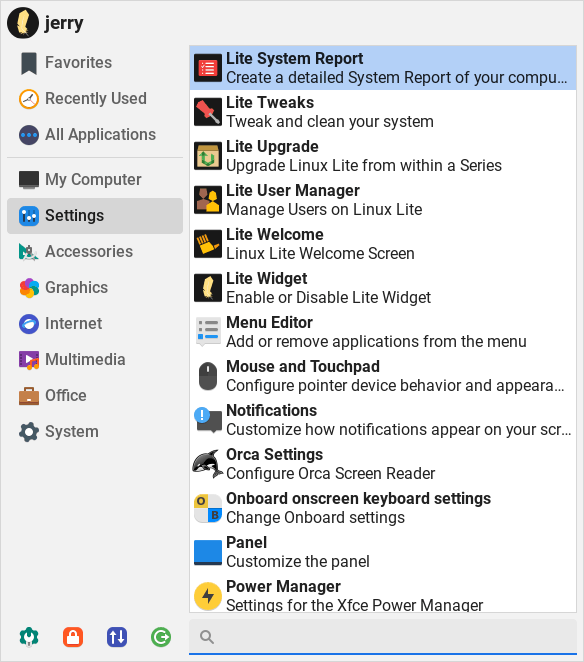
Click on Menu, Settings, Lite System Report.
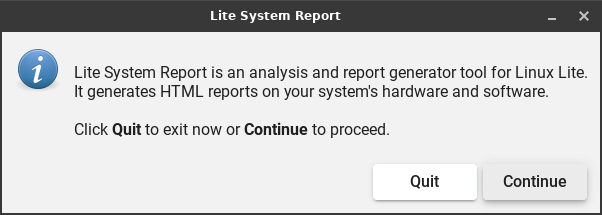
A window will pop open, read the information and click on Continue when ready.
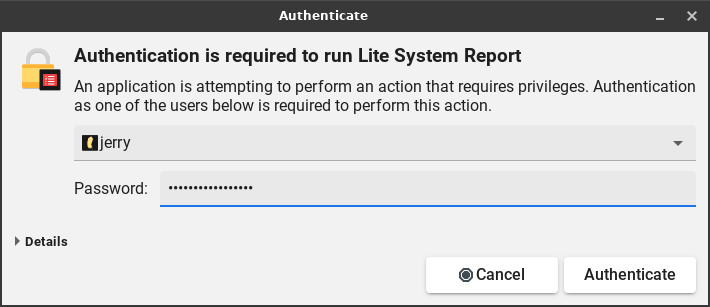
Enter your password and press the Enter key.
Unselect the options you don’t need to or have been asked to exclude from your Report.

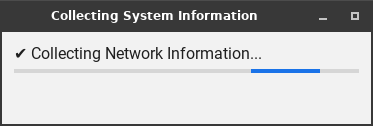
The report will take anywhere from a few seconds to less than a minute depending on your hardware.
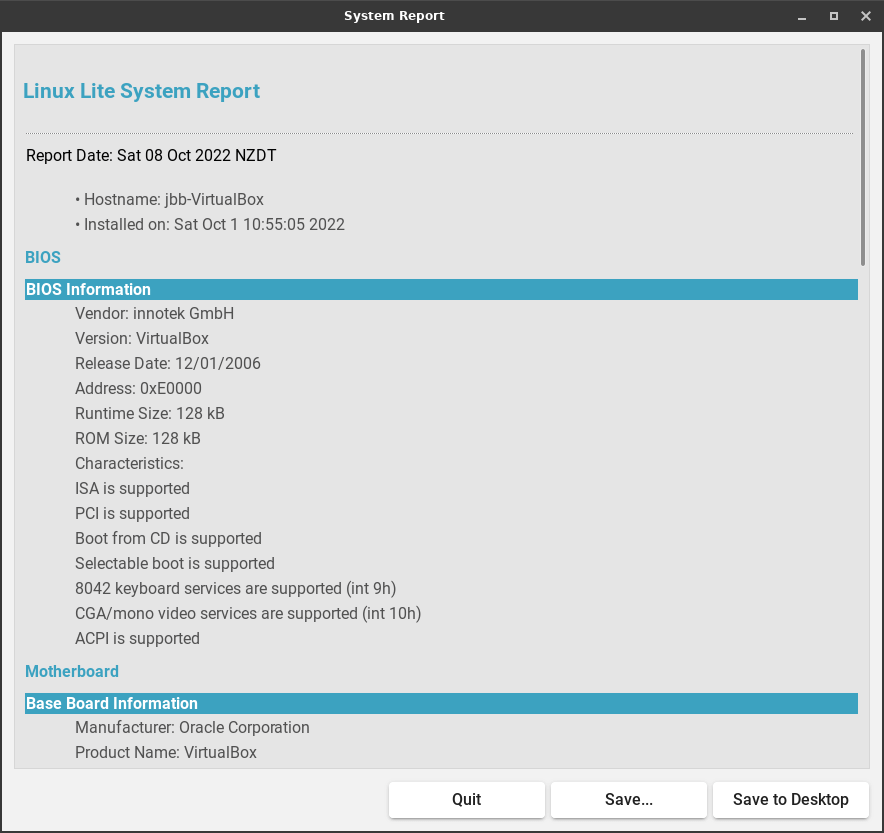
When it is finished, the Report will appear. The Report will be similar to the one below. Click on Save.
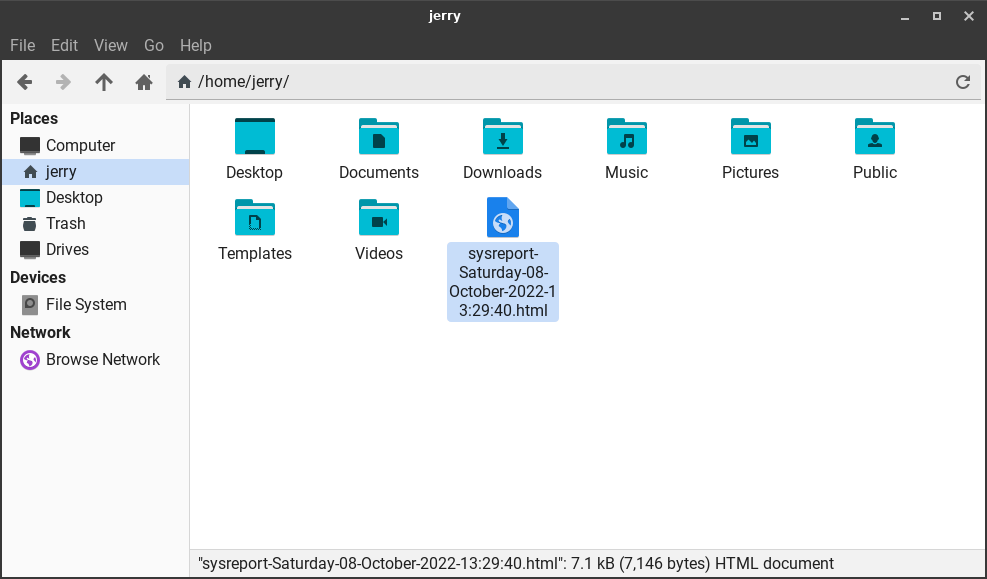
Next you’ll be asked where to save the Report, in the following example we select our Home folder (/home/jerry).
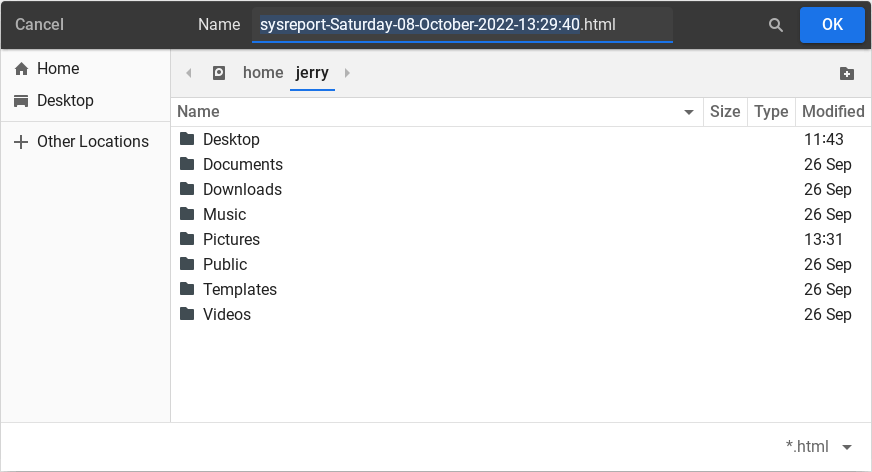
In this example the Report is located in /home/jerry.
Go to the Linux Lite Forums. A link is provided here — http://www.linuxliteos.com/forums/
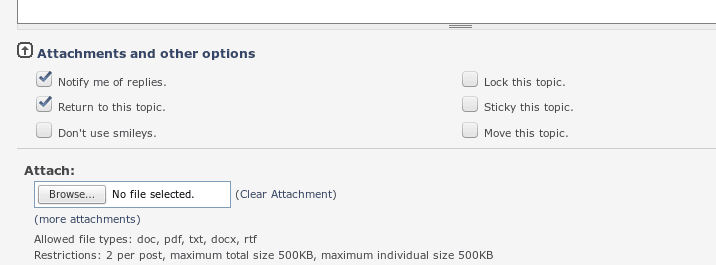
Start a new thread with an accurate Title description of the problem you are having, then a detailed write up of your problem. At the bottom of the page you will see
where you can add attachments. Browse to /home/youruser and select the report.
Now click on Post, and someone will help you as soon as they’re available.
This section will guide you on how to create your first Linux Lite share making the process as simple as it really is once you understand the basics:
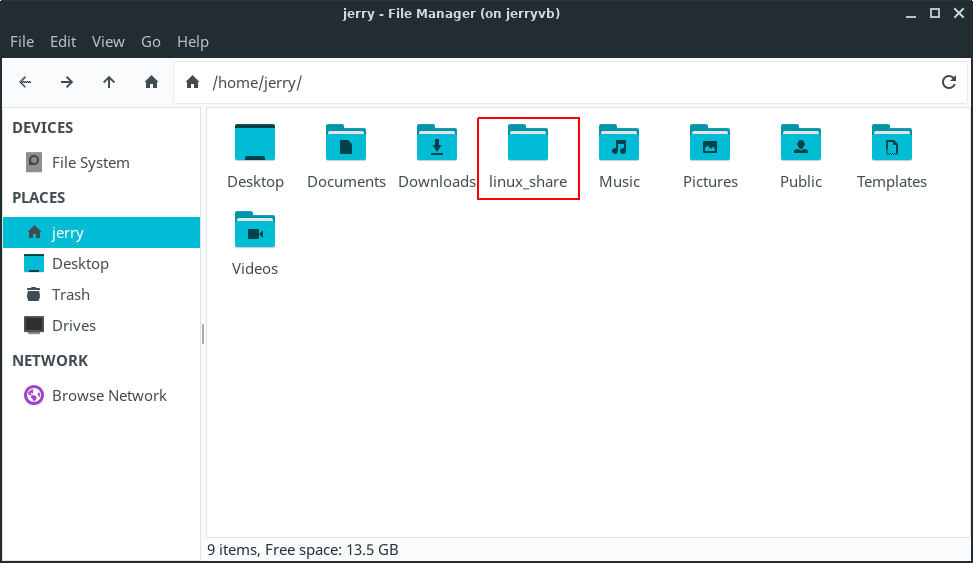
Create a new folder inside your home folder by right-clicking an empty section in your home folder and selecting Create Folder from the context menu pop-up. In this
example we will name it:
linux_share
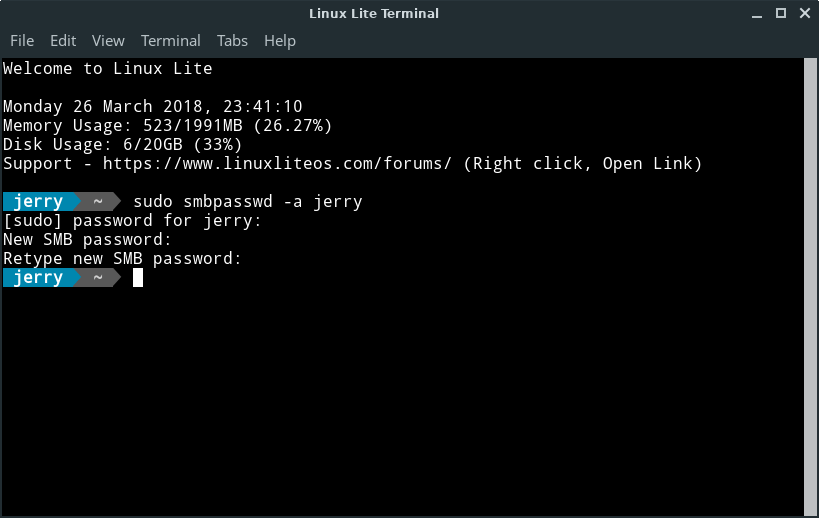
Next, we need to tell Samba (SMB) who we are going to login as to access our Linux Lite shares. Open up a terminal and type:
Terminal Command:
…where name is your Linux Lite username; in our case the username is jerry. For easily remembering the SMB password, you can use the same password for SMB as that in your Linux Lite
user account if you wish.
You’ll be asked to enter the new SMB password twice.
Open your home folder, navigate to the /etc/samba/ directory, right click on the file smbusers and Open as Administrator.
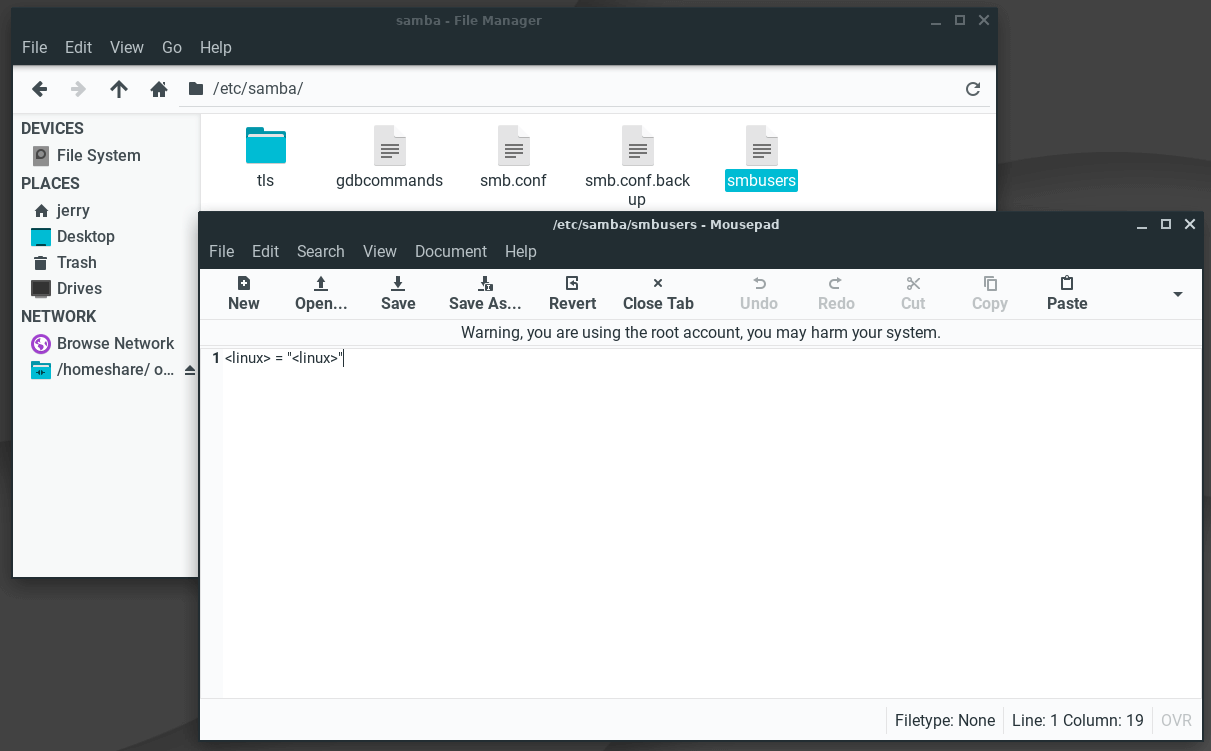
The file will open in the Text Editor. The smbusers file will contain a username map list (one per line) of your Linux Lite and SMB accounts.
We will replace the default linux = «linux» in that file with our Linux Lite username in each of the brackets:
username = «username»… in our case: jerry = «jerry»

You can now Save and Close the smbusers file, and close the terminal.
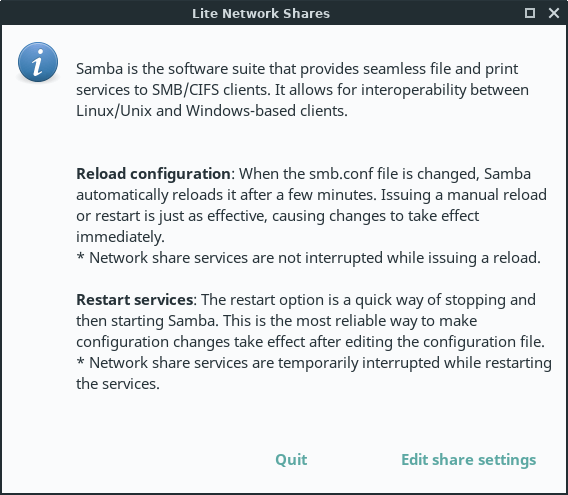
Open Menu, Settings, Lite Network Shares and click on Edit Share Settings.
The configuration file will then open in leafpad text editor. Default settings are shown below:
|
#======================= Global Settings ==================================== workgroup = WORKGROUP path = /home/%U/linux_share |
For a first time basic setup, there is no need to change the default settings. You likely only need to verify the following:
|
WORKGROUP — must be equal to the workgroup name in your network. «WORKGROUP» is usually the default.netbios name — must be equal to the computer name. In a terminal type in hostname to get your netbios name.:~$jerryvb is the netbios name / computer name.path = the path to the folder in your home directory where shared files will be stored. ONLY change the folder name part; e.g.: /home/%U/linux_share » linux_share » is the folder name in Linux Lite you are sharing from your home folder. » %U » is Samba’s substitution for the username; meaning same as your username. Leave the %U as it is. Change ONLY the word » linux_share » to the name of the folder you created in the first step of this tutorial if you used a different folder name. |
Save and Close the file, then click on Restart services.
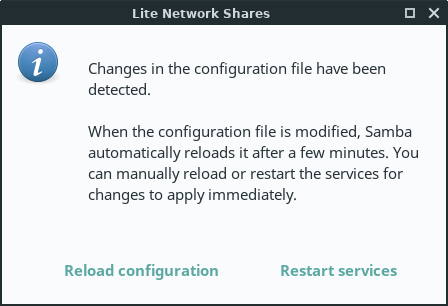
You can now access Linux Lite shares from another computer in your network.
TIP: Keep pressing F5 in the share folder, sometimes it takes a few seconds for the shares to appear.
If at any stage you want to add more share folders, you can simply add more blocks like in the example below:
|
#======================= Global Settings ==================================== workgroup = WORKGROUP path = /home/jerry/linux_share path = /home/jerry/Videos path = /home/jerry/Downloads |
Volume Toggles
Here, we will show you how to set keyboard shortcuts for Volume + Volume — and Mute Volume.
Providing you are not already using the hot keys on a supported multimedia keyboard, the following is an excellent replacement.
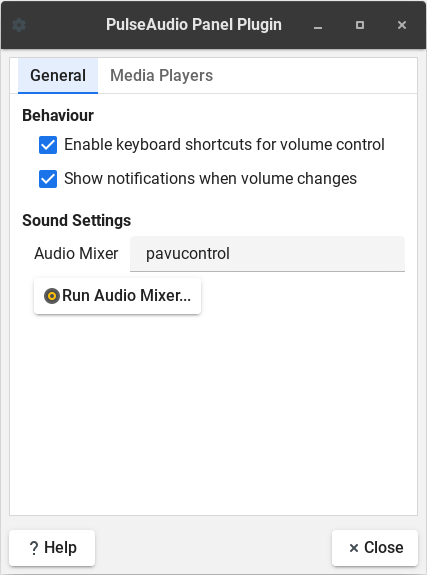
First step is to right click on the Volume icon in the tray, select Properties and ensure Enable keyboard shortcuts for volume control is ticked.
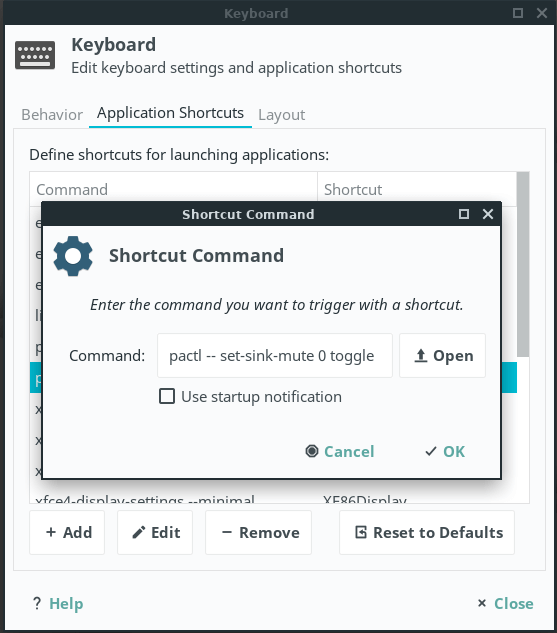
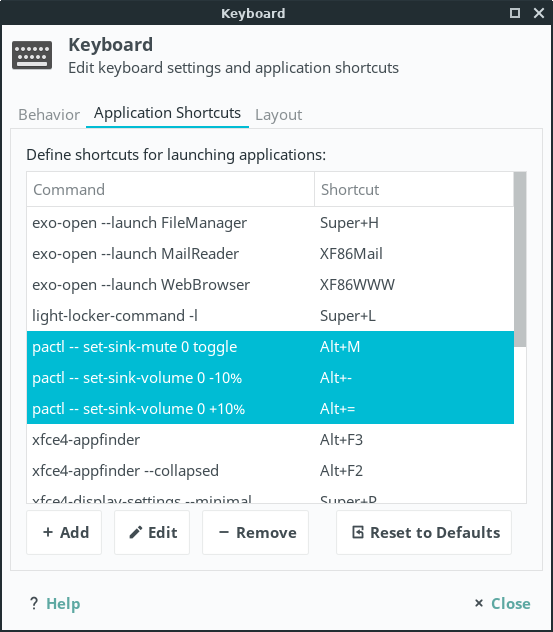
1. Next click on Menu, Settings, Keyboard and click on the Applications Shortcuts tab.
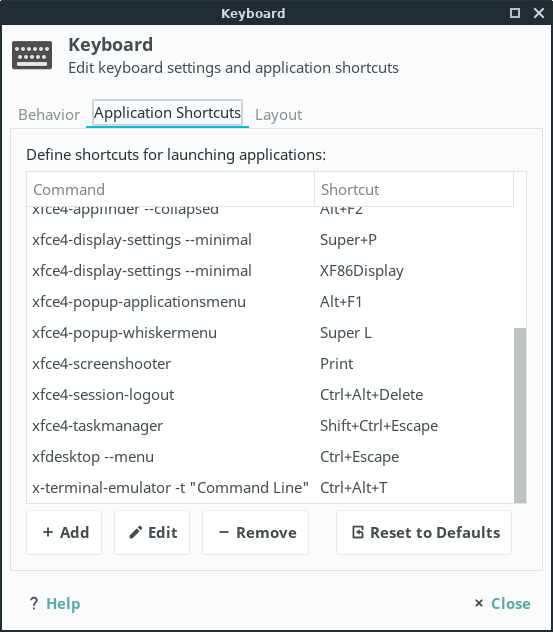
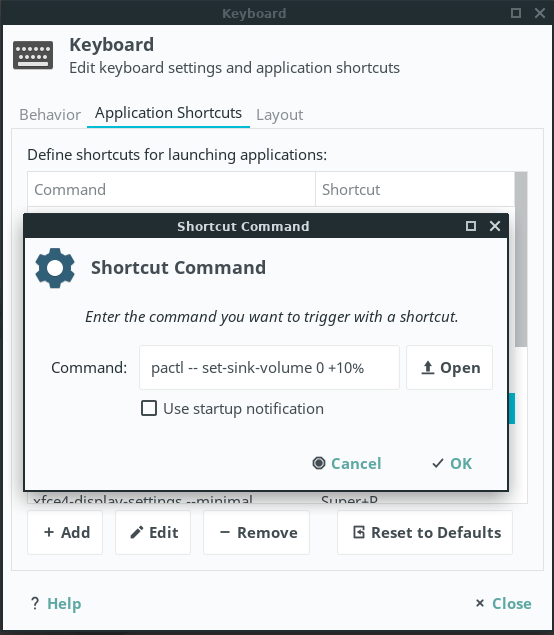
2. Next click on the Add button and paste in the following:
pactl — set-sink-volume 0 +10%
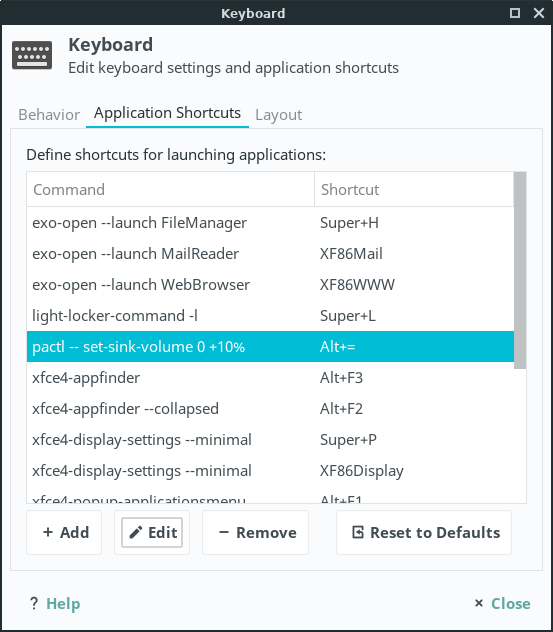
3. Click Ok and then hold down the Right Alt key and the =/+ near the top of your keyboard.
Now Right Alt plus =/+ is set to raise the main volume.
4. To set a toggle to lower the volume by 10% each time, repeat steps 1 -3 above but this time to lower the volume, enter this command:
pactl — set-sink-volume 0 -10%
5. This time hold down the Right Alt key and the -/_ near the top of your keyboard (next to the =/+ button).
Now Right Alt plus -/_ is set to lower the main volume.

6. To set a toggle to mute the volume repeat steps 1 -3 above but this time to mute the volume, enter this command:
pactl — set-sink-mute 0 toggle
7. This time hold down the Right Alt key and the M on your keyboard.
Now Right Alt plus M is set to mute the main volume.
Now all 3 volume toggles have been set, try them out.
Какой файл скачивать, iso или торрент?
С официального сайта можно скачать либо iso файл образа, либо торрент файл. Мы вам советуем воспользоваться вторым способом, так как скорость скачивания будет намного выше. Проблем с торрентом точно не будет, ведь во всем мире очень много поклонников Линукс Минт. Разработчики Linux Mint предлагают вам на выбор несколько рабочих окружений. Это MATE, Cinnamon, XFCE и KDE. Скорее всего, вам эти буквы ни о чем не говорят, поэтому остановимся кратко на каждом из них. Наиболее простой и привчный вид после Windows имеет рабочее окружение MATE. Если ваш компьютер довольно слабый по характеристикам, то вам подойдет версия Linux Mint XFCE. Для любителей эффектности и красивого внешнего вида имеется Линукс Минт KDE или Linux Mint Cinnamon. Каждая из версий имеет разрядность в 32 и 64 bit. 32 bit рекомендуется для компьютеров в которых оперативной памяти меньше 4 Гб. Во всех остальных случаях необходимо выбирать 64 bit.
A Network Share is a computer resource made available from one computer to others on a computer network such as files, folders and printers to mention the most common.
These resources can be remotely accessed from another computer, typically via a local area network or intranet, transparently as if it were a resource in the local machine.
Linux Lite includes the Lite Network Shares application to help in configuring your shares for access from other computers in your network; e.g.: a Windows machine.
In Linux, the suite that provides seamless file and print services interoperability for Windows, Linux and Unix is known as Samba.
Installation Issues
No Option to Install Alongside Windows?
If this happens, it usually means that Windows is already using four partitions
on the hard drive, which is the limit for BIOS based computers using traditional MBR type partitions. (Newer computers may that use UEFI firmware may use
GPT partitioned drives that do not have the 4 partition limit. This discussion does not get into that.) You will need to either eliminate one of the current
partitions, or add another hard drive to the computer for installing Linux Lite.
If you are unfamiliar with partitioning, it would be best to make a post on the Forums for help before
proceeding. Generally speaking, in this situation there is may be a partition set aside where the manufacture has put copies of drivers and other extras
that were part of the initial installation. There may also be a recovery partition that gets used for reinstalling Windows in the event that is needed. If you
went through the process of creating a recovery USB or set of recovery DVD’s, then you can probably get rid of the recovery partition. Same goes for the partition
set aside for manufacturer installed drivers and extras, if you made a copy of that.
Once one or both of those partitions has been deleted, you may also need to shrink the main (largest) Windows partition (probably labeled as «C: drive»).
If you have the space, ideally you should try to allocate 50-100GB for Linux Lite. (It will be fine with +/-15GB; but you won’t have much room for expansion).
Before shrinking any partition, be sure to defragment the partition in Windows first. Then shrink the partition and leave the free space as it is, un-partitioned.
Do not create Linux partitions with Windows disk manager. It is best done using Linux tools.
At that point, you can go ahead and run the installer again and it should now offer the choice to install «Alongside Windows». If it needs to it will create
an «extended» partition that will serve as a container for the «logical» partitions needed for the installation. (That is a way that is commonly used to get around
the 4-partition maximum rule. As long as only 3 partitions are «primary», an extended partition can be used to house multiple logical partitions within it — thus
giving you the ability to have more than four partitions.)
Does Your Newer Computer Use UEFI Firmware for Booting?
If you have a newer model computer with UEFI firmware, it may allow for two modes of booting: UEFI/EFI-mode or BIOS/CSM/Legacy-mode.
There is a good chance that Windows is installed to the hard drive in UEFI-mode. In that case it will also be using the newer GPT partitioning scheme on the hard drive.
(This applies mainly to Windows 8, but some versions of Windows 7 may be installed that way too.)
You need to confirm for sure which way Windows is installed before attempting the Linux Lite installation. The first thing to check is
whether or not you are using a 64-bit version of Windows. You should be able to find that out by going to the «System» section from the
«Control Panel». If you find that it is a 32-bit version, then you will be able to install Linux Lite. (Only 64-bit versions of Windows currently support UEFI booting.)
If you have a 64-bit version of Windows, it could be installed in either BIOS/Legacy-mode or in UEFI-mode; so you will need to investigate
further. Go to Windows disk management and take a look at the partitions on the hard drive. If you see a small partition near the beginning of
the drive, formatted as FAT32, labeled along the lines of «System» or «EFI System Partition», then you have a UEFI installation
of Windows and will not be able to properly install Linux Lite. If you don’t see that partition, then you should have an MBR-partitioned
disk and you can install Linux Lite. If you need help figuring that out, take a screenshot of your hard drive partitions and post that
to the Forums with your inquiry.